Fields
Availability: New Administration Center is available since eWay-CRM 6.1.2.
eWay-CRM allows you to edit existing fields or define your own fields. Along with Form Designer, now you can customize forms as you need.
Article contains:
- Work With Fields List
- Add Custom Field
- Edit Field
- Duplicate Field
- Delete Custom Field
- Export List
- Filter List of Fields
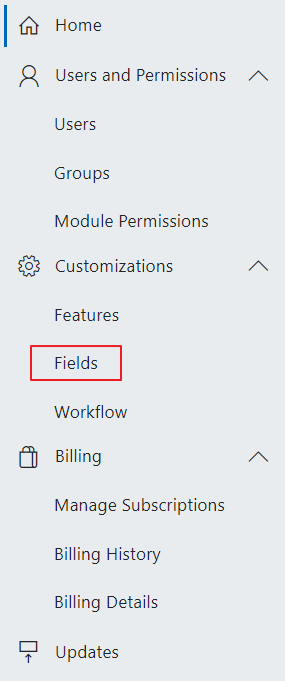
Fields are in the left menu in Administration Center under the Customizations section.
When you click Fields, you will see the list of all available modules.
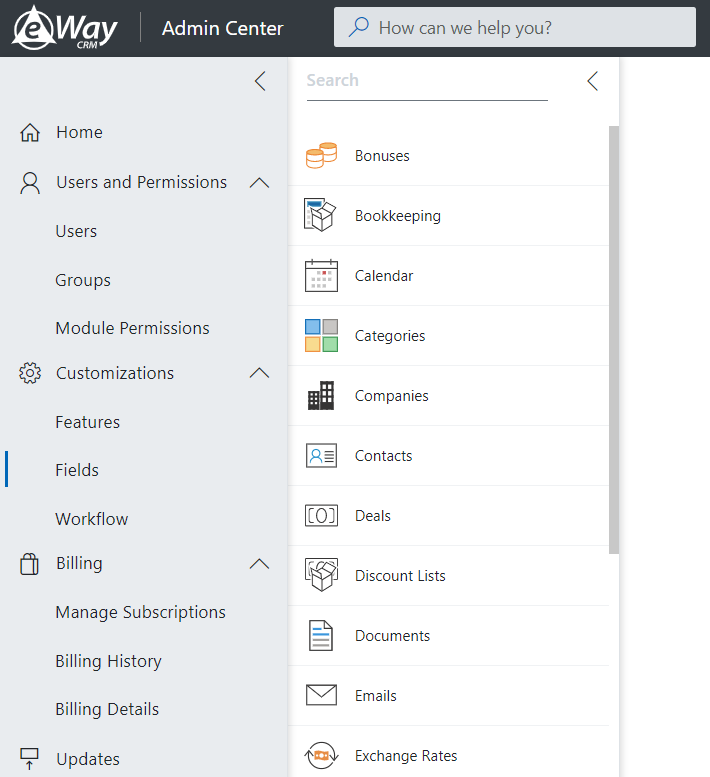
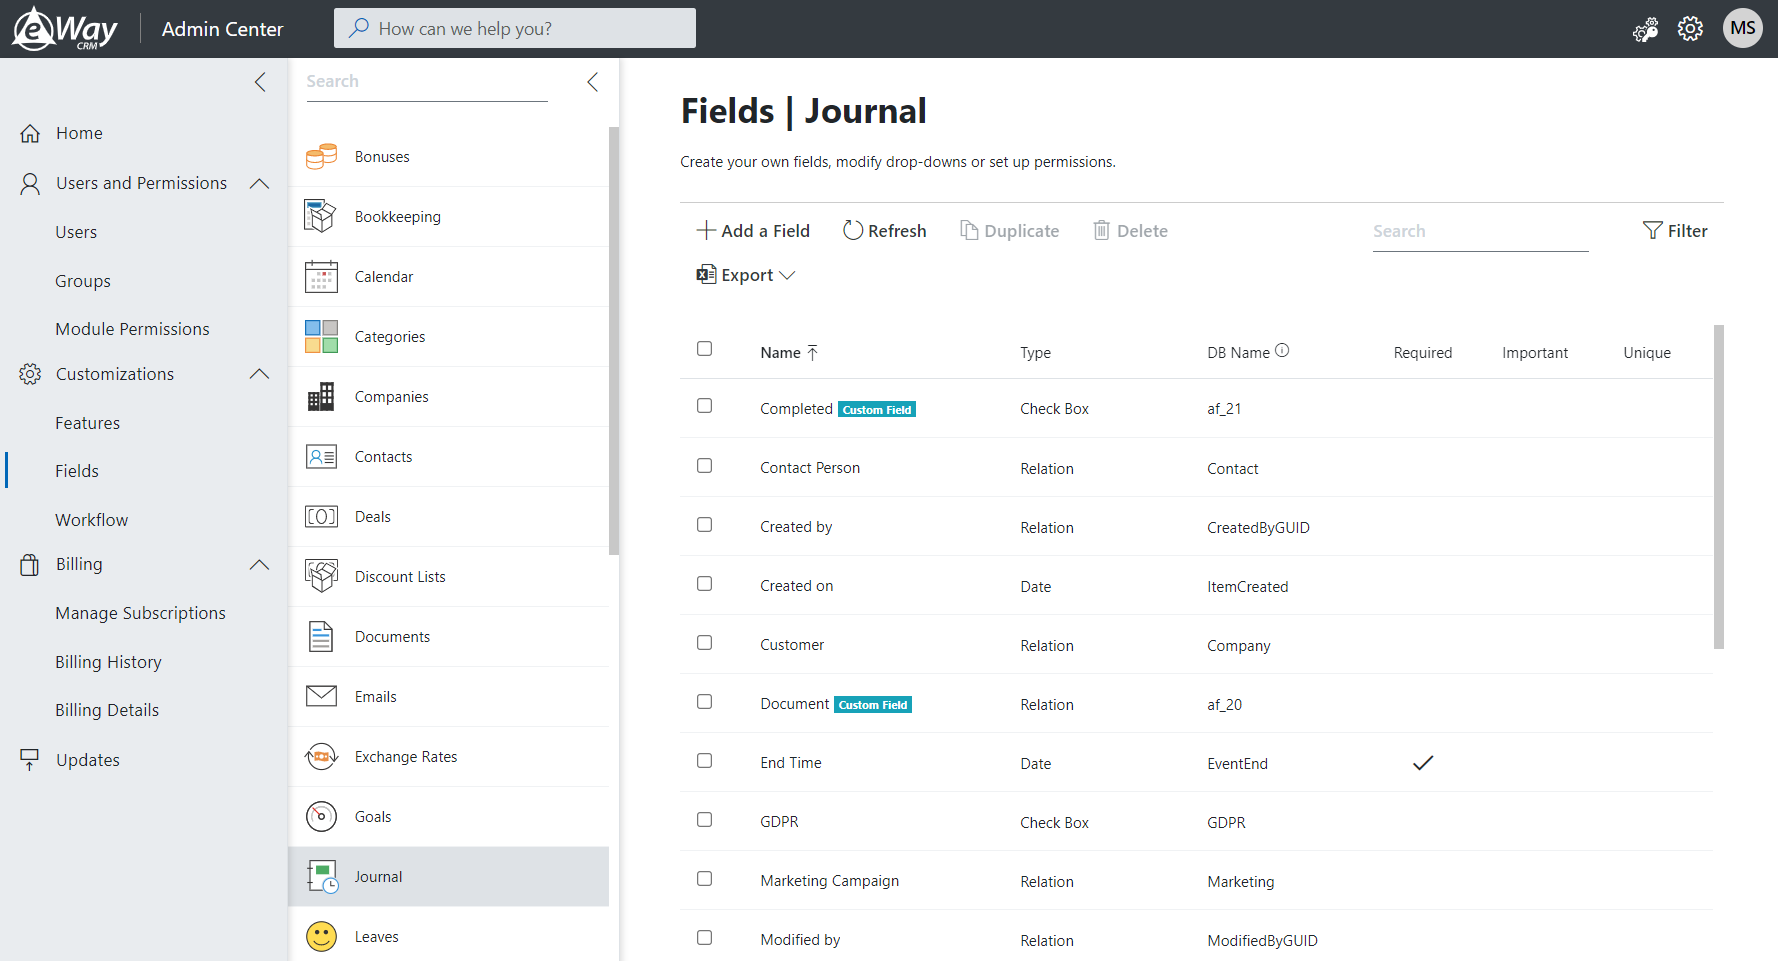
Select a module and click it. You will see the list of fields for the selected module:
Work With Fields List
Top Menu
The top menu of the list contains these possibilities:

| Option | Description |
| Add a Field | Add new custom fields. See Add Custom Field. |
| Refresh | Update the list to see whether another user with an administrator account did not create a new custom field or edit or delete some existing one. |
| Duplicate | Duplicate selected field. See Duplicate Custom Field. |
| Delete | Delete selected custom field. See Delete Custom Field. |
| Export | Export the fields list into the Excel file. See Export List. |
| Search | You can easily search in the list. You will see only fields that contain search string in some column. |
| Filter | You can filter the list by predefined criteria. See Filter List of Fields. |
Fields List
Fields list looks similar to this one:
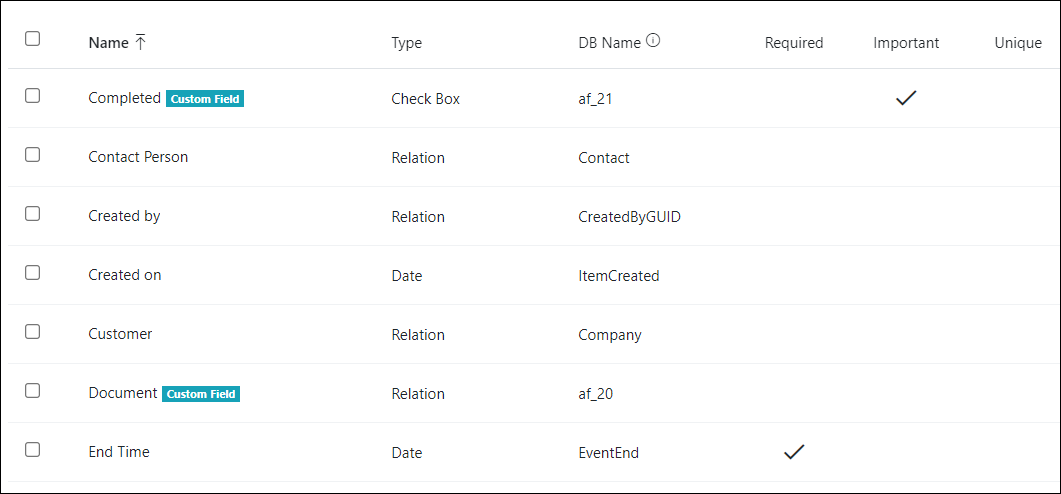
| Column | Description |
| Check Box | Click the field and you select it. The check box indicates that the custom field is selected. You can select more than one field at a time. |
| Name | Name of the field that is displayed to users. |
| Type | Type of the field. |
| DB Name | Name of the field in the database. |
| Required | If there is a check sign in this column, the field is required to be filled for all users and when a user is creating an item this field can't remain empty. For more information, see Required Field. |
| Important | If there is a check sign in this column, the field is important for all users and when a user is saving an item he or she will be noticed when the field is empty. But the saving can be completed even though the field is empty. For more information, see Important Field. |
| Unique | If there is a check sign in this column, the field is required to be filled by different values for all users and when a user is creating an item this field can't remain empty and the value must be new. For more information, see Unique Field. |
Field Types
| Type | Description |
| Check Box | This is a standard check box that determines whether a value is logically true or false (e.g. agreement to receive newsletters). |
| Number | This is a field in numeric format. User can specify the format (e.g. decimal, percentual, etc.). |
| Relation | Using this field type you can create a relation with other items in the system (from one selected module). This field can be used only for relations with the modules that can be found in the Add New menu. When you are filling this field, you will be prompted with the item list via combo box in the selected module (for example all contacts). |
| Drop Down | You can predefine several values in the combo box to select the appropriate value – that's what the user-defined drop down menu stands for. It can be used when an item may get only one of several values (e.g. Emotion – Positive, Neutral, Negative). The creation process is slightly different from other custom fields. First, the name and type is entered, drop down menu values definition dialog will be brought up right after clicking OK. |
| Multi Select Drop Down |
As same as Drop Down, Multi Select Drop Down is also user defined drop down menu - it is used when users should select vales only from defined list. The basic difference between Drop Down and Multi Select Drop Down is that Multi Select Drop Down allows users to mark more than one value. |
| Link |
If you want to keep a record of additional information as hypertext links, you can use Link. You don’t need to store the links in text form in the notes and then copy them into the browser address row. Thanks to this field you will have a clickable link (e.g. Link to Server Repository). |
| Date | The Date custom field allows you to add all additional and important dates related to an item by using the calendar control. Thanks to this control, dates are saved in the same structural form by all users. |
| Single Line Text |
This custom field is intended for text values and the text length is restricted to 255 characters (e.g. Folder Index System). |
| Multi Line Text | This custom field is intended for very large text values (more than 255 characters). You can set how many lines the field will display without scrollbar. |
Add Custom Field
When creating custom fields, it is important to keep in mind that although the number of custom fields is not directly limited, an unnecessarily large number of fields can significantly slow down the system. In addition, database has a limit of 1,024 columns, which eWay-CRM Desktop further reduces by creating additional system fields.
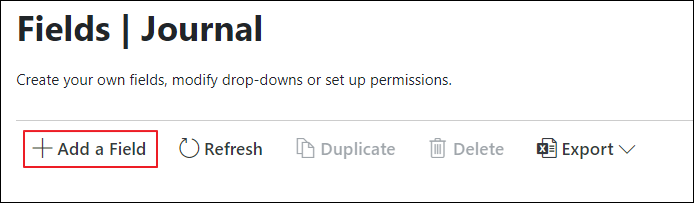
If you want to add a new custom field, just click Add a Field button:
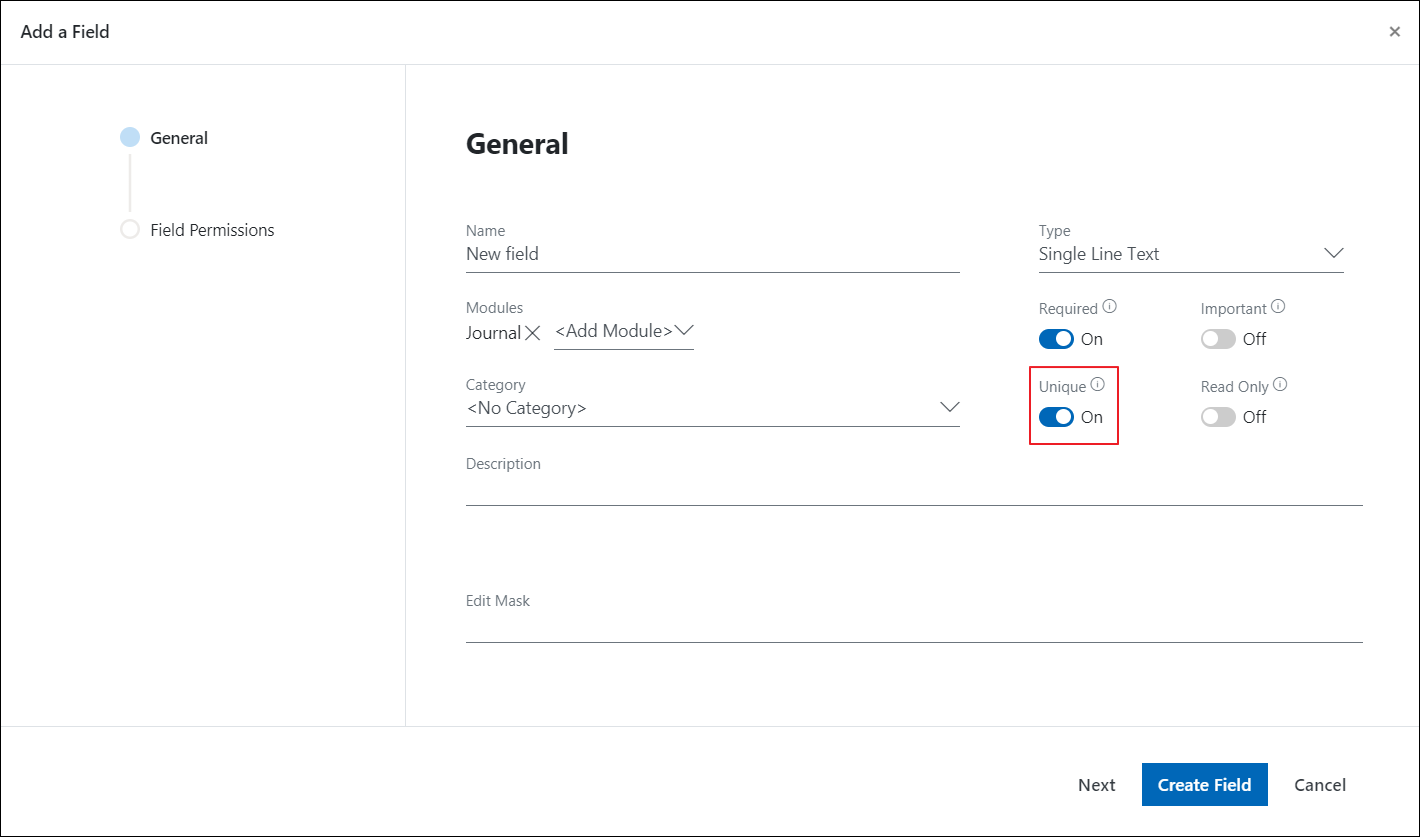
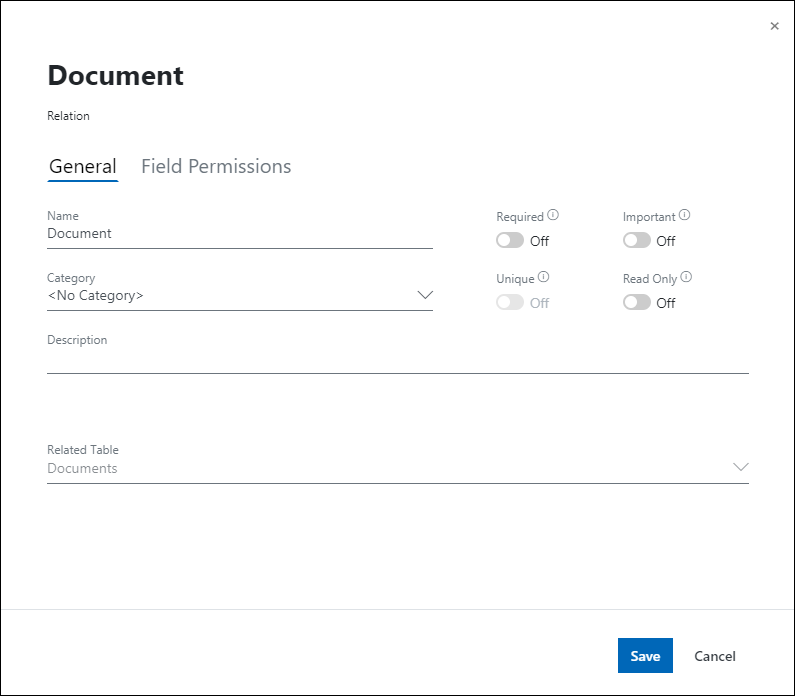
The guide will pop, In the first step, you will see these options (some options are specific for selected field type):

| Field | Description |
| Name | fill in the name of the field. |
| Type | Select the type of your custom field. |
| Modules | You can select whether the field will be created for the current module or you add it to other modules. |
| Category | Select the category of the field. |
| Required |
If the function is activated, the field is required and must be filled when an item is created. See Required Field. Turned on function makes the field required for all users. If you want to make the field required only for some user group(s), set it by permissions - see the next step under the table. If this function is activated, Important and Read Only switches cannot be turned on at the same time. |
| Important |
If the function is activated, the field is important and the user will be informed if it is empty during saving an item. Although, this field may remain empty. See Important Field. Turned on function makes the field important for all users. If you want to make the field important only for some user group(s), set it by permissions - see the next step under the table. If this function is activated, Required, Unique, and Read Only switches cannot be turned on at the same time. |
| Unique |
If the function is activated, the field is unique and must be filled with unique value when an item is created. See Unique Field. If this function is activated, Important and Read Only switches cannot be turned on at the same time. The Required switch is activated with Unique because a unique value must be required. |
| Read Only |
If the function is activated, the field cannot be edited. This is useful when you use the field for some automatic calculation. Turned on function makes the field read only for all users. If you want to make the field read only for some user group(s), set it by permissions - see the next step under the table. If this function is activated, Required, Unique, and Important switches cannot be turned on at the same time. |
| Description | You can specify for what purpose should be the field filled. |
If you insert values, go on by clicking Next.
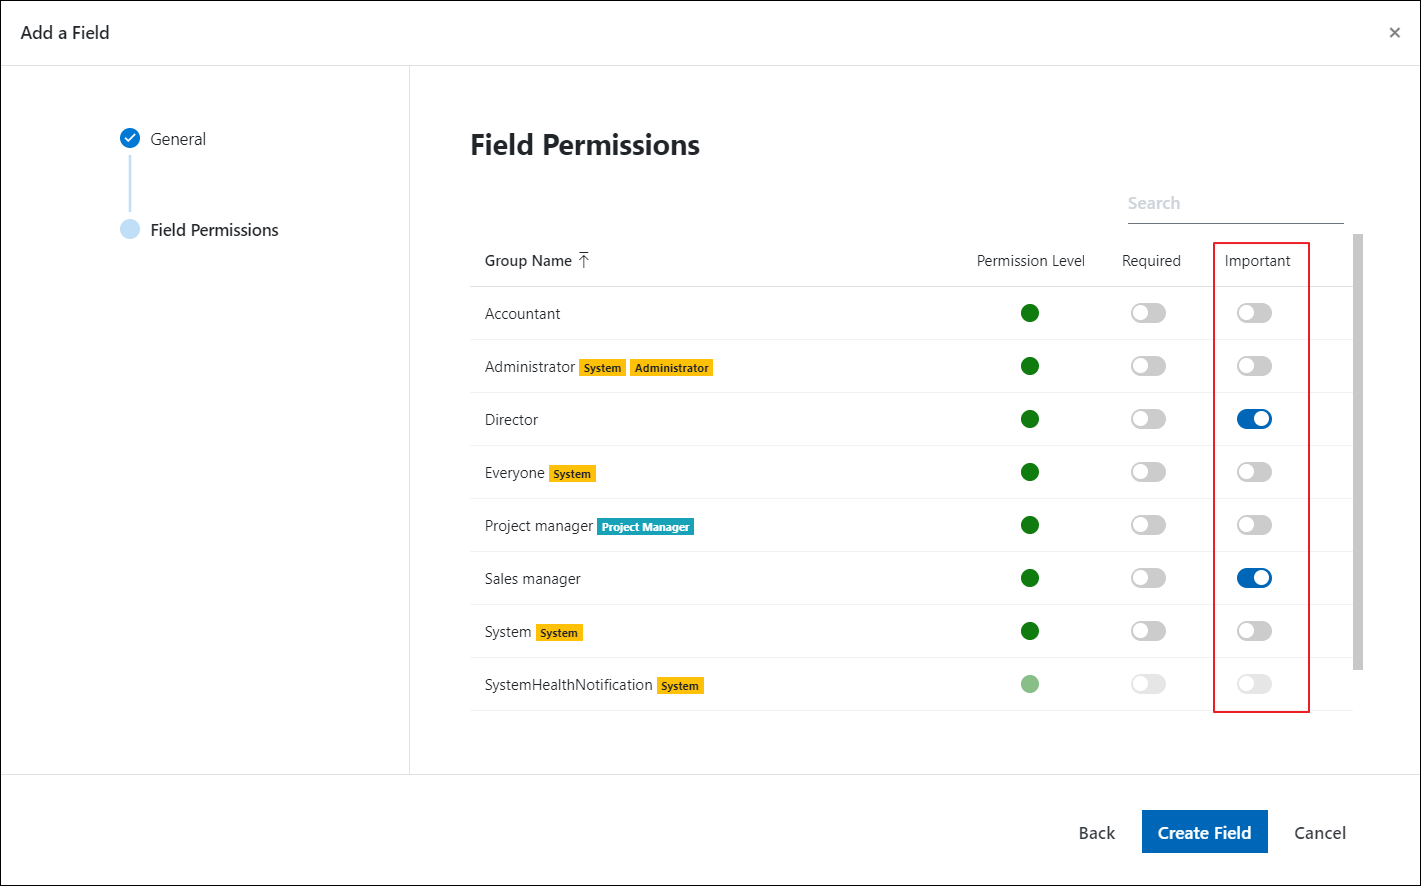
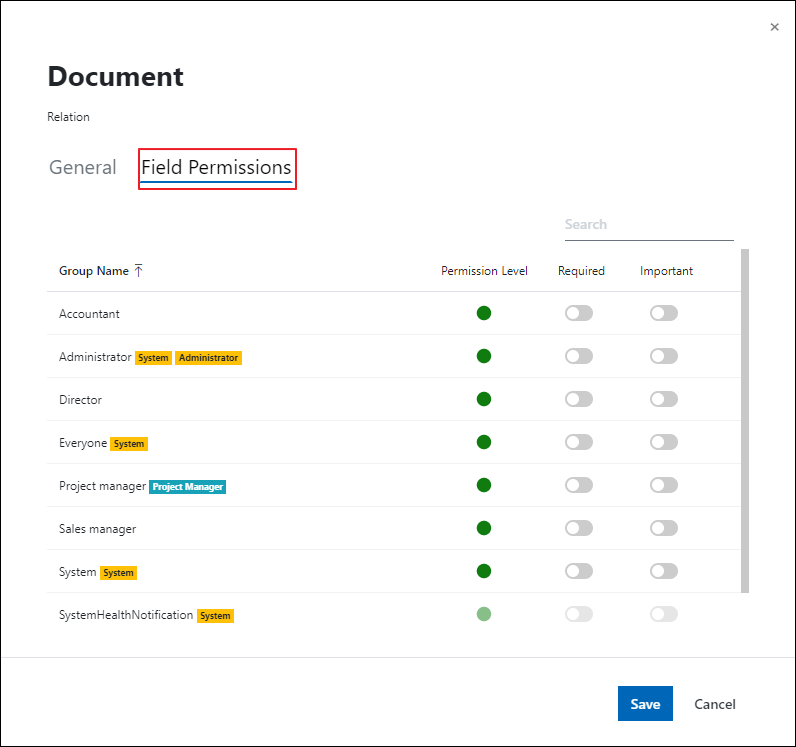
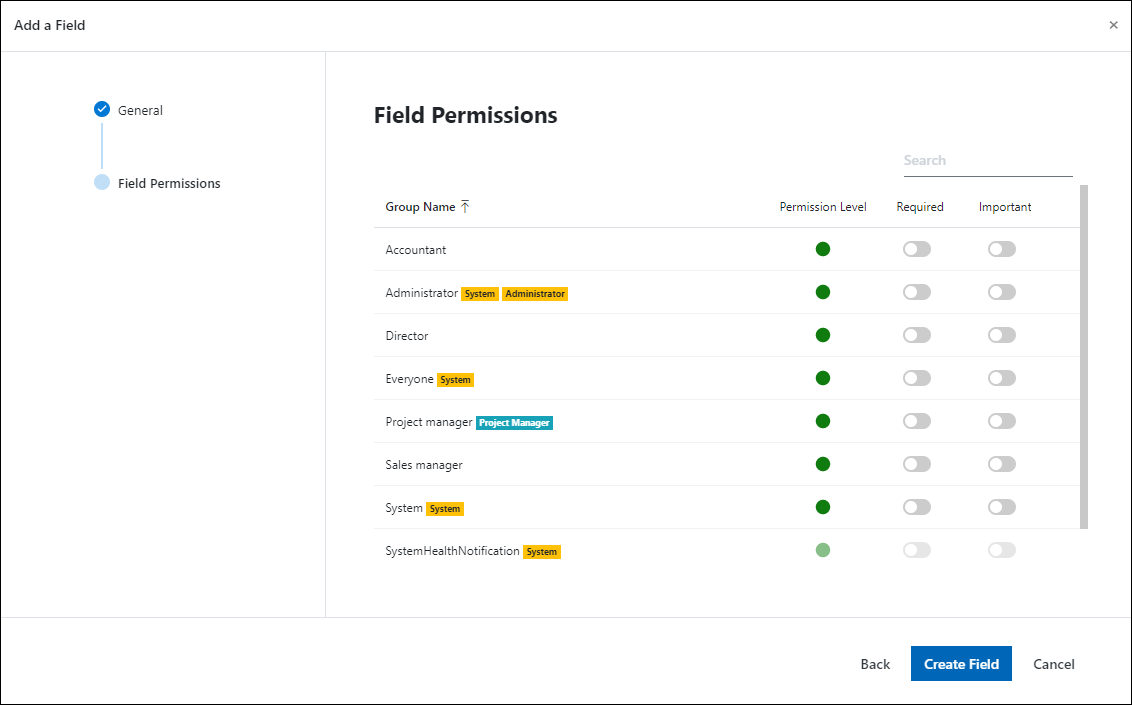
In the second step, set permissions related to the field.
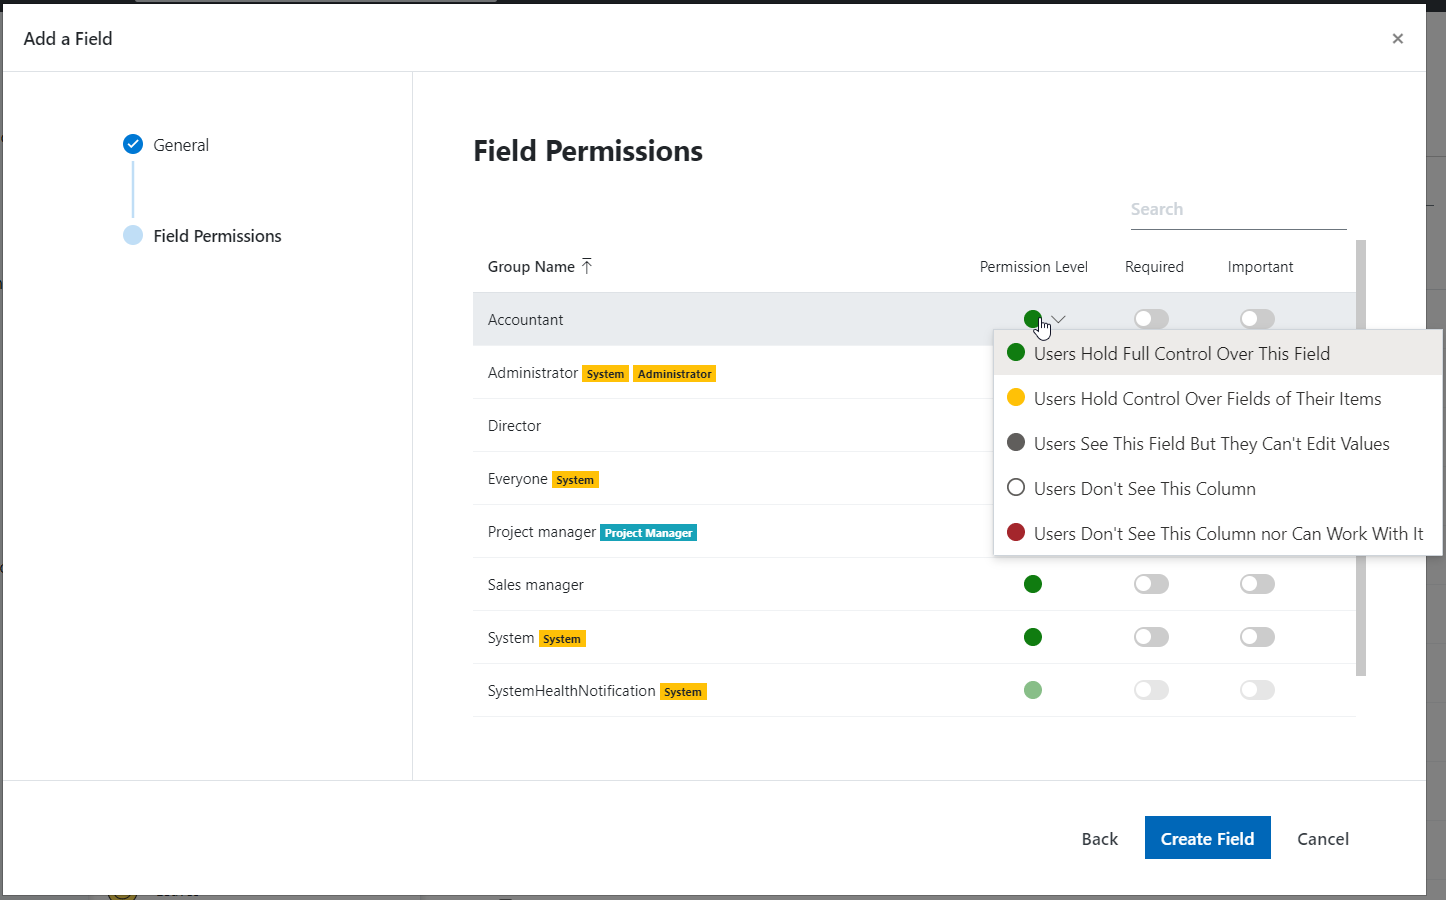
| Column | Description |
| Group Name | Groups whose permissions can be changed. |
| Permission Level |
Choose how the group can work with the field. Permissions are (some field types may have limited options for permissions change):
Note: Users Hold Control Over Fields of Their Items permission cannot be evaluated correctly wen some actions are applied - e.g. if te permissions is set to the field and there is action Set Field Value on it, the permissions is ignored and the action proceeds. |
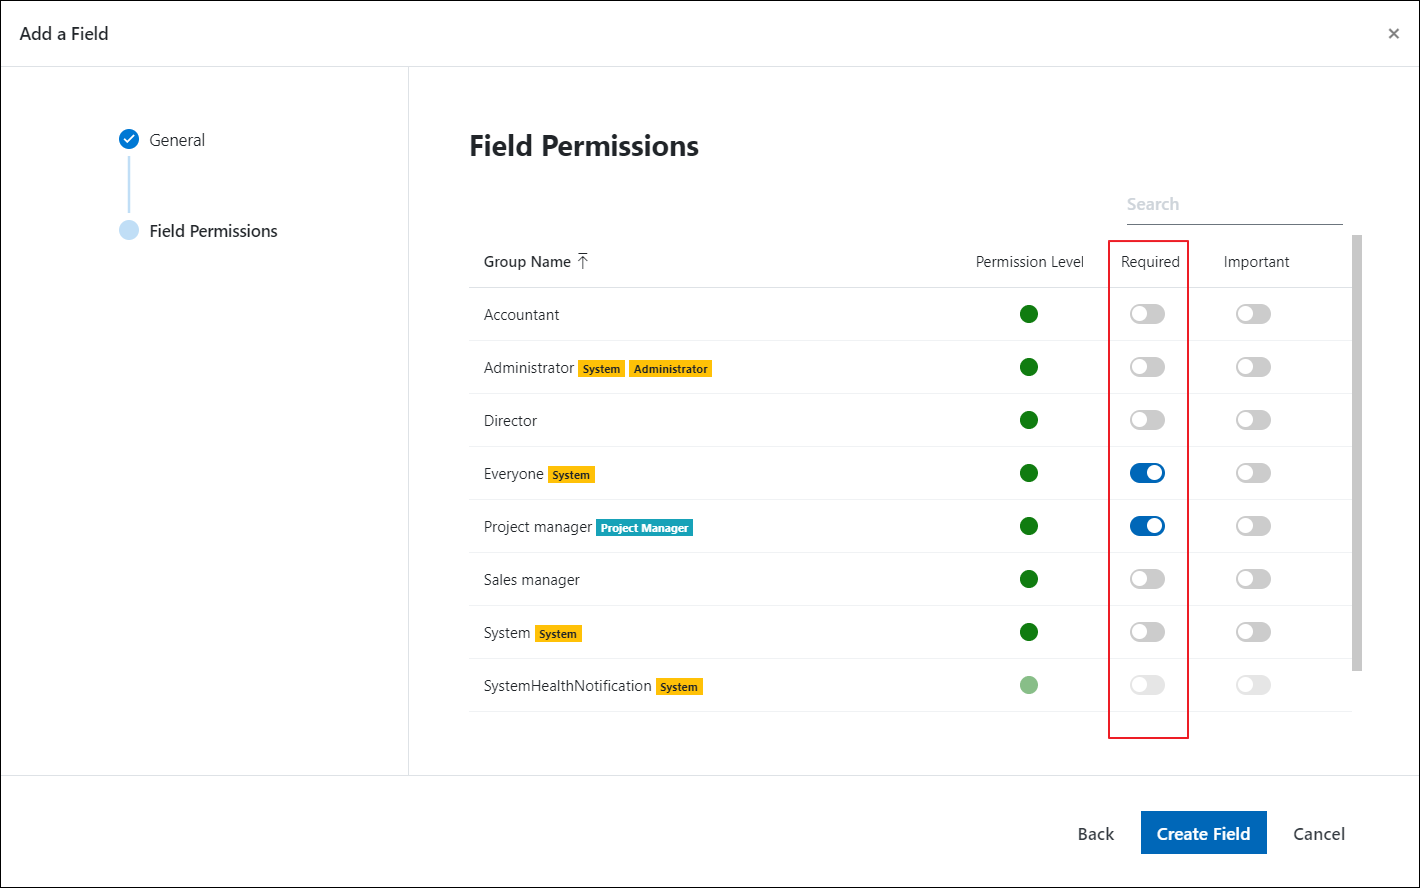
| Required | The field must be filled when the item is created - see Required Field. |
| Important | The user will be informed that the value in the field is not inserted when he or she is creating a new item - see Important Field. |
For completion, click Create Field button. The new field will be displayed in the custom fields list.
Required Field
The Required column determines the field that must be filled. If the value in the field is empty (e.g. email on a contact), the item cannot be saved.
In some cases, it may not be possible to enforce the completion of a field. These specific situations are described in the article Cases where the completion of required fields cannot be enforced.
The field is displayed with a red background if it is empty.
![]()
Important Field
The Important column determines the field that should be filled. If the value in the field is empty (e.g. email on a contact), the item can be saved but user is informed that this field remains empty.
The field is displayed with a yellow background if it is empty.
![]()
Unique Field
The Unique function determines the field that must be filled with unique values. If the value in the field is empty or the value is not unique from other items, the item cannot be saved.
The field is displayed with a red background if it is empty or has a non-unique value.
![]()
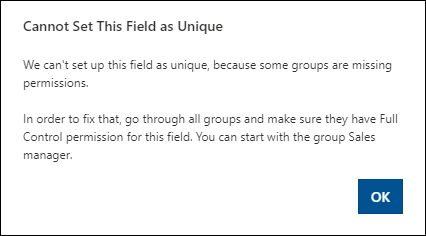
Restrictions
The field must be text or link type.
You need to be sure that column permissions for the field are set to Users Hold Full Control Over This Column. This must be applied to all user groups in the system. If you have set different permission for any group, you will not be able to set Unique on this field. If so, you will be informed about it:
You cannot be able to select Unique for the field when you already have items in your database and those items have the same values in this field or this field is not filled for more than one item. Even empty values are not unique. If so, you need to set the value in the field for all existing items to unique values. Then, you will be able to set the field to Unique.
If you want to bulk edit items, e.g. time sheet names, and this field has set Unique permission, you will not be allowed to bulk edit this column.
Duplicates When You Are Going Online
User can have set the field as non-unique, but when he or she is offline, the permission changed. User already created duplicates in the field that is now Unique. When the user is going online, the system indicates duplicates and ad suffix to duplicate values. This suffix is "(X)" where X is the number of the duplicate. Synchronization always proceeds correctly and you are sure that there are still only unique values and your items are preserved.
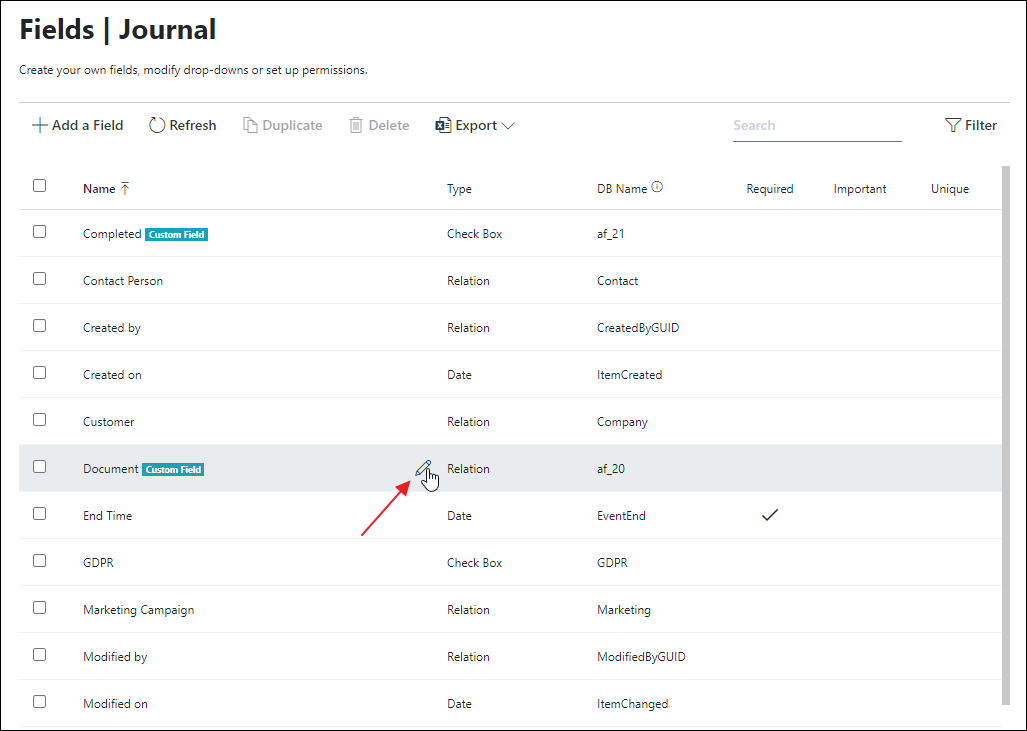
Edit Field
If you want to edit some field, double-click the field or move mouse over this field and click pencil icon that shows up:
Now, you can edit what you want. The General tab gives you the option to change the name, category, or description, and other settings that are specific to the current field type - see Add Custom Field.
In the Field Permissions section, set permissions related to the field - see Add Custom Field.
To confirm changes, click Save.
Duplicate Field
Click one field to select it. If you select a field (for duplicating, you can select only one at a time), the Duplicate button becomes active:
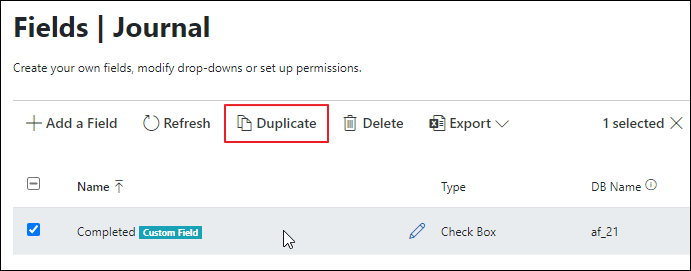
After clicking Duplicate, you will see a dialog with these options:
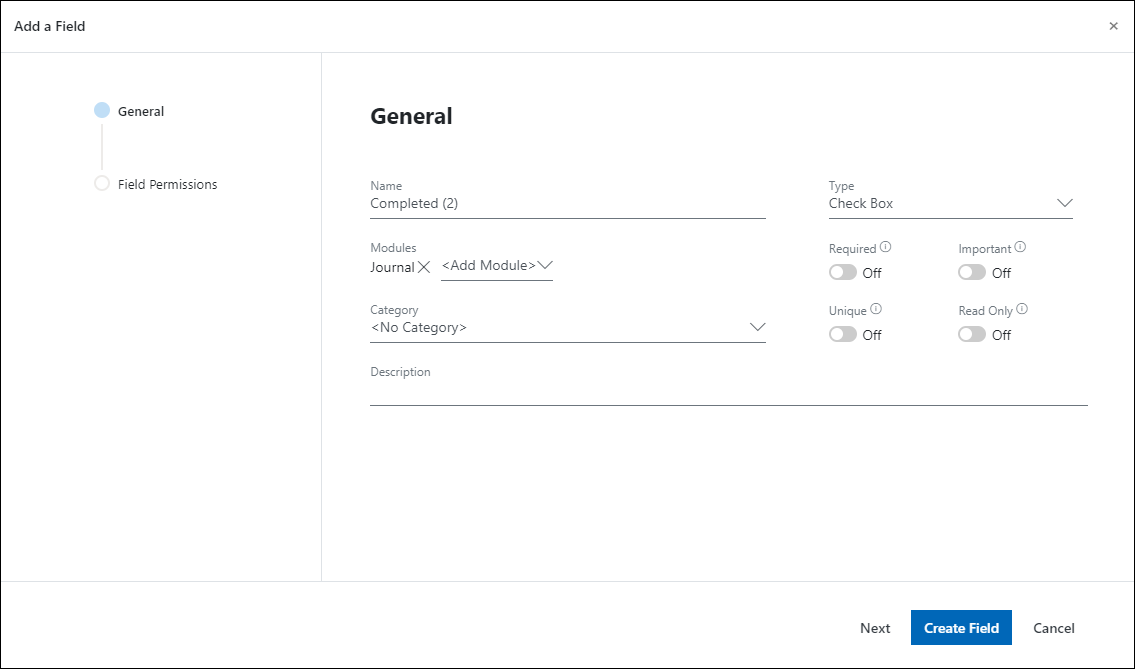
| Column | Description |
| Check Box | Click the custom field and you select it. The check box indicates that the custom field is selected. You can select more than one field at a time. |
| Name | Name of the field that is displayed to users. |
| Type | Type of the custom field. |
| DB Field | Name of the field in the database. |
| Category | The category to which the field is related. |
| Required |
If the function is activated, the field is required and must be filled when an item is created. See Required Field. Turned on function makes the field required for all users. If you want to make the field required only for some user group(s), set it by permissions - see the next step under the table. If this function is activated, Important and Read Only switches cannot be turned on at the same time. |
| Important |
If the function is activated, the field is important and the user will be informed if it is empty during saving an item. Although, this field may remain empty. See Important Field. Turned on function makes the field important for all users. If you want to make the field important only for some user group(s), set it by permissions - see the next step under the table. If this function is activated, Required, Unique, and Read Only switches cannot be turned on at the same time. |
| Unique |
If the function is activated, the field is unique and must be filled with unique value when an item is created. See Unique Field. If this function is activated, Important and Read Only switches cannot be turned on at the same time. The Required switch is activated with Unique because a unique value must be required. |
| Read Only |
If the function is activated, the field cannot be edited. This is useful when you use the field for some automatic calculation. Turned on function makes the field read only for all users. If you want to make the field read only for some user group(s), set it by permissions - see the next step under the table. If this function is activated, Required, Unique, and Important switches cannot be turned on at the same time. |
| Description | Additional text about the field. |
If you insert values, go on by clicking Next.
In the second step, set permissions related to the field.
| Column | Description |
| Group Name | Groups whose permissions can be changed. |
| Permission Level |
Choose how the group can work with the field. Permissions are (some fields types may have limited options for permissions change):
|
| Required | The field must be filled when the item is created - see Required Field. |
| Important | The user will be informed that the value in the field is not inserted when he or she is creating a new item - see Important Field. |
For completion, click Create Field button. The new field will be displayed in the custom fields list.
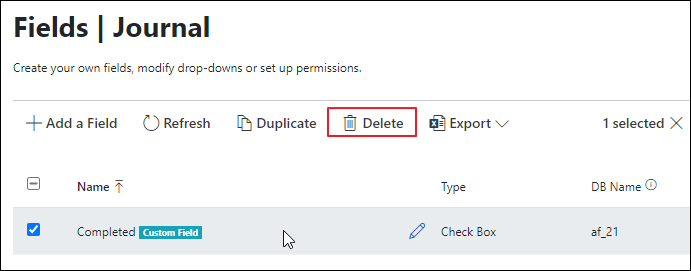
Delete Custom Field
Click one or more custom fields (system fields cannot be deleted) to select them. If you select some custom field, the Delete button becomes active:
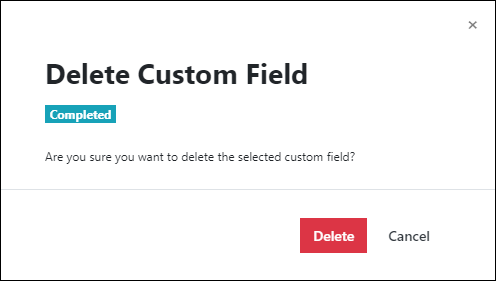
When you click Delete, you will see a confirmation dialog where you can check that you really delete only those fields you want to delete. To confirm removing the group, just click Delete button.
Export List
When you click Export, you have these options:
- Export This View - the list of fields from the current module will be exported to the Excel file.
- Export All Modules - the list of fields from all modules will be exported to the Excel file.
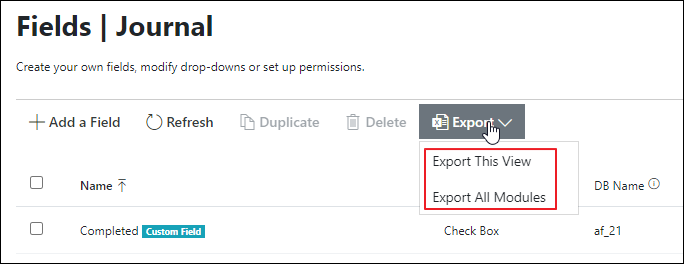
If you choose your option, the Excel file with data will be created.
Filter List of Fields
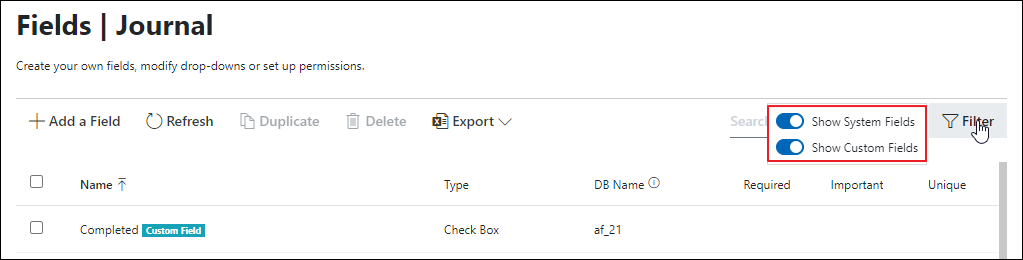
When you click Filter, you have these options:
- Show System Fields - the filter is turned on in default and system fields are displayed in the list; if it is turned off, system fields are not shown in the list.
- Show Custom Fields - the filter is turned on in default and custom fields are displayed in the list; if it is turned off, custom fields are not shown in the list.