Contacts Module Introduction
The Contacts module is primarily intended for the administration of persons you collaborate with (customers, suppliers, clients, etc.). The Contacts module represents an electronic replacement of your address book. You can easily manage your contacts in eWay-CRM Desktop and relate them with projects, companies, events, etc. You can see all relations in the Contact window in particular tabs. You can find phone numbers, email addresses, and other entries about a contact in its Contact window. All data has to be previously added by you or other authorized users.
Contacts List
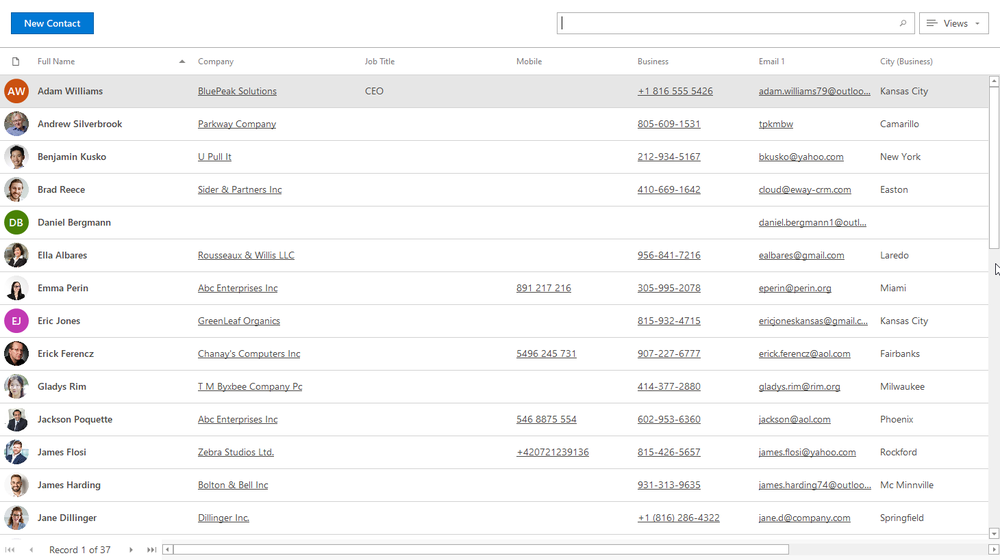
Clicking the Contacts icon on the eWay-CRM Desktop toolbar will open a list of all Contacts that are saved in the eWay-CRM system.
If you want to edit the basic list view and choose the data you are interested in, go to List of Items, where you can find general information on working with the main list.
You can see basic information about a contact in the main list that you previously filled. You have to double-click the contact for more information. The Contact window will open.

Full Name Column
Using Full Name Format, you can specify the format of the displayed contact's name in the Full Name column.
Last Activity and Next Step Columns
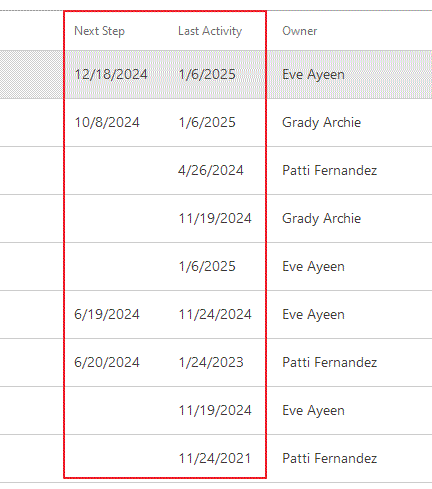
Last Activity and Next Step are special columns that can be added by the Column Chooser to your list. Columns give you the best review about the activity on your items and you can be sure that some items are not forgotten.

Last Activity allows you to see when was the last activity on the item - it means when was the last time the journal, document, or email was related to the item. The Last Activity Attributes setting can be used for selecting what module should be used for the calculation. You can select only one or all of them - it is up to you and your needs.
Next Step allows you to see when will be the nearest activity on the item - it means when the end of the nearest task or the date of the nearest event. Next Step Attributes setting can be used for selecting what module should be used for the calculation. You can select only one or all of them - it is up to you and your needs.
Contact Management
If you have the appropriate permissions, you can perform the following actions:
- Create new contact – detailed information about item creation can be found in the chapter: Create New Items
- Editing existing contact – detailed information about editing can be found in the chapter: Edit Items
- Item removal – there are several ways to remove an item. They are described in the chapter: Remove Items
Contact Window
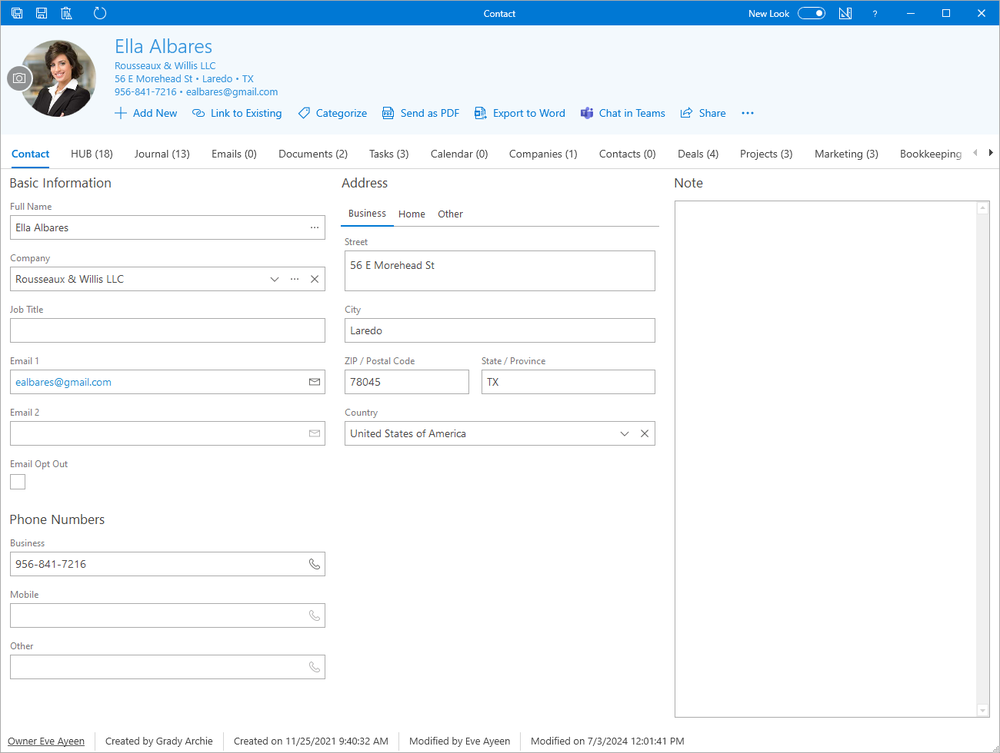
Double-clicking a selected contact will bring up its working window. The same Contact window, without pre-filled data, will appear when creating a new contact. It’s up to you to enter all the necessary data.

| Basic Information |
Basic information about a contact—the most important fields are Full Name and Email 1 which are used for other functionalities. The name of the contact can be written right in the name field but it is necessary to type it in the chosen format - see Full Name Format. If you want to insert the name with titles, click the Full Name button. The Company field allows you to easily relate contact with a company. If you select a company, its address (use the Contacts Address Source setting to define what address will be filled from company to a contact) will be automatically added to the contact's address as same as the website of the company. Otherwise, if you have the address and website filled on contact and you add a company by + sign, the address and website from the contact will be added to the new company. If you import contacts from Microsoft Outlook, the company will be filled as a relation or as a text, due to the setting Create New Company While Importing Contact. Profile picture allows you to insert a photograph of a contact. If you insert an email address into the email fields and this email address is related to the Gravatar service, a picture from your Gravatar profile will be loaded automatically. The Email Opt Out check box allows you to mark contacts who don't want to receive your newsletters. The function is also automatic: If you send a contact newsletter and he or she subscribes from your emails, the Email Opt Out field will be automatically marked. This contact will be marked as not subscribed while filtering your contacts. You select only those who want to receive your newsletters. |
| Address |
You can write three different addresses for a contact—business, home, and other. If you are creating a contact from the company using the Add New icon in the ribbon, the address of the company will be filled into the contact. |
| Phone Numbers |
You need to insert phone numbers in the form CountryCode LocalNumber, e.g. +420 223369817. For more information about possible errors, go to Incorrect contacts set - synchronization rewrites phone numbers from 00 to ++ where you can find information about the correct phone number form, too. |
| Note |
Any text you want to add to a contact. For more information about the field, see Note Field. |
Integration of Contacts With Outlook
Because the Contacts module is a default part of Microsoft Outlook and also a part of eWay-CRM, it creates specific options. eWay-CRM contacts are separated from Outlook contacts and the decision whether or not they should be synchronized is up to you. There are specific buttons for synchronization with Outlook, as you can see in the picture below:

Clicking the Synchronize With Outlook button will synchronize a selected eWay-CRM contact with the Contacts module in Microsoft Outlook. If the contact is synchronized, there is no need to manage it anywhere else — changes that are made in eWay-CRM will also appear in Microsoft Outlook, and vice versa. General information about synchronization settings can be found in the article Contacts Tab.
For more information about automatic synchronization settings, go to Automatic Contacts Synchronization Between MS Outlook and eWay-CRM. The instructions for manual synchronization can be found in the article Manual Contacts Synchronization Between MS Outlook and eWay-CRM.
Clicking the Import to Outlook button in the ribbon of the Contact window will copy a selected contact with all its details from eWay-CRM to the Contacts module in MS Outlook. Unlike synchronization, this is only a one-time action. For more information about import, go to Contacts Import From Microsoft Outlook to eWay-CRM.
Clicking the Open in Outlook button will open the contact in the Outlook window. If the button is disabled, you cannot open the contact in Outlook because the contact was not imported into Outlook or is not synchronized.
For more information on the possibilities of integration of eWay-CRM with MS Outlook, go to: Integration With Microsoft Outlook.
For other general information on the working window, go to: Item Dialog.
