Tasks
eWay-CRM Tasks module gives you the list of tasks right in eWay-CRM. It is up to you whether you want to synchronize tasks with Microsoft Outlook or have different tasks in eWay-CRM and different in Microsoft Desktop.
This article focuses on the basics of the Tasks module in eWay-CRM Online. If you want more general information about this module, please go to the description of the module for eWay-CRM Desktop.
Tasks List
Clicking the module name in the top part of the eWay-CRM Online page, you get into the tasks list.

When you click the link, you will see the list of all items that your user has permission to.
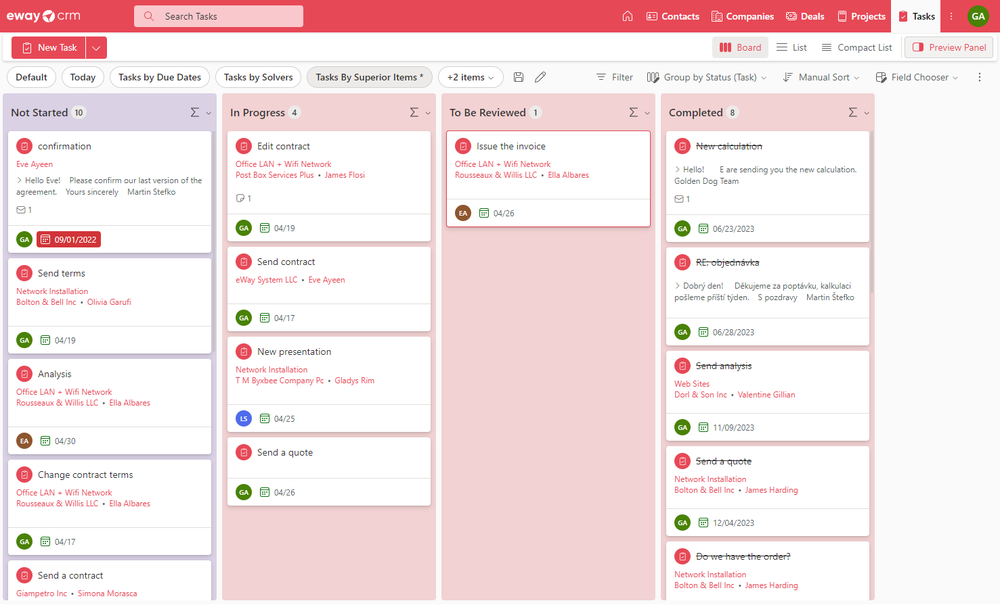
You can search items in the list, filter them, customize the list, etc. For more information about list opinions, go to List of Items Introduction.
Item Preview
When you click an item, its preview panel shows on the right side of the web page where you can see the values of the items and also some relations. For more information about the preview, go to Item Preview.
Quick Change of Task Dates in eWay-CRM List
You can work on tasks right in the list. Just right-click a task. Under the Follow Up option, you can set when tasks should be finished, or you change the date and time of a reminder.
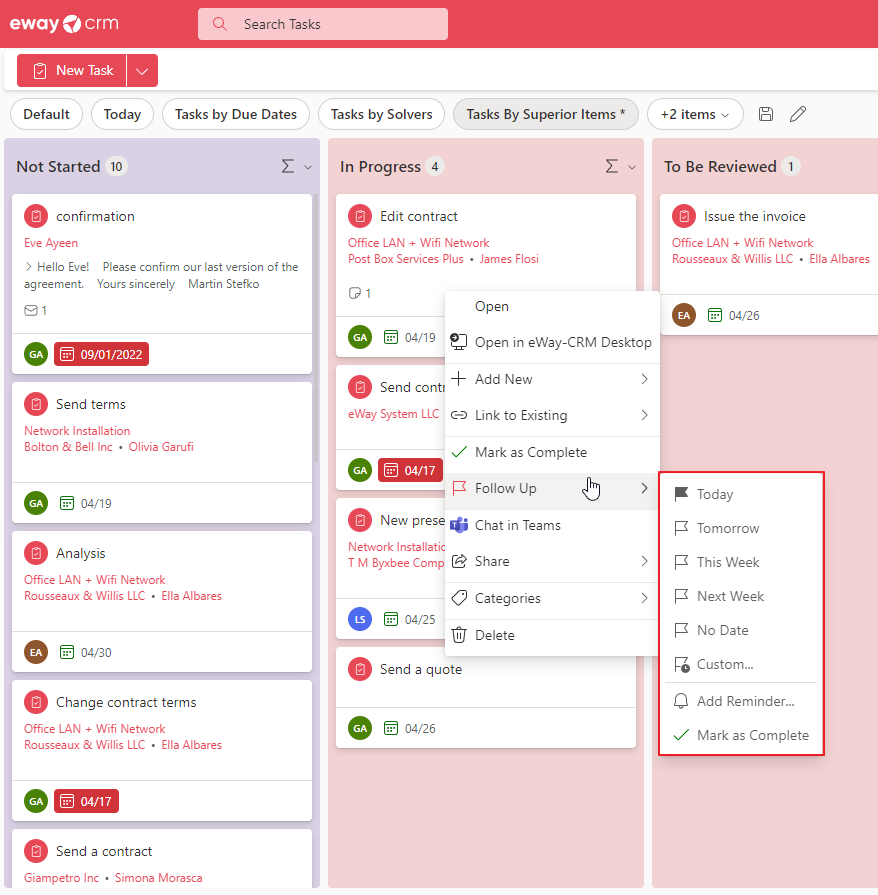
The quick change of task dates is possible on all types of views - the board, list, or compact list.
Task Dialog
Find out basic information about item creation and editing here: Create and Edit Items.
To easily create tasks, it is also possible to use AI features.
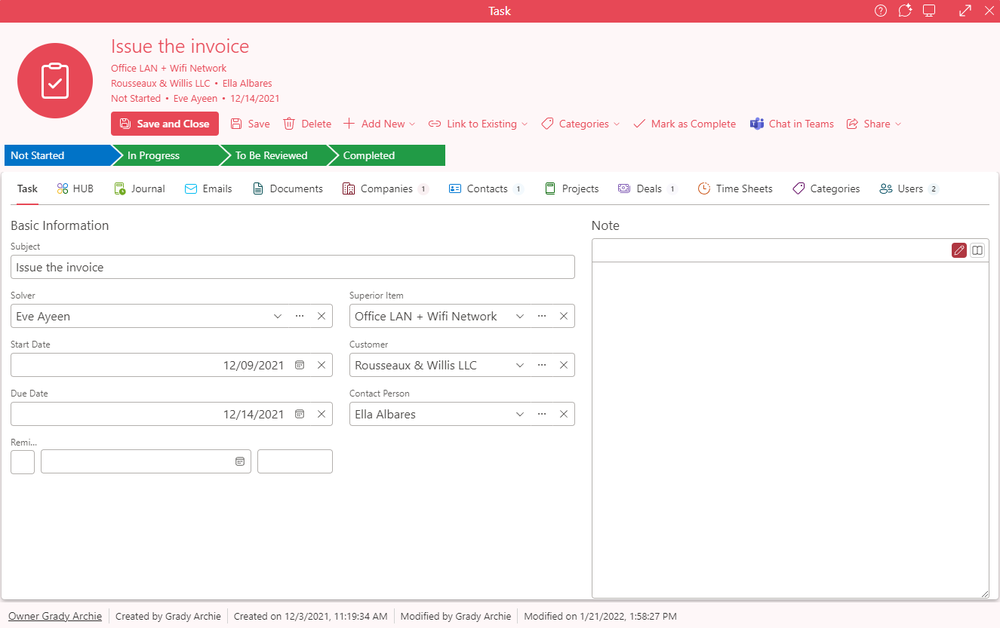
If you want to open an item, just double-click it. You will see similar details:
| Field | Description |
| Superior Item | A marketing campaign, task, project, or deal the task is related to. |
| Customer | A company related to the task. |
| Contact Person | A contact related to the task. |
| Subject | The name of the task. |
| Start Date | The date when the processing of the task started. |
| Due Date | The date when the task should be completed. |
| Reminder | Set the reminder - the date and time when a reminder pops up. |
| Priority |
Set how important the task is. If task synchronization between eWay-CRM Desktop and Outlook is enabled and the user uses priority values other than the standard Low / Normal / High, the value will be reset to Medium. Priorities are matched based on the FileAs field. If the user uses To Do items instead of standard tasks, priorities are not mixed up; items with high importance are always marked as important. |
| Completed (%) | Percent shows how much of the task is completed. |
| Solver | The user should complete the task. If the user is not the same as the Delegator, he or she will be informed by email that there is a new task after saving this task. |
| Delegator | The field cannot be changed, there is the user who created the task. |
| Note | The general text you can add to your task. |
When you want to display other fields or customize your dialog, use Form Designer in eWay-CRM Desktop. eWay-CRM Online displays a dialog similar to Microsoft Desktop, but some differences can happen due to the position of field groups in eWay-CRM Desktop - eWay-CRM Online does not use only the horizontal position of the field group, but the vertical is also important, e.g. when the group is on the right in eWay-CRM Desktop but it is higher than the group on the left, it is displayed higher in eWay-CRM Online.
Item Header
The top part of the item detail allows you to do some basic operations with the item and informs you about the item:

| Option | Description |
| Profile Picture | The picture you related with the item. |
| Basic Information | Right next to the profile picture, you have basic information about the item so you do not need to find them anywhere else. |
| Save and Close | Save all changes and close the dialog. |
| Save | Save all changes. |
| Delete | Delete the item if you have appropriate permissions. |
| Add New | Click the button and select the module on the list. A new item window pops up. Fill in values, save the item, and the relation to it is created. For more information, go to Work With Relations. |
| Link to Existing | Click the button and select the module on the list. The list of all available module items appears. Select the item you want and the relation to it is created. For more information, go to Work With Relations. |
| Categories | Add a category to the item - see Create Categories. |
| Mark as Complete | Just by one click mark the task as complete. See Complete the Task. |
| Chat in Teams | Share the item using Microsoft Teams - see Send a Link to Open an Item Via Teams. |
| Share | Use it to share the item as a link or as a message sent by email. |
Complete the Task
When the task is finished, you want to mark it as completed so you can move to other ones. eWay-CRM Online allows you to do it as easily as possible.
You can complete the task right in the list, just right-click the task and select Mark as Complete.
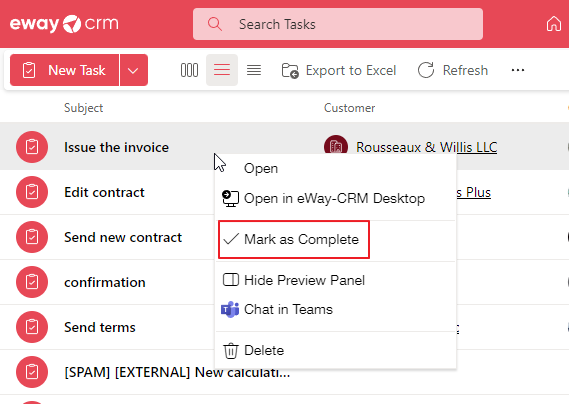
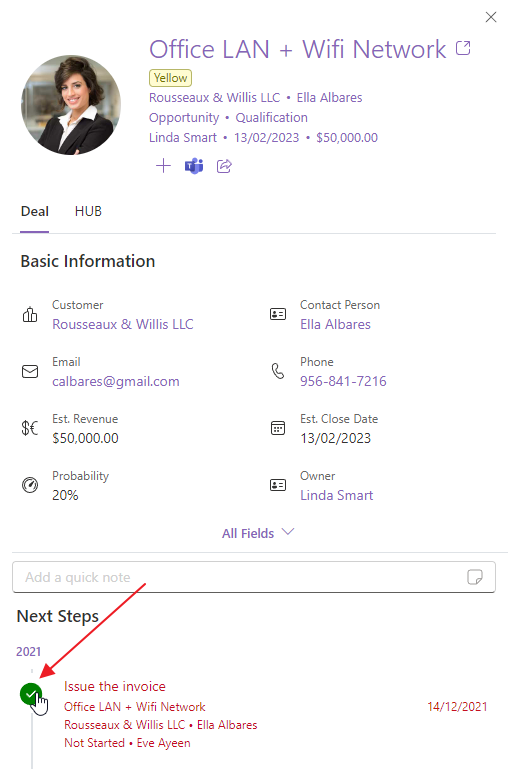
You can easily complete tasks in the item preview: just move the cursor over the task icon - it turns green - and click it. The task is completed. The user must have permission to move to the status and all actions related to the workflow must be met.
If you have task details opened, you can complete them by clicking Mark as Complete in the top menu.

The next option is to move the task to the Completed state - see Task Workflow below.
If you are using the Board view and you have grouping by State (default grouping), you can complete the task just by dragging it and dropping it into the Completed column.
Task Workflow
The Tasks module has workflow - you can set different statuses for tasks to describe their process; flows between statuses can also have some actions that are proceeded.

For more information about workflow, go to Work With Workflow.
