List of Items Introduction
The list of items is the basic interface where the user works in eWay-CRM Web. Its controls are described in this article in the following chapters:
- List Controls
- Modules Menu
- Global Search
- Create New Item
- Types of Views
- Custom Views
- Other Tools
- Columns Management
- Column Chooser
- Column Filter
- Complex Filters
- Group Items
- Summarize Items in the List
- Select an Item and See Its Options
- Item Preview
- Suggested Contacts
List Controls
When the user goes to the eWay-CRM Online, he or she will see the list of a module and all items that the user has permission to see.
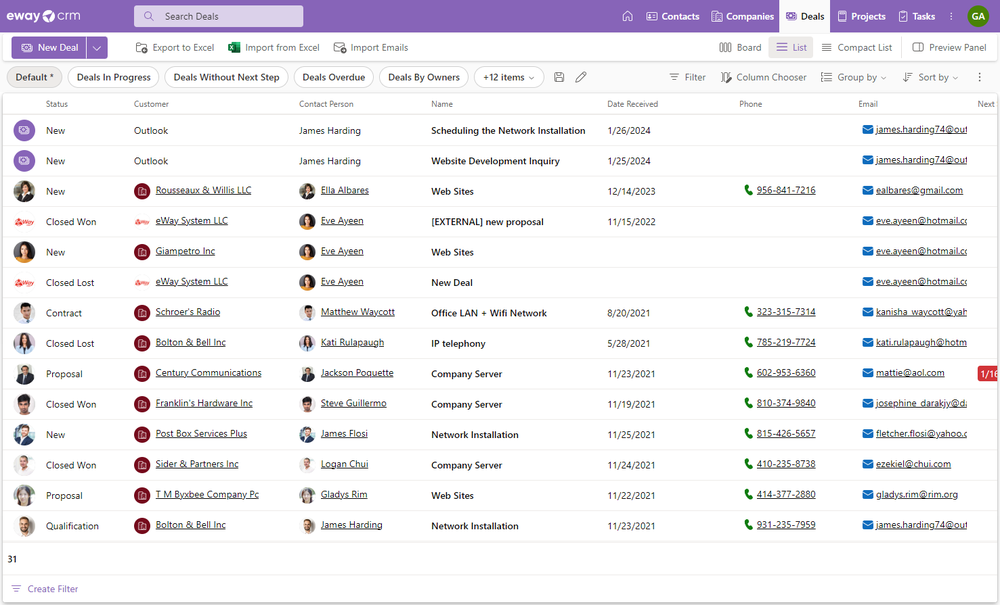
Right in this list, it is possible to move to another module, search items, filter them, or select which columns should be displayed. User can also create new items right in the list if he or she has sufficient permissions.
Modules Menu
The modules menu is in the top part of the page:

Users can easily move among modules just by clicking the module name. The item list is opened for each module.
Global Search
The search panel is in the top part of the web page:
![]()
If the user types in some string, the whole displayed module is searched - if the filter is set, search results are only from these filtered items.
Since eWay-CRM 9.0, it is possible to search anywhere in eWay-CRM Online using the item’s GUID (unique database identifier) or the item’s ID, provided the ID column exists for the given module
Create New Item
The item can be created right on the welcome page. If you want the description of this function, go to Welcome Page.
If the user wants to create a new item in the displayed module, he or she just clicks the New button.
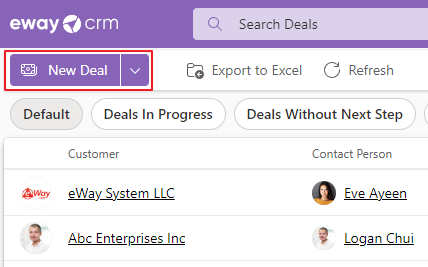
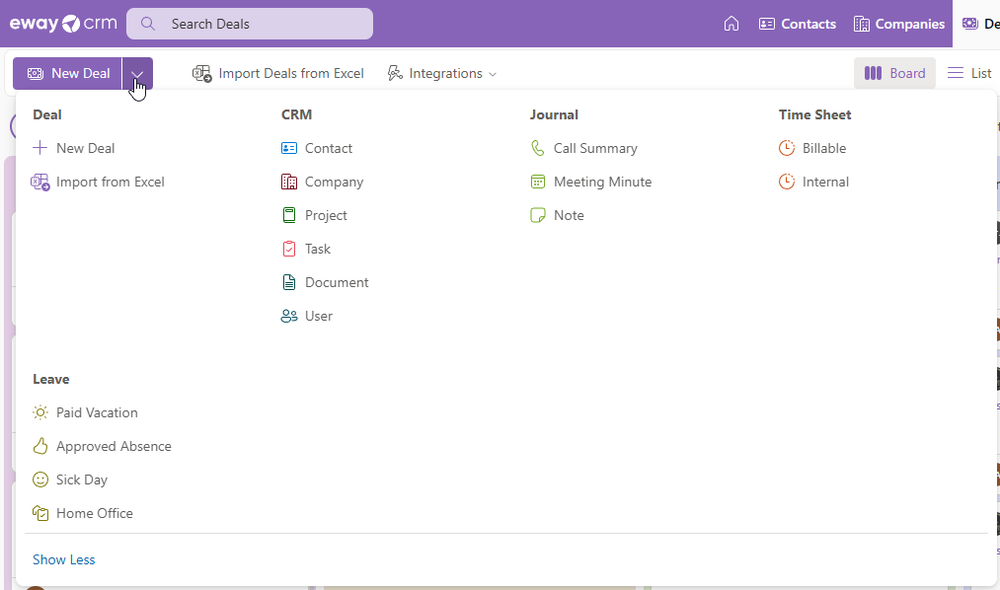
To create a new item in other modules, it is needed to click a small arrow next to the New button where the user sees a menu of items that can be created. At the same time, you have the option to click Show More to view the extended menu.
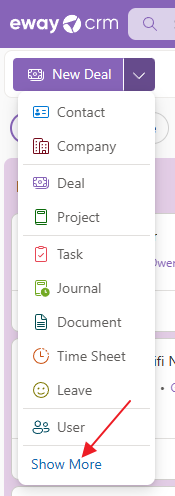
A wider menu will appear, allowing you to create items directly with the specified type.
For more information, go to Create and Edit Items.
Types of Views
In eWay-CRM Online, you have these types of views:
- Board
- List
- Compact List
You can easily change the type in the top toolbar:
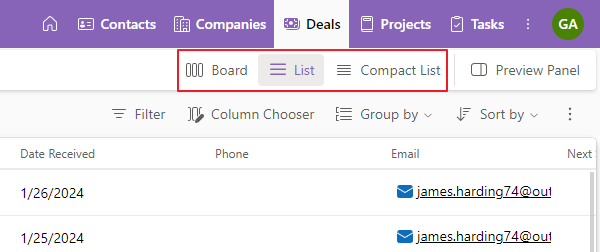
The following chapters can be applied for the List and Compact List view. If you want to work with the Board, please follow these instructions.
Custom Views
Availability: Custom views have been available since eWay-CRM 7.6.0.
As you are used to in eWay-CRM Desktop, eWay-CRM Online allows you to use your own saved views. User views can be selected right from the panel at the top of the list.

There you can see all views that are available for the module - default view, your own views (only yours), and shared views (for all users). Just click the one you want to have displayed - the displayed view is always marked with a tick (if there is also an asterisk sign - * - it means that you are using this view but with some changes).
Custom views can be saved - views saved in eWay-CRM Online are only available in eWay-CRM Online, not in eWay-CRM Desktop.
You just need to set up the list as you need and click on the plus icon next to the displayed views.

A dialog will appear where you can write the name of the view and decide whether it will be just yours or if you want to share the view with colleagues. Then just save it.
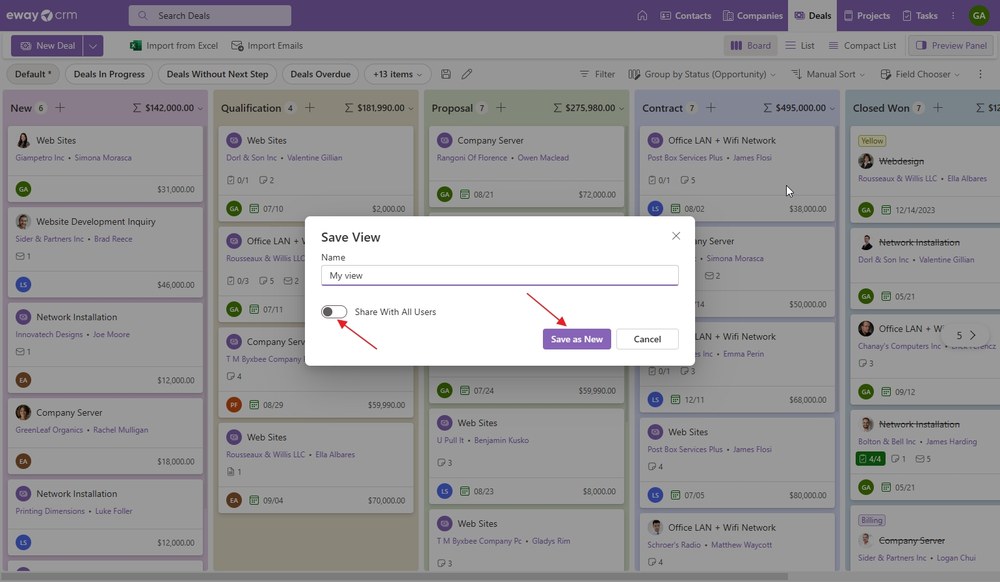
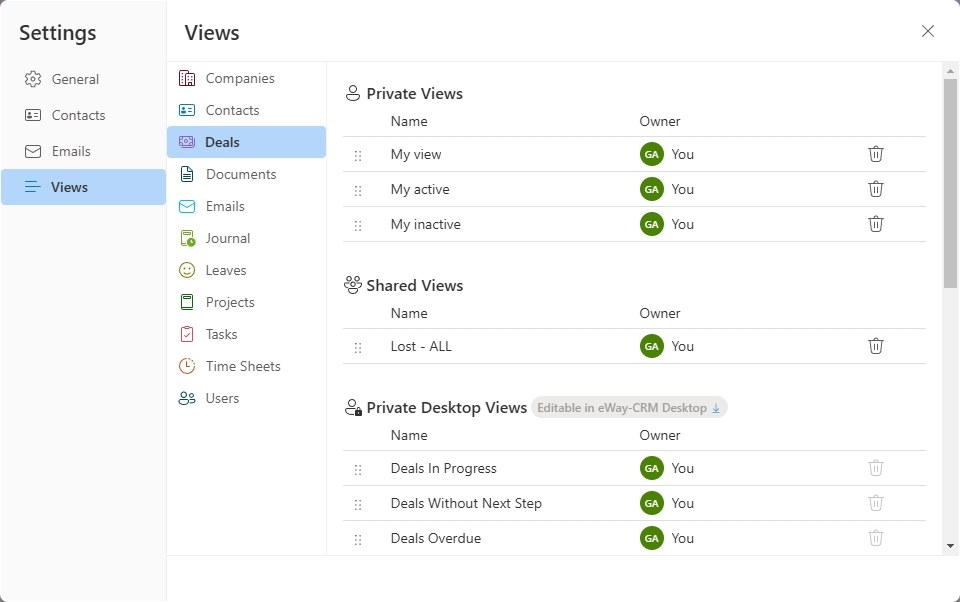
You will immediately see the view in your list of views.

If you click on the pencil icon next to the view names, their settings will appear. You can learn more about it in the article Settings.
Other Tools
On the panel with views, you can see other tools. The first is a Filter which can be used for the filtering of items in the list.

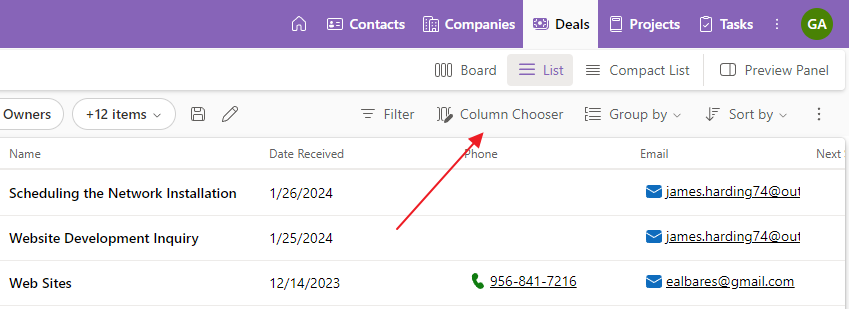
Column Chooser allows you to add other columns to your list. See Column Chooser.
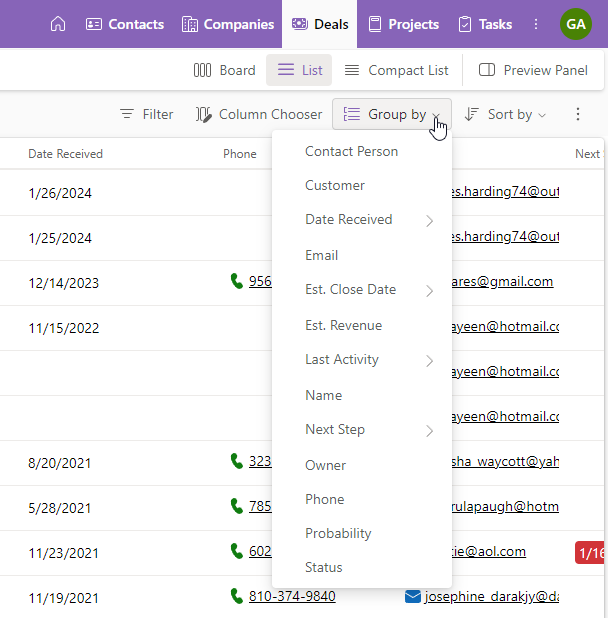
If you click Group by, you can select a column that will be used for grouping items. For more information about grouping, see the chapter Group Items.
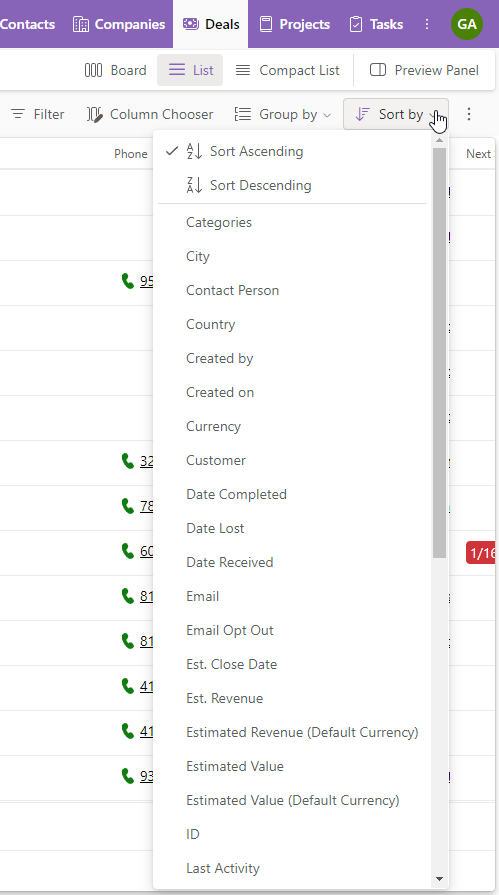
If you click Sort by, you can choose the column that will be used for sorting items. For more information, see the chapter Sort Items.
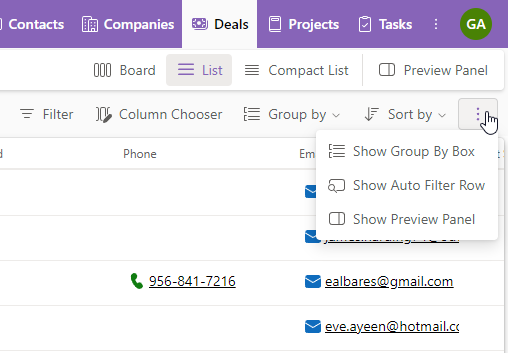
When you click the three dots icon, there are these options:
Columns Management
The columns management is intuitive and very similar to work with columns in eWay-CRM Desktop. You can drag-and-drop columns, sort them by clicking on their name, and right-click to see the context menu there are other options on how to work with the list.
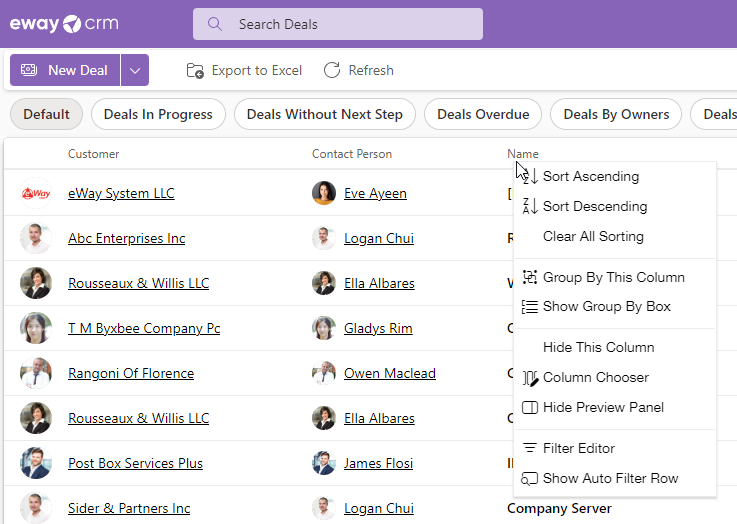
In the menu, there are these options:
- Sort Items - Sort Ascending, Sort Descending, and Clear All Sorting
- Group Items - Group By This Column and Show/Hide Group By Box
- Column Chooser - Hide This Column and Column Chooser
- Show/Hide Preview Panel
- Filter Editor
- Show/Hide Auto Filter Row
Column Chooser
Right-click any column name and select Column Chooser in the context menu. You will see a list of all available columns for the current module.
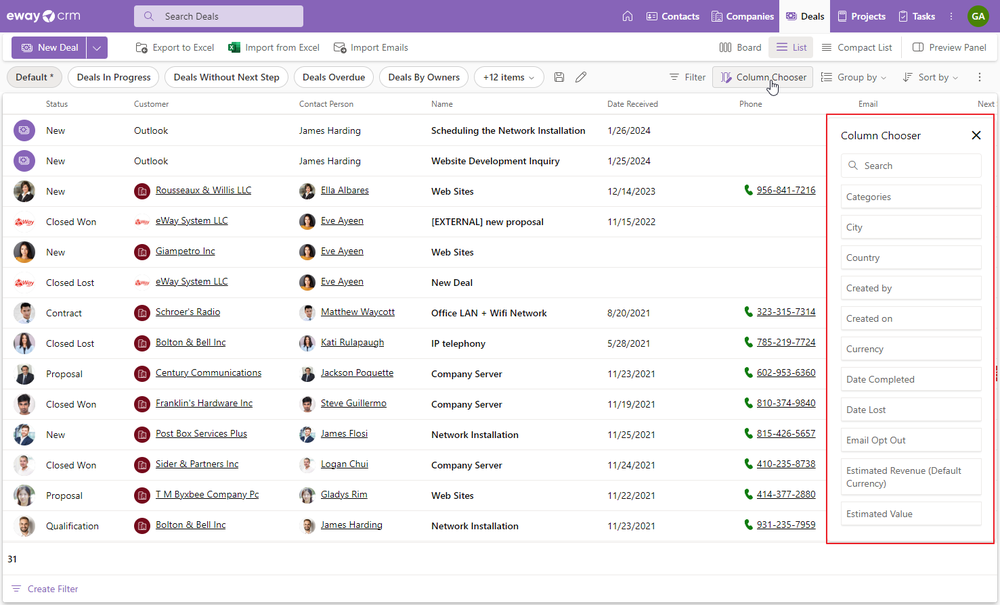
Marked columns are already displayed in the list, unmarked not. If you want to add some column to the list, mark it or drag-and-drop it on the place where you want it; if the column should not be displayed, it must be unmarked in the list. Then, the user only closes the list of columns.
Columns Order
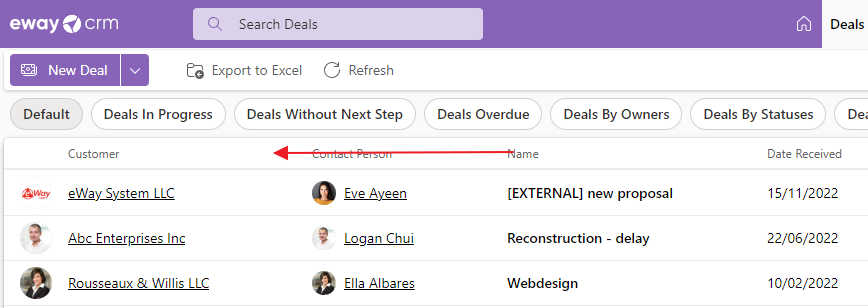
Columns can be easily moved just by drag-and-drop. Click the column header, hold the mouse, and move the column to the position where you want it.
Sort Items
Sorting can be easily done with a single click on the column header.

The first click will set ascending sorting, the second will set descending sorting.
Or you can sort the list by right-clicking the column name and selecting Sort Ascending or Sort Descending.
Auto Filter
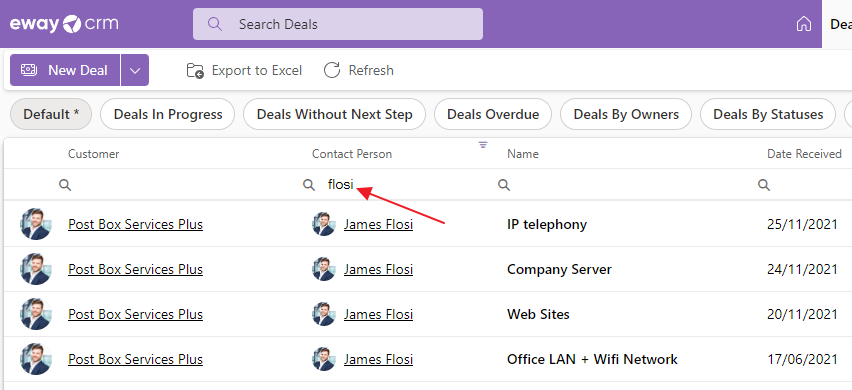
Auto Filter can be displayed when you right-click any column name and select Show Auto Filter Row.
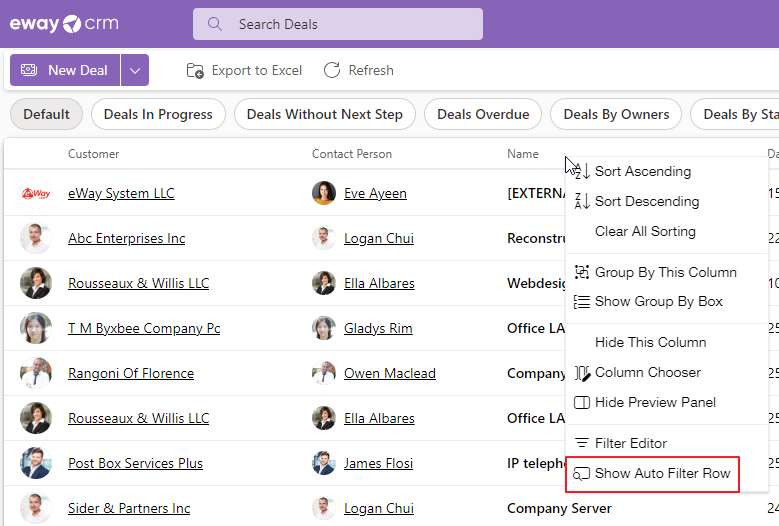
Users can filter by value in each displayed column. Just click on the filter row and type in a specific string.
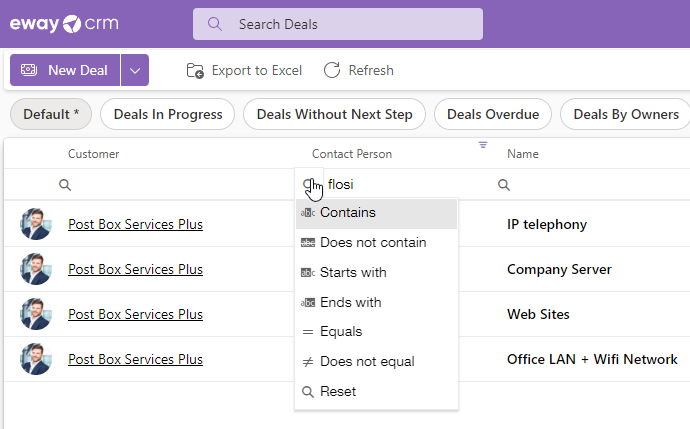
If the operator for the filter does not suit you, you can click the icon on the left of the search field and change the operator.
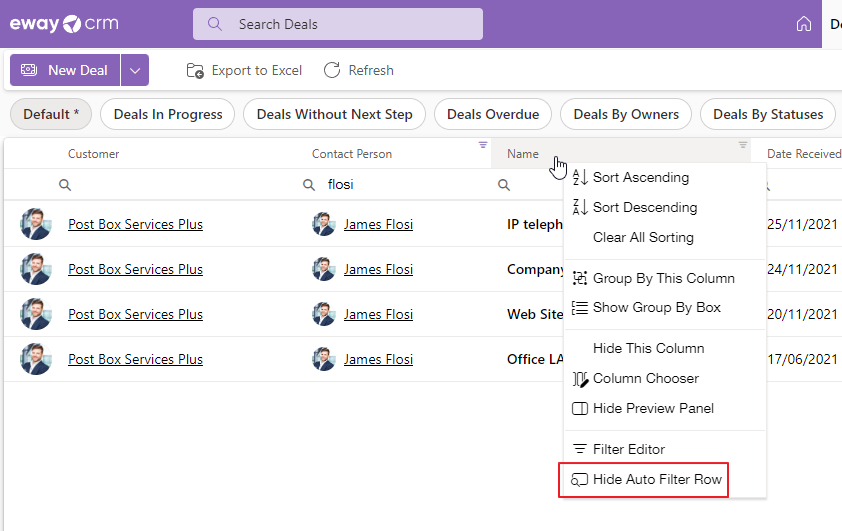
If the user is not using a filtering row and it seems redundant to him or her, it can be easily hidden by right-clicking the column name and selecting Hide Auto Filter Row.
Complex Filters
For filters, you need to right-click any column name and select Filter Editor.
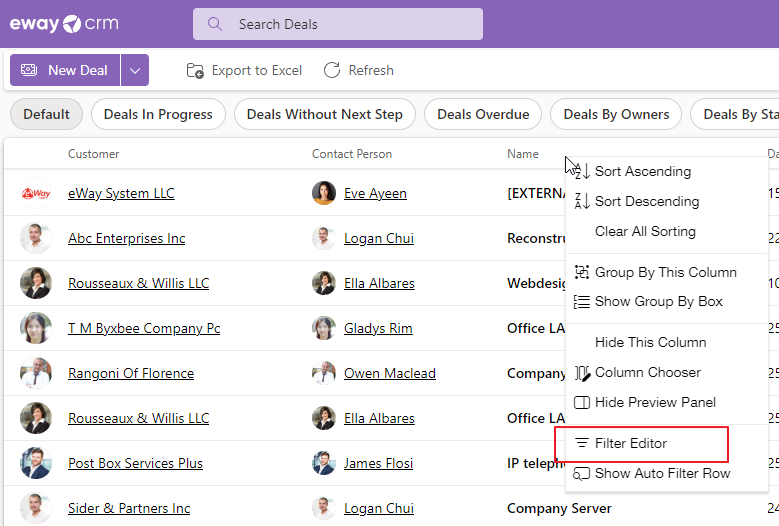
The filter editor is opened where you can set more complex conditions for filtering.
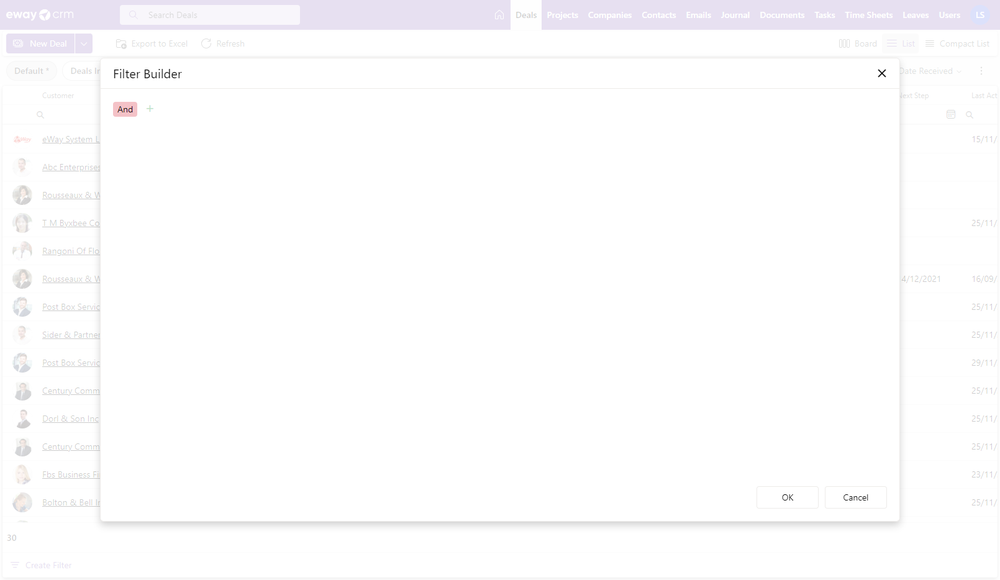
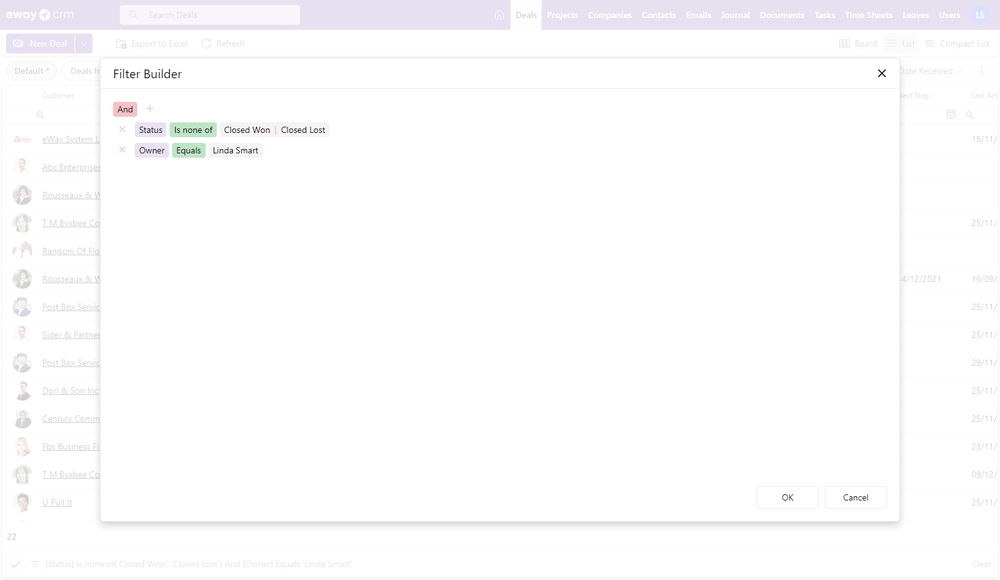
Example: If you want to create a condition to see only active projects where the project manager is a specific user.
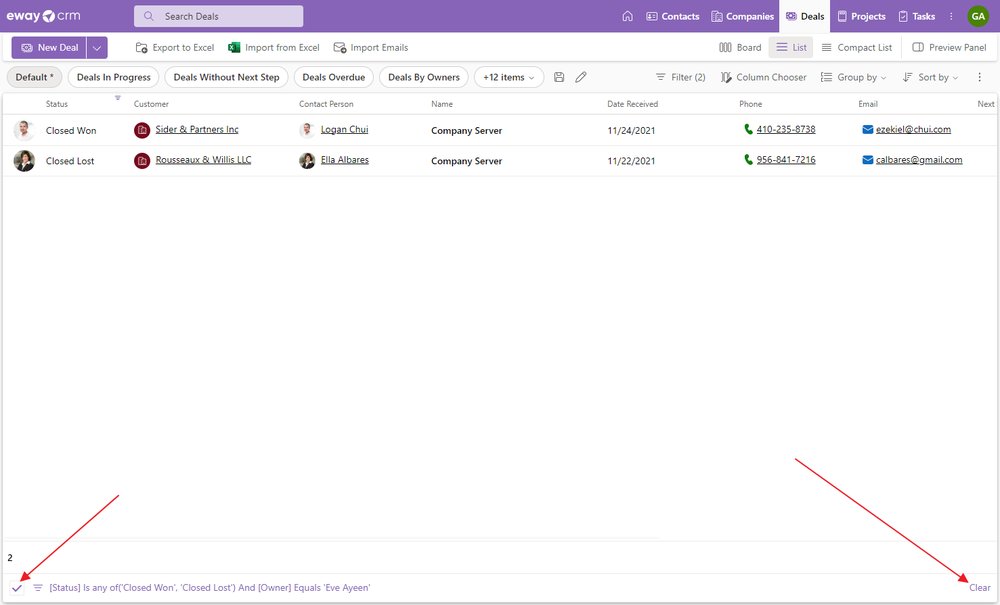
If you want to cancel all filters set in the list, click Clear at the right bottom part of the page. I you just want to see the whole list but save the filter, unmark the filter field in the left bottom part of the page.
Group Items
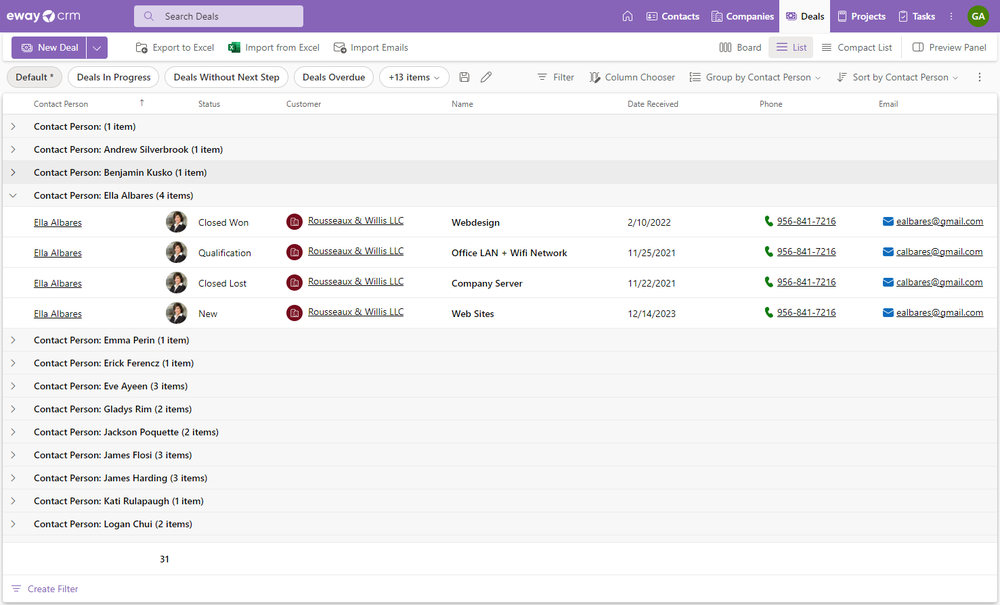
Right-click any column name and select Group By This Column.
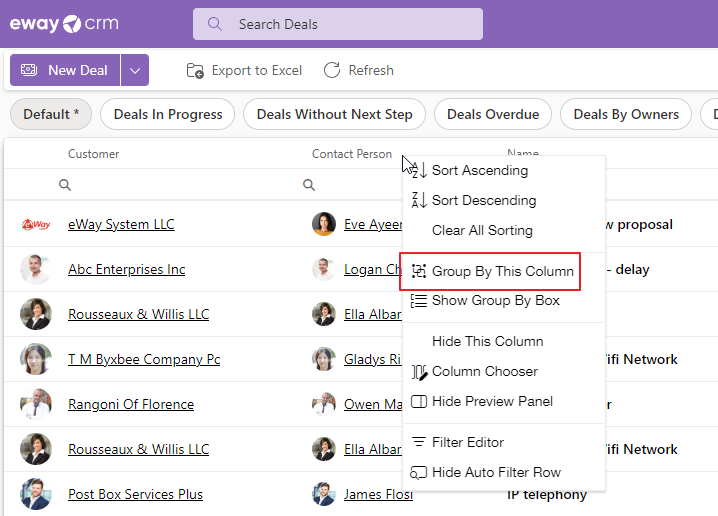
You will see the list grouped by your choice.
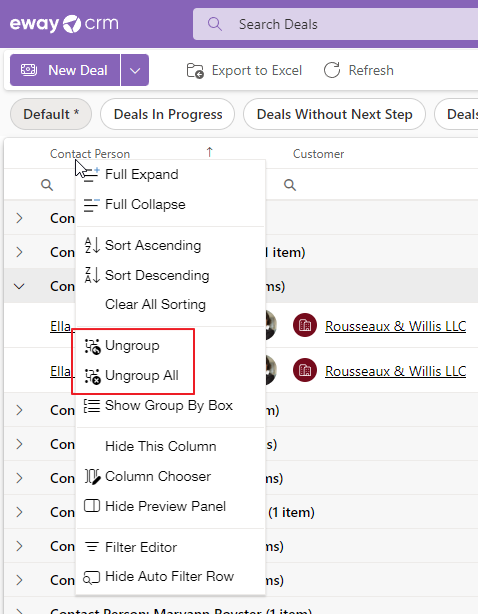
Cancel Grouping
You can cancel groups in the same way as you create them - right-click the name of the grouped column and select Ungroup or Ungroup All.
Group By Box
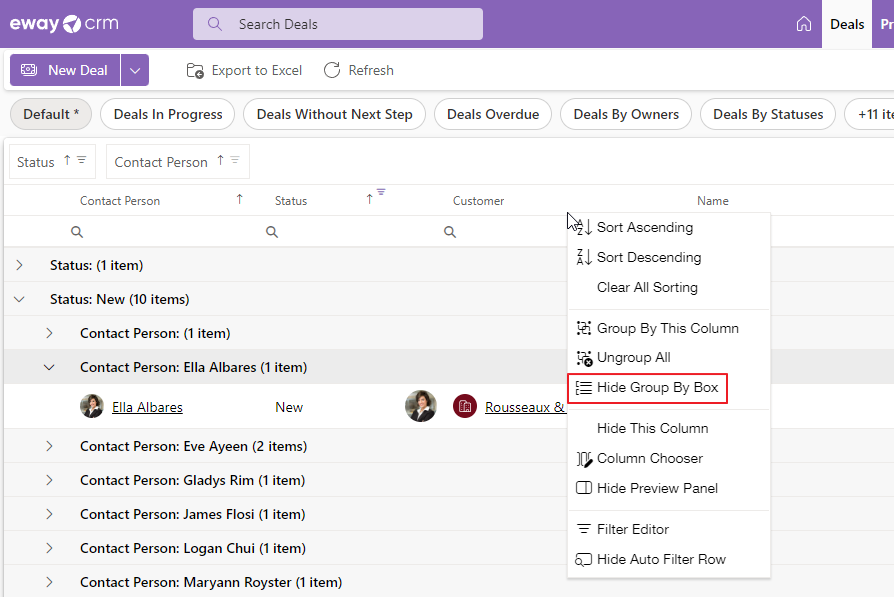
Group By box can be displayed when you right-click any column name and select Show Group By Box.
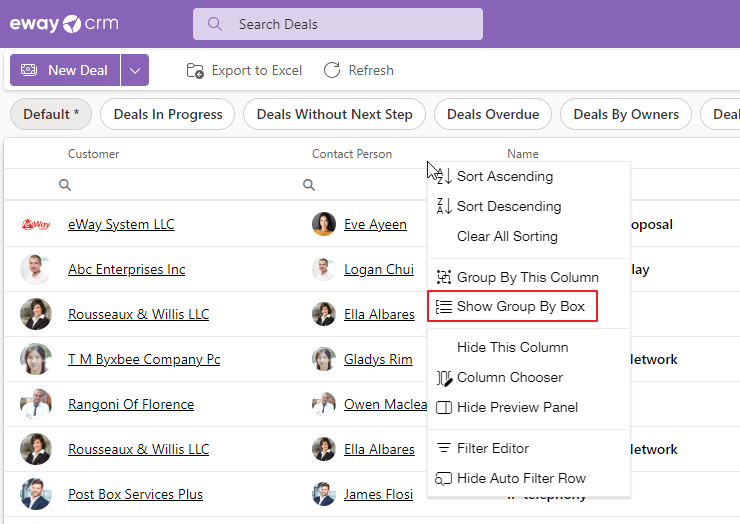
If you click the option, you will see a new panel above the items list - you can drag column titles and drop them here.

In the Group By box, you have a great review of what fields are used for grouping:
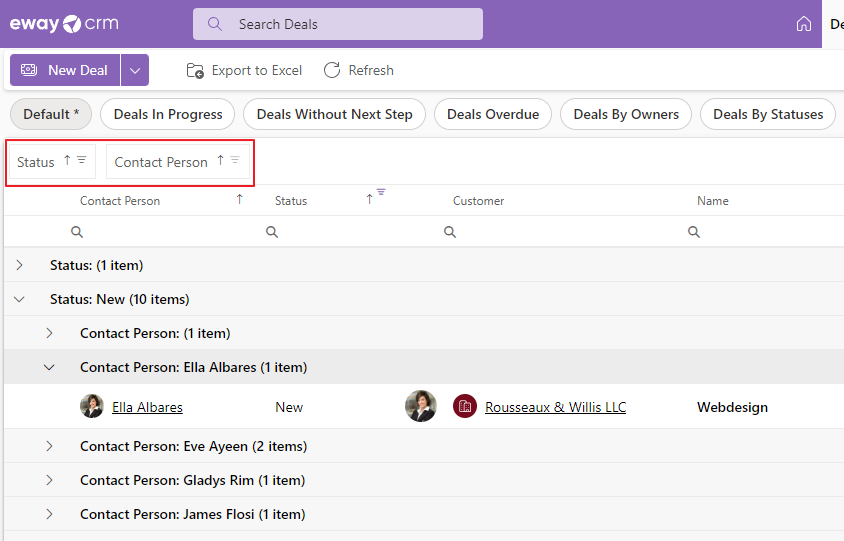
If you want to hide the box, just right-click any column name or the box itself and select Hide Group By Box.
Summarize Items in List
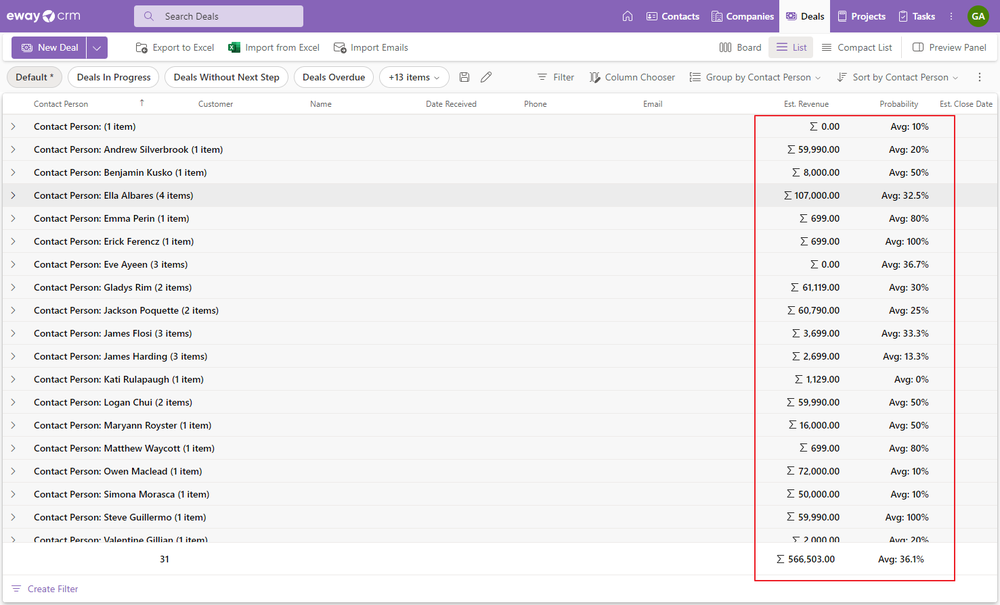
Only numeric columns are summarized. The summarization is automatic (see the summarization in eWay-CRM Outlook) and when the grouping is applied, also each group has its own summarization.
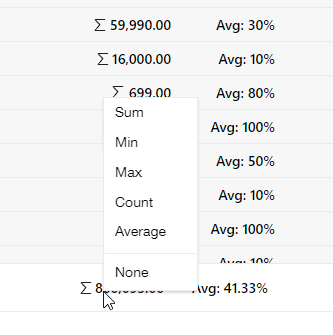
If you want to change the summarization type, click the summarization field and select a different one.
Select an Item and See Its Options
Availability: This feature is available from eWay-CRM version 9.1.
You can easily select an item in the list by clicking on it. If you want to select multiple items, click on the circle in the left part of the list, where the logo, photo, or icon of the item is displayed.
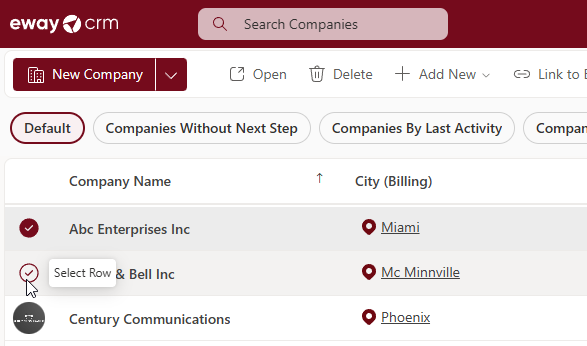
Once selected, you can choose multiple items for bulk editing. Options for managing the selected items will appear at the top of the window. For more information, see the article Selecting items in the list.

Item Preview
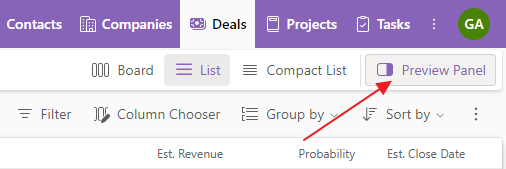
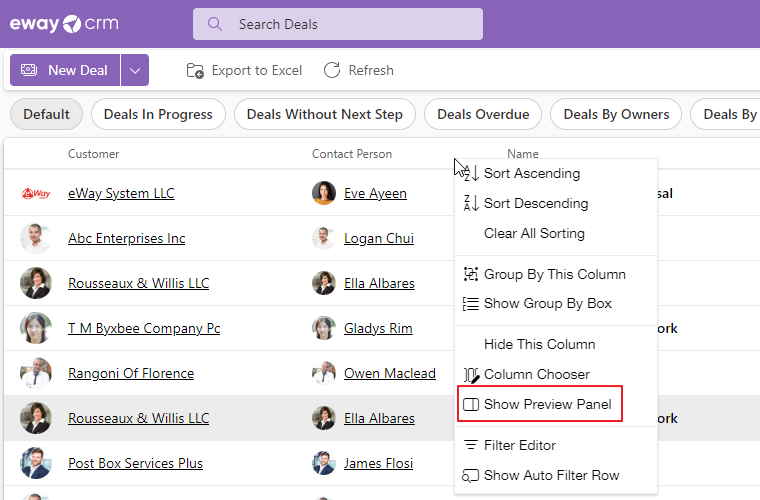
If you want to click the item and display its preview, you need to turn on the function. The Preview Panel button is on any list right next to view options. Just click on it to have it in the same position as in the picture.
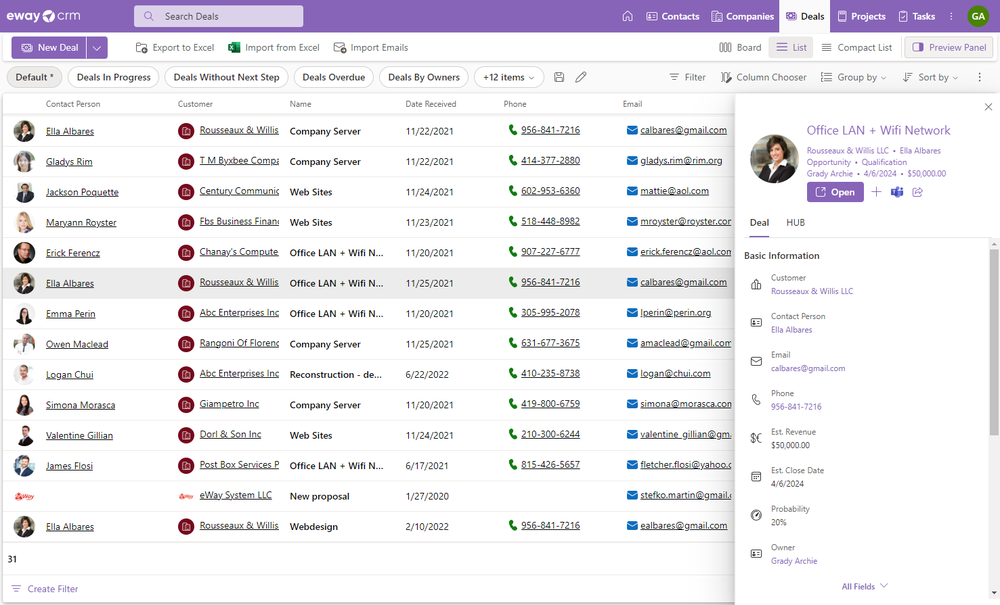
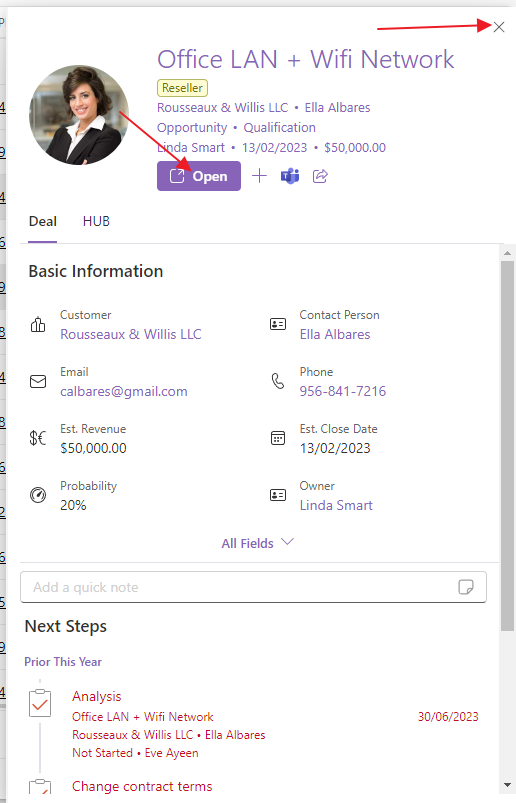
Clicking the item in any list will show the item preview in the right part of the web page where the user sees all filled values of this item.
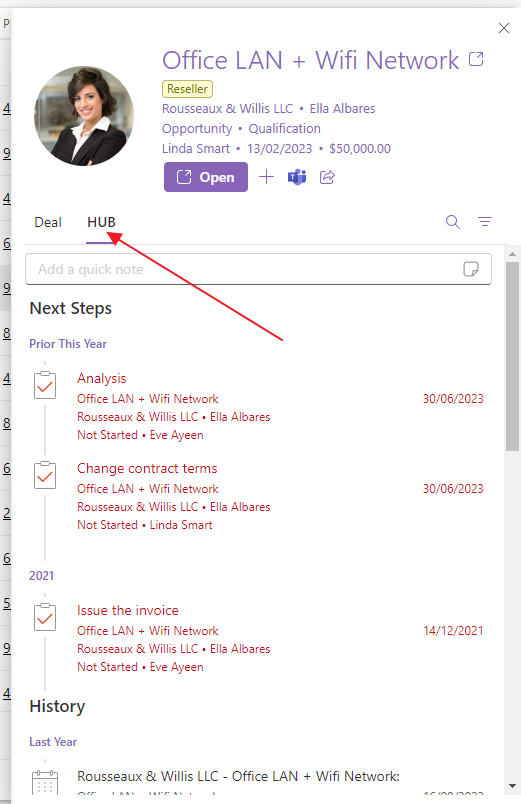
Or the user can click on the HUB of the item - this is a review of all tasks, calendar events, journals, time sheets, emails, and documents that are related to the item. Items in the HUB are sorted descending by date. If the HUB has too many items, you can search for them.
eWay-CRM Online remembers whether you had the preview panel open on the item detail or the HUB tab, and it will open on the same tab next time.
If the user is not using a preview panel and it seems redundant to him or her, it can be easily hidden by right-clicking any column name and selecting Hide Preview Panel.
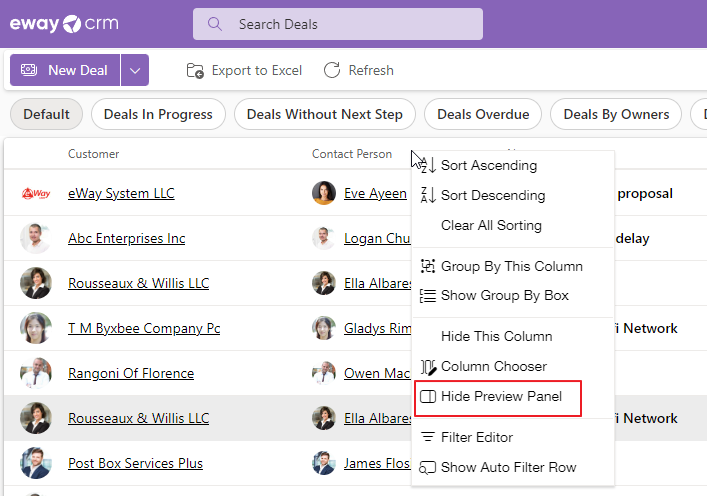
The same way can be used for displaying the panel again - click Show Preview Panel.
Preview Controls
If the preview header contains, for example, a company or contact name, it is a clickable link.
In the preview, you can go to the item editing window by clicking the Open button. The X icon is used for closing the preview panel.
Suggested Contacts
This feature is available from the module Contacts & Companies (Lite). In the Lite version, the feature is limited to 10 contacts per month per user; in the Standard version, it's 50 contacts per month per user; in the Plus version, there are no limits on the feature.
Availability: This feature has been available since eWay-CRM 9.1.
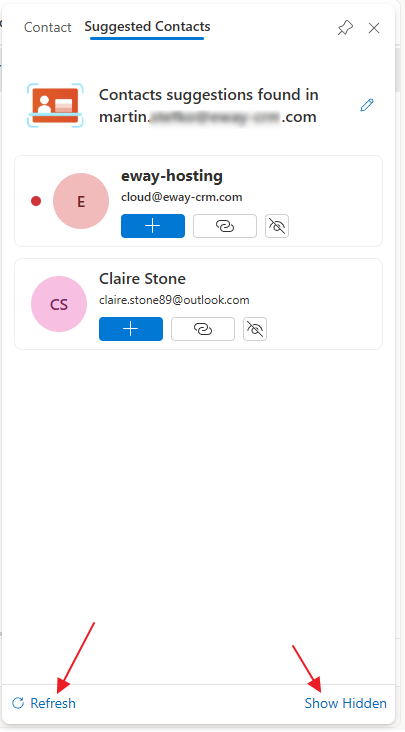
The Suggested Contacts tab is only available in the Contacts module. Click on any contact to display the preview panel (see above), and you'll notice that this panel is slightly different for contacts. In addition to pinning the panel for contacts, you can also switch to the Suggested Contacts tab.
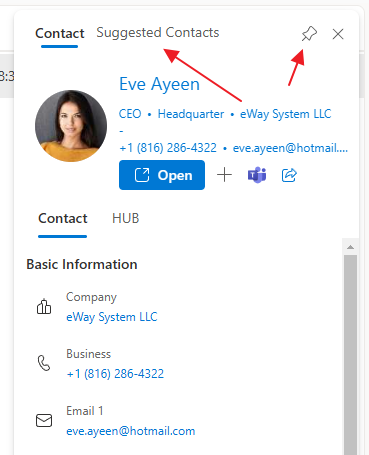
You will see which contacts are suggested based on your received emails – you need to be signed in to your Microsoft 365 account.
At the top, there is the account you are currently signed into. Using the pencil icon, you can log in to a different account, and after logging in, new suggestions related to this new account will be loaded immediately.
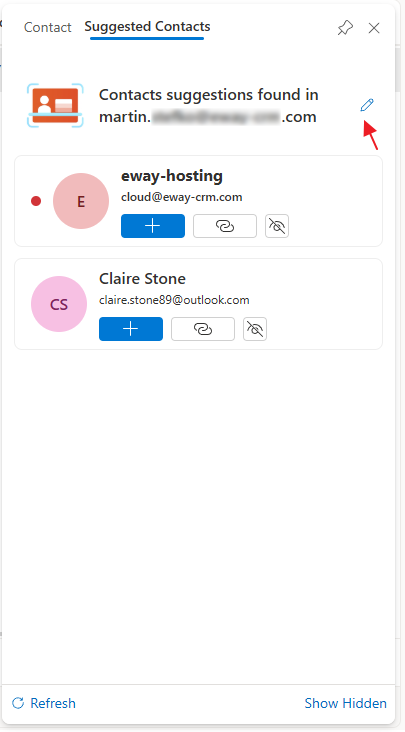
The functionality is the same as with the contact list – see Create contacts based on received emails. You'll see a list of suggested emails, with newly suggested ones marked with a red dot and appearing at the top of the list. You can take the following actions with these items:
- Convert to Contact – Creates a new contact in the Contacts module.
- Merge with Existing – Adds the email address to an existing contact.
- Hide – Click the icon if you don’t want the suggestion to appear in the main suggestion list (you can access hidden suggestions by clicking Show Hidden).
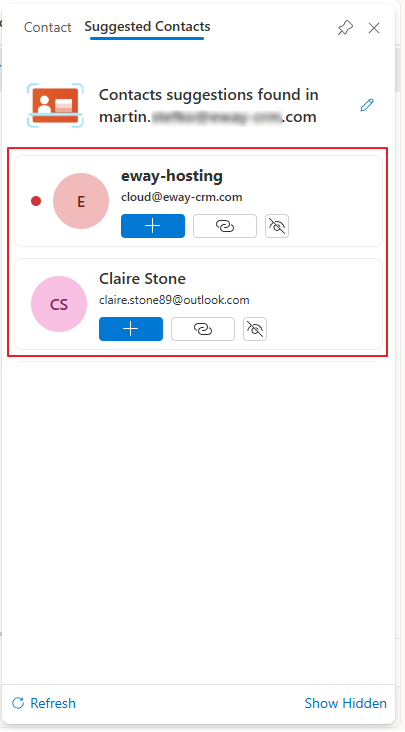
At the bottom, you have the option to Refresh the list to check for any new suggestions or click Show Hidden to view hidden contacts.
