Getting Started With eWay-CRM Mobile
After you login, you can start using eWay-CRM Mobile immediately. However, we recommend that you wait until the initial synchronization is complete.
1. Modules
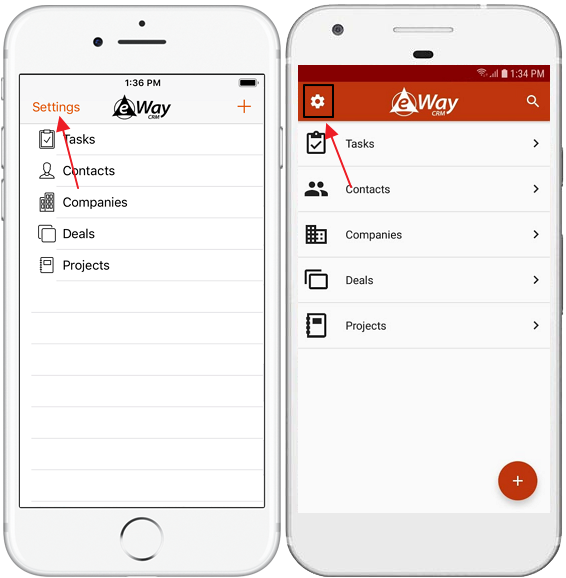
After launching the application, you will see the list of available modules:
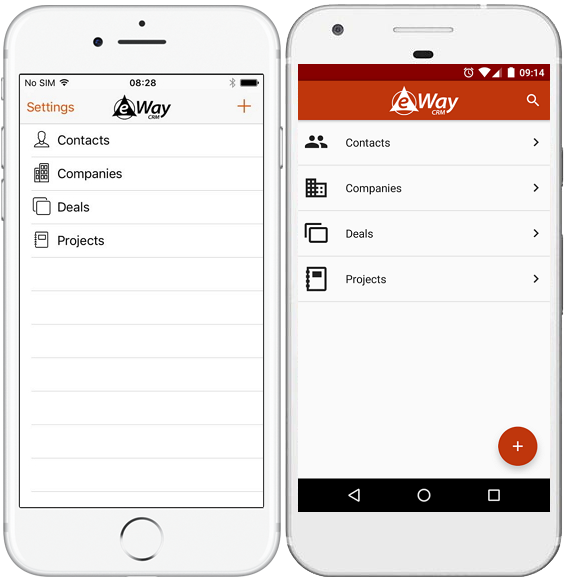
On this screen you can either tap any module to get the list of items or add a new journal, document or photo by clicking the "+“ sign.
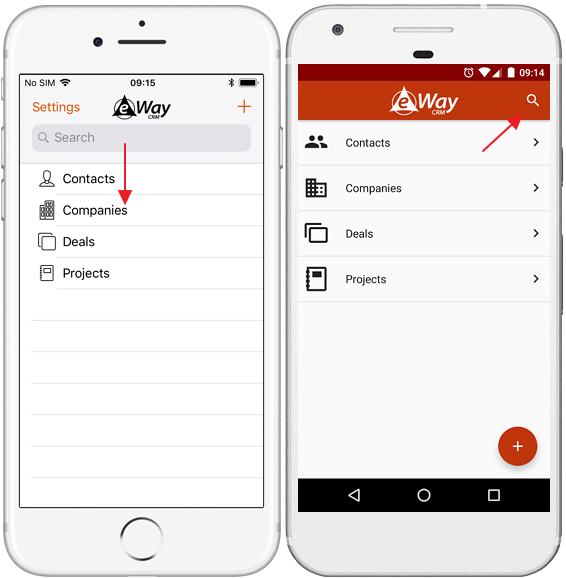
The main window allows you to search in all modules.
For iPhones: You need to swipe down in the window to show search field.
For Android phones: Just click on the magnifying glass icon in the right top corner.
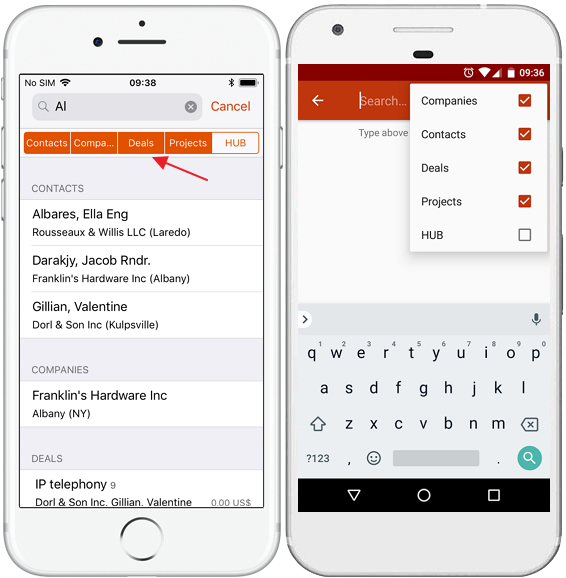
Global search will be used for all modules, only HUB is not set as a default for searching. But you can set in what modules you will be looking for results.
For iPhones: Just mark or unmark module name in the top part of the window. Module name with orange background will be used for searching.
For Android phones: You need to click on three dots icon. If you do so, you will see menu where you mark or unmark modules you want to use for searching.
2. List of Items
By tapping on a module, you will get a list of items, e.g. contacts as in the example below.
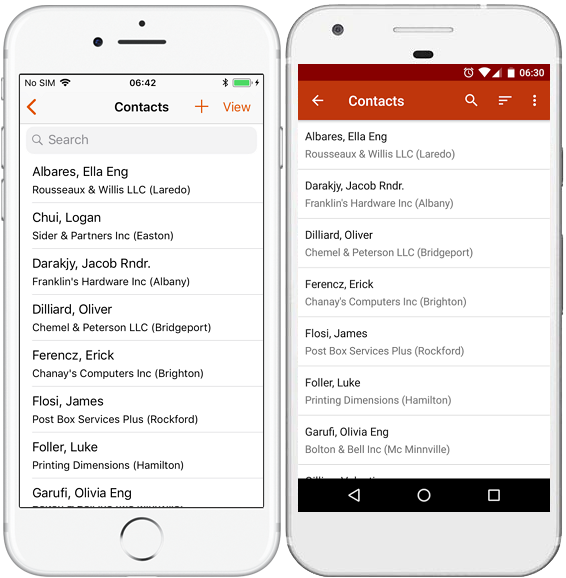
Important: You will see items only if you have permissions to view them (same as in eWay-CRM Outlook plug-in).
The number of items displayed in the list can be set by Row Restrctions in Module Permissions.
Besides names, you will also see additional details such as cities for companies and related companies for contacts. Now, you can:
2.1 Searching Items
Global Search
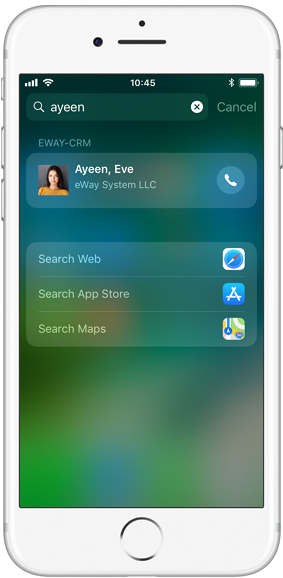
iPhone allows you to have results from eWay-CRM Mobile in the global search of the phone. There are results from these modules: deals, projects, contacts and companies. Right from the search, you can go to item detail in eWay-CRM Mobile or, for example, call the contact from eWay-CRM Mobile.
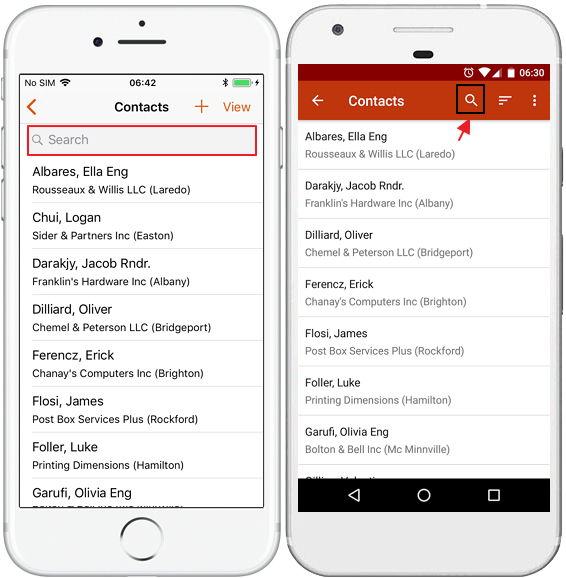
Search in Application
To find an item, tap the field with the magnifying glass in the top of the screen.
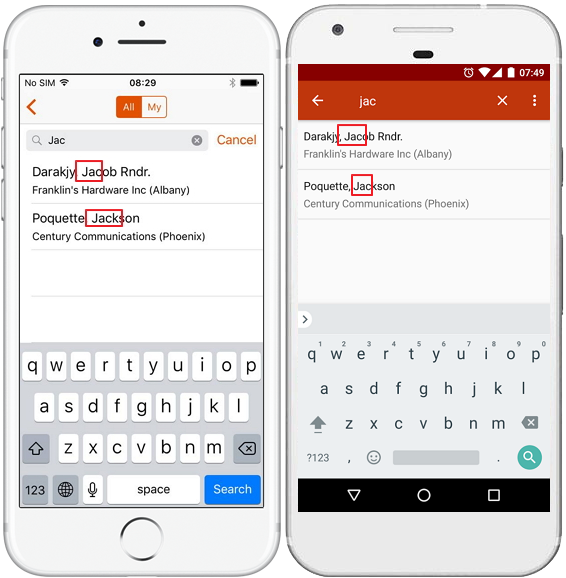
Start typing the name of the item. Only values displayed in the list of items on the screen will be searched, e.g. name, company and city for contacts.
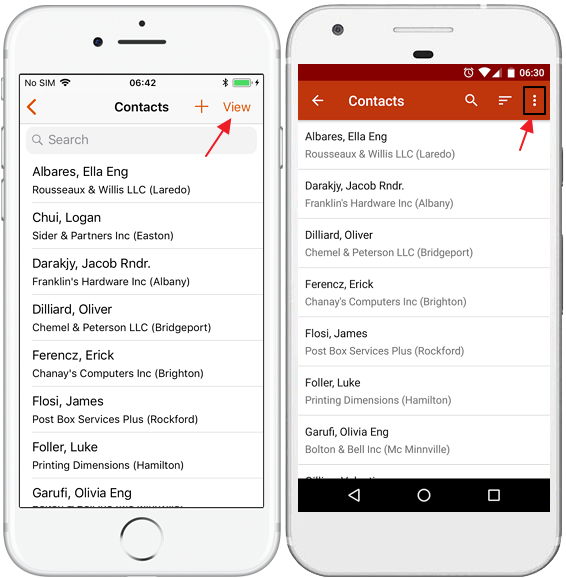
2.2 Filtering Items
You may want to filter items in the list by their ownership or status. To do that:
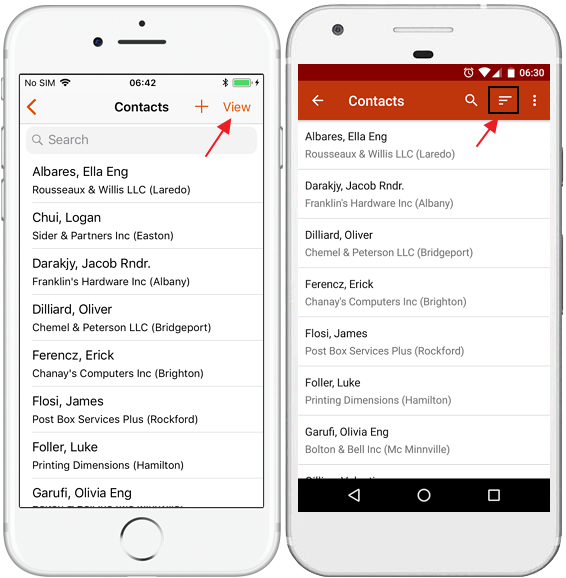
- iPhones: Tap View in the right top corner.
- Android phones: Tap three dots in the top right corner of the screen and select Filter.
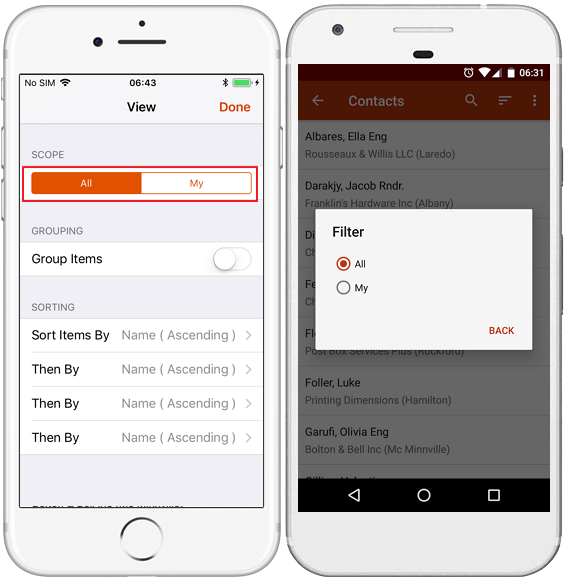
Filters will be available:
- iPhones: In the top part of the screen. You tap your filter and tap Done.
- Android phones: In the new window where you just select filter you want to apply.
There are different filters available depending on the module.
| Modules | Filters |
|---|---|
|
Contacts |
All - all available items under a selected module My - items with yourself specified as the owner |
| Deals Projects |
All - all available items under a selected module |
| Tasks |
All Active - only non-completed tasks |
eWay-CRM Mobile will remember your choice and will offer it to you later on until you change it.
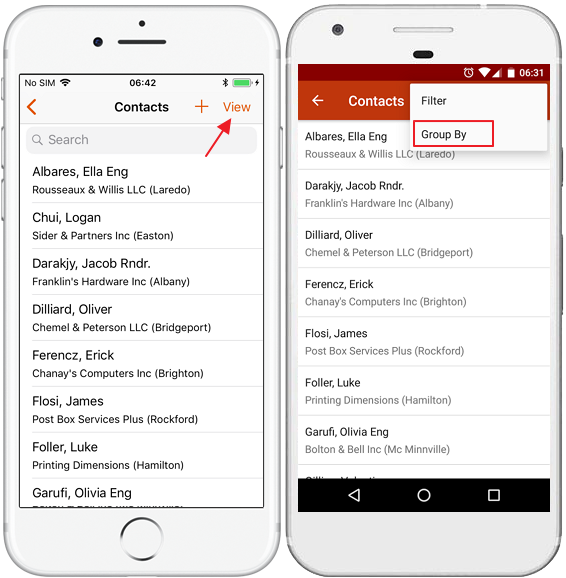
2.3 Group Items
You can group items in the list by different fields:
- iPhones: Tap View in the right top corner.
- Android phones: Tap three dots in the top right corner of the screen and select Group By.
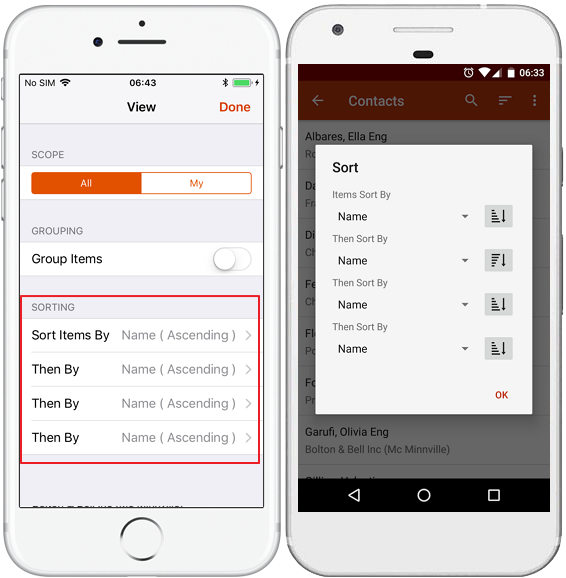
You will see the dialog when you can select by what field the items will be sort:
- iPhones: Mark Group Items and select field you want to use for grouping in the Group By field.
- Android phones: Select field you want to use for grouping in the dialog.
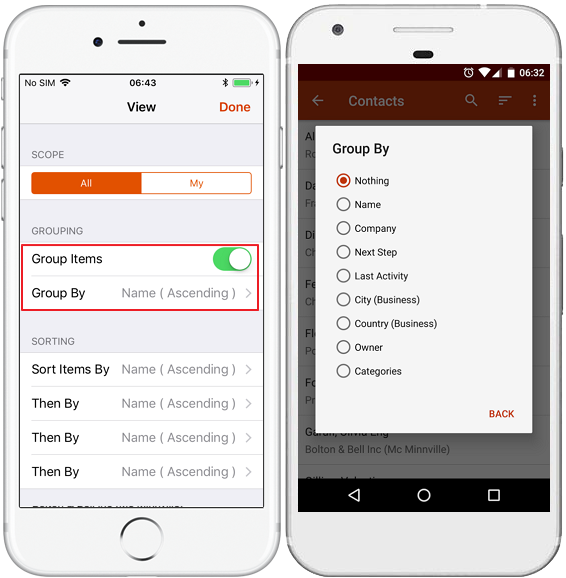
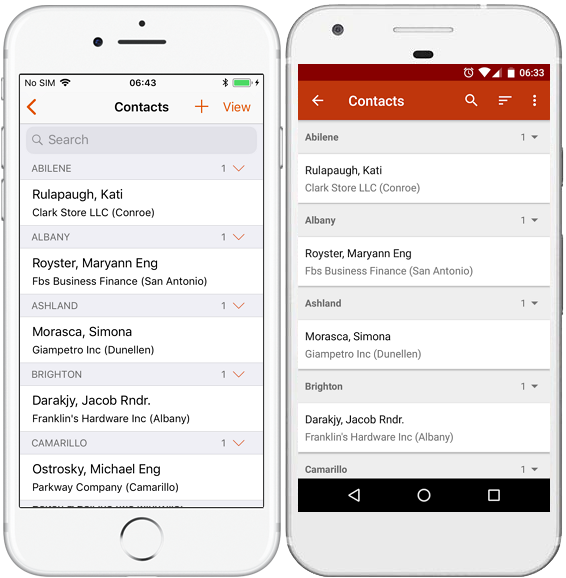
If you confirm your choice, items will be grouped by the field you choose (e.g. City as in the picture below).
2.4 Sort Items
Default sort in lists is by Name but you can sort items by different fields:
- iPhones: Tap View in the right top corner.
- Android phones: Tap sort icon in the top right corner.
There you can select up to four levels for sorting of items in the list (you also set whether you want to sort in descending or ascending order).
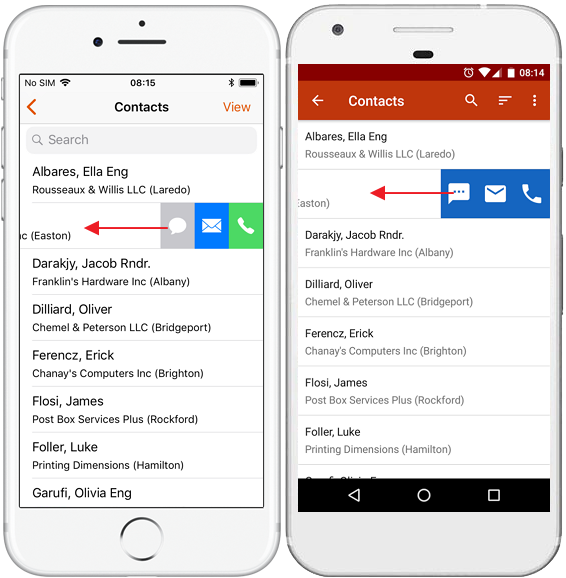
2.5 Quick Access Menu
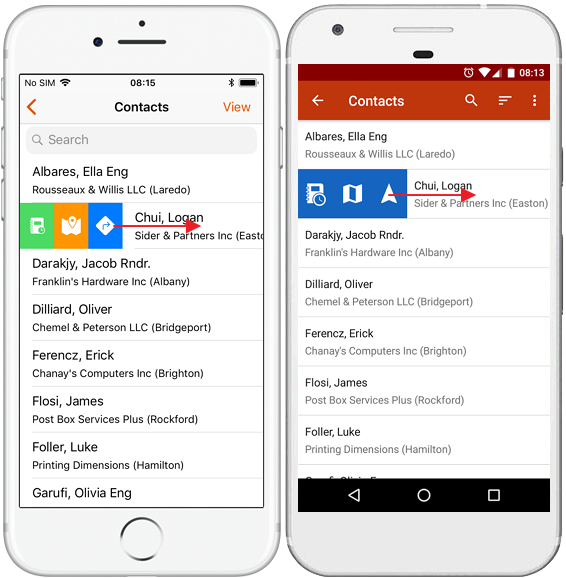
Each of main modules (contacts, companies, deals and projects) allows you to swipe the item to right or to left and display quick access menu.
If you swipe item to the right, you will see options for creating journal and map navigation:
| Android Icon | iOS Icon | Function |
|---|---|---|
| Create a journal with prefilled superior item, customer and contact person if they are available. Journal will be in the HUB of the item. | ||
| It will open the application you have set as default for maps display. Address is taken from item detail; if there are more addresses you will see the list to select which you want to display on map. | ||
| It will open the application you have set as default for GPS navigation. Address is taken from item detail; if there are more addresses you will see the list to select which you want to navigate to. |
If you swipe item to the left, you will see options for calling and sending messages:
| Android Icon | iOS Icon | Function |
|---|---|---|
| Send SMS to the phone number that is taken from the item detail. If there are more phone numbers, you can choose one you need from the list. | ||
| Send email to the email address that is taken from the item detail. If there are more addresses, you can choose one you need from the list. | ||
| Make a call to the phone number that is taken from the item detail. If there are more phone numbers, you can choose one you need from the list. |
Data for contacts, companies and deals are taken from their details; for projects, data are taken from their contact person or customer.
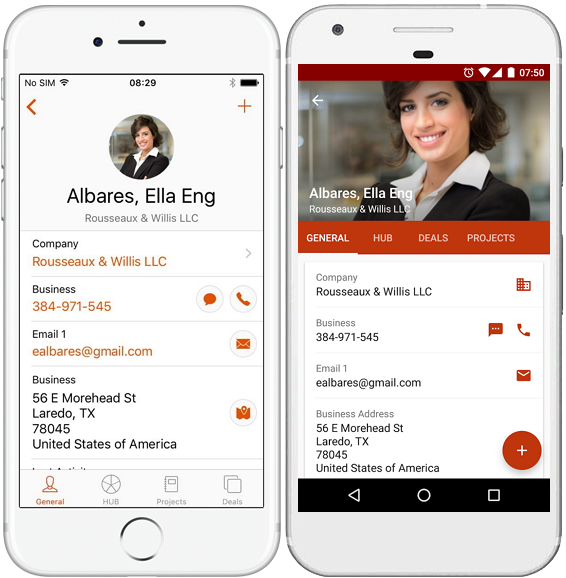
3. Item Card
Tap an item to open it and review details.
Important: You will see items only if you have permissions to view them (same as in eWay-CRM plug-in for Outlook).
eWay-CRM Mobile displays the same fields that you have in your eWay-CRM Outlook plug-in including custom fields. Empty fields are hidden by default.
On the item card you can:
- Copy the Field Value
- Review Relations of Items
- Tap icons to Review Related Items
- Review Communication History With HUB
3.1 Copy the Field Value
Each value in the field can be easily copied. Just tap and hold the finger over the value you want to copy. On Android phones, the value is immediately copied to clipboard. On iOS phones, you need to tap Copy.

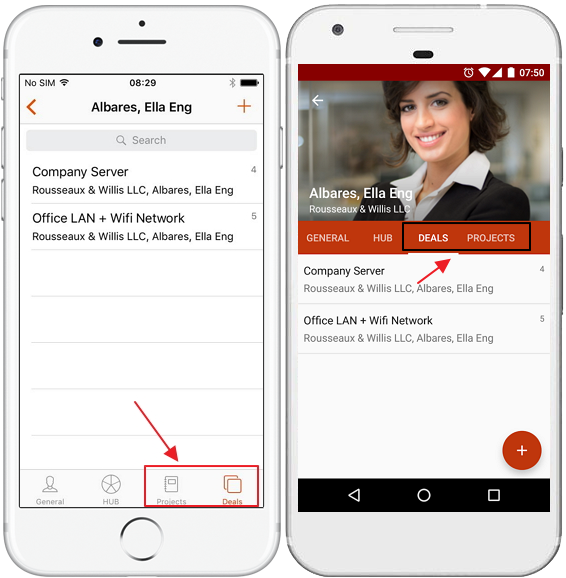
3.2 Review Relations of Items
When you click Deals, Projects, Contacts or Companies tab (different item types has different tabs in detail) you will see all items to what you item is related. For example, you can display all projects or deals that are related to your contact.
3.3 Tap Icons to Review Related Items
On item cards, you will find same fields that you have in the eWay-CRM Outlook plug-in apart from empty fields. If there is an icon beside a field, you can tap it to review details (e.g. a contact person on the Deal card).
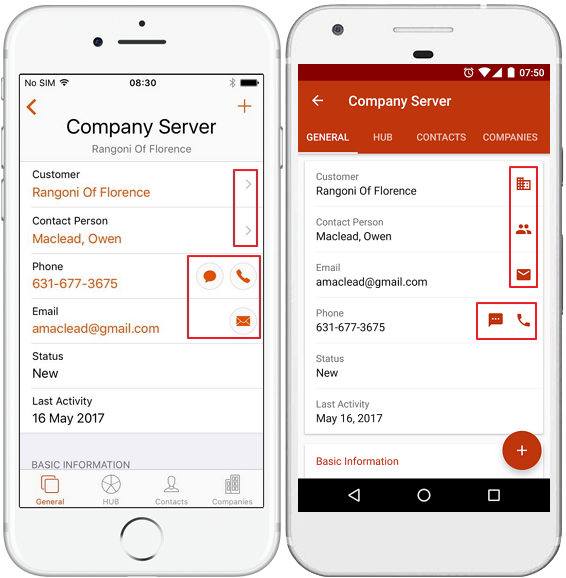
You can tap all items you can see on the item card to find more details. The table below describes the icons‘ meanings.
| Android | iPhone | Meaning |
|---|---|---|
| Contacts details | ||
|
|
Companies details | |
| Deals details | ||
| Projects details | ||
| Dialing the number specified in the Phone field or offers you application to dial number. | ||
| Sending a text message to the number specified in the Phone field. | ||
| Sending an email to the email address specified in the Email field via available mailing applications (Gmail, Outlook, etc.) * | ||
|
Finding the address specified in the Address field via available navigation applications (e.g. Google Maps)* |
||
|
Address will be found in application for maps. It is applied only for Android phones; iPhones have same solution for maps and GPS navigation.* |
* If you don’t have any appropriate application installed on your mobile phone, the action will not be performed.
4. Synchronization
Synchronization ensures that data in your mobile phone and in the server database is identical.
Synchronization can be of three types:
4.1 Initial Synchronization
This type of synchronization occurs when you log in to your eWay-CRM Mobile for the first time.
4.2 Automatic Synchronization
This type of synchronization depends on your mobile phone activity and the battery status. Provided that your battery is full and you use a Wi-Fi connection, the synchronization will happen as follows:
- Every 90 seconds if you use eWay-CRM Mobile
- Every hour if you don’t use eWay-CRM Mobile
4.3 Manual Synchronization
To synchronize data manually, you can:
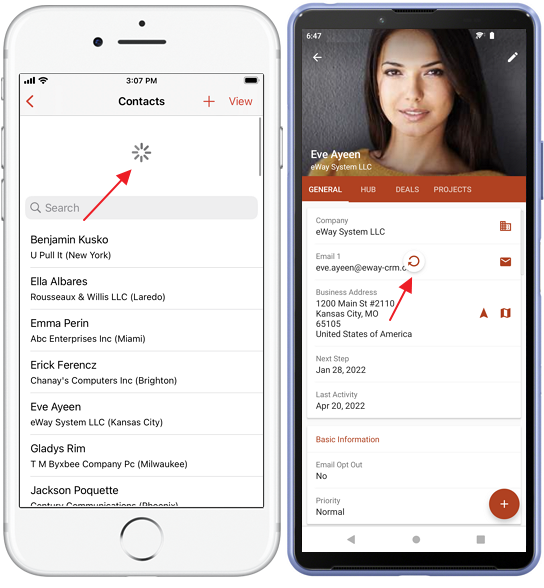
- Swipe down from the top. You will see a progress icon during the synchronization.
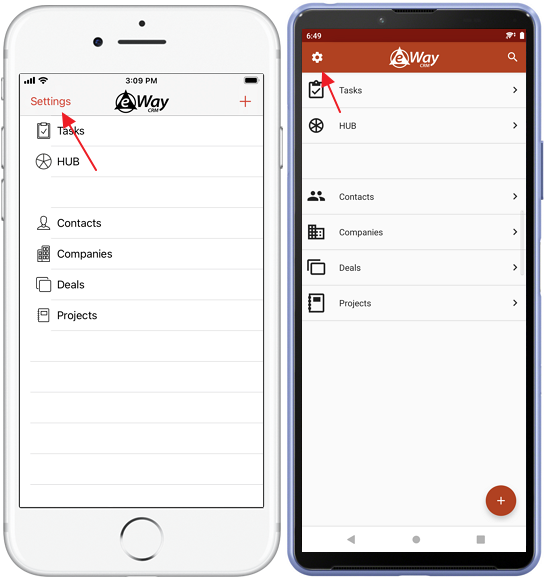
- Tap Settings in the main menu.
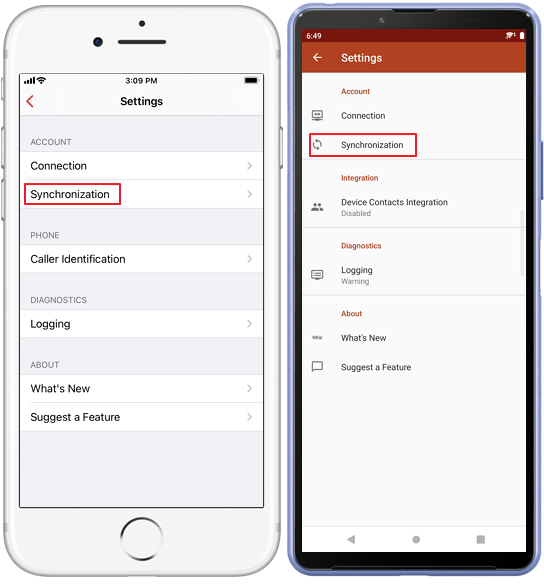
Then, click Synchronization.
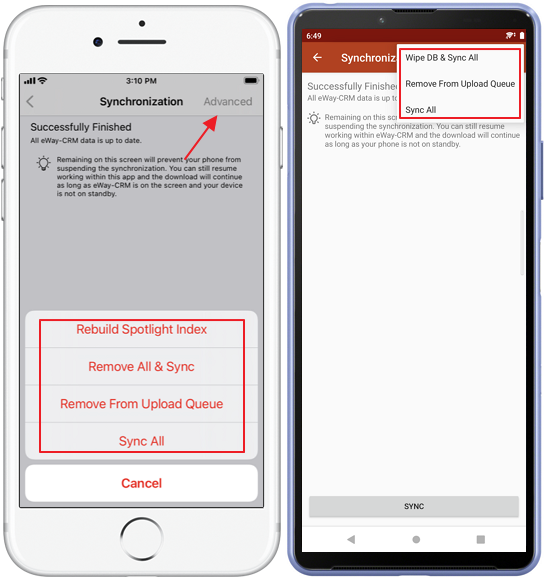
In this window, you can see whether the synchronization is successful, or not. If you click Sync, you can run synchronization manually, if you need it.
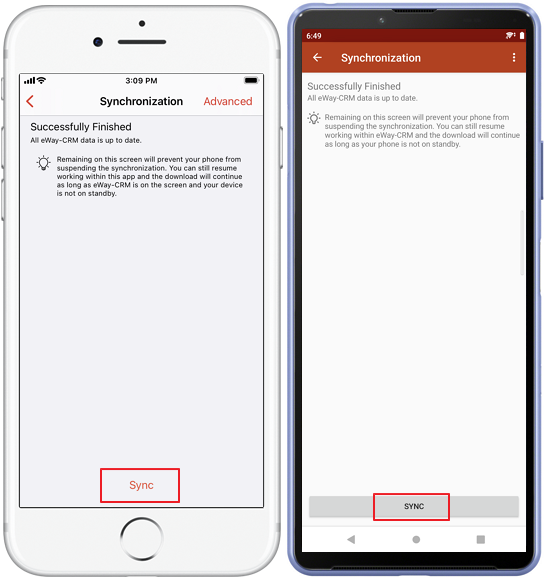
If you want to use other options in this dialog, you need to tap Advance (iPhone) or click three dots in the top right corner (Android). There are options that can help with some issues that can appear while using the application:
- Rebuild Spotlight Index (only iPhone) - the Spotlight function rebuild its indexes, so you have up-to-date data that can be searched in iPhone searching
- Wipe DB & Sync All / Remove All & Sync – full synchronization same as the initial synchronization that recreates a database on your phone to the up to date version (e.g. after an error)
- Remove From Upload Queue - it deletes changes that should be uploaded to the server
- Sync All – revision of all items, not only item changes
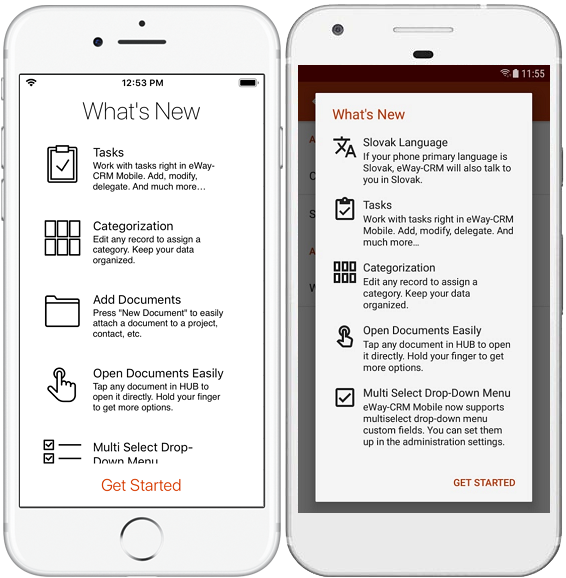
5. What's New
You can always see new features in your eWay-CRM Mobile. It will pop at you with new version, but you can check it in application itself.
Go to eWay-CRM Mobile Settings.
Then, select What's New.
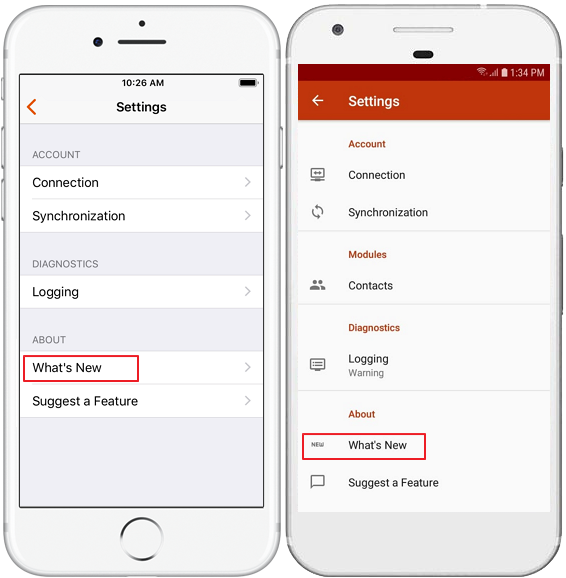
Check all new features.