Create Custom Field
Double-clicking the custom filed in the list will bring up the custom field card. When you create a new field a card will appear without pre-filled data – it is up to you to enter all the necessary data.
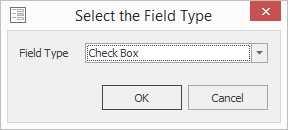
First, in the Field Type menu select the type of the custom field that is the most suitable for data you want to be filled into the field - the overview of all custom field types is available in Custom Field Types.

Fill in all values of the selected field type:

Fields on Field Detail
Enter the field name into the Field Name and consequently the item will be displayed with same name in the system. The Comment field is intended for a caption which will be displayed when the user move the mouse over the field.
The Category field is used for the categorization of your custom fields. For more information about categorization, go to General and Custom Fields Section.
The General Section check box determines whether your custom field will be displayed in the General or Custom Fields section of the item window. For more information about sections, go to General and Custom Fields Section.
Clicking the OK button in the lower part of user values card saves the changes and closes the card. Clicking Cancel will close the card, but changes will not be saved. You can save the custom field by pressing Enter in any field you want. The custom field will be immediately saved.
Values are described in articles for each custom field type.
