Workflow
Availability: The Workflow section in Administration Center is available since eWay-CRM® 7.0.0.
eWay-CRM® allows you to create and edit workflow for different modules based on your needs.
The article sontains:
- Work With Workflow List
- Create New Workflow
- Basic Workflow
- Specific Settings of Basic Workflow
- Advanced Workflow
- Rename Workflow
- Hide Workflow
- Duplicate Workflow
- Delete Workflow
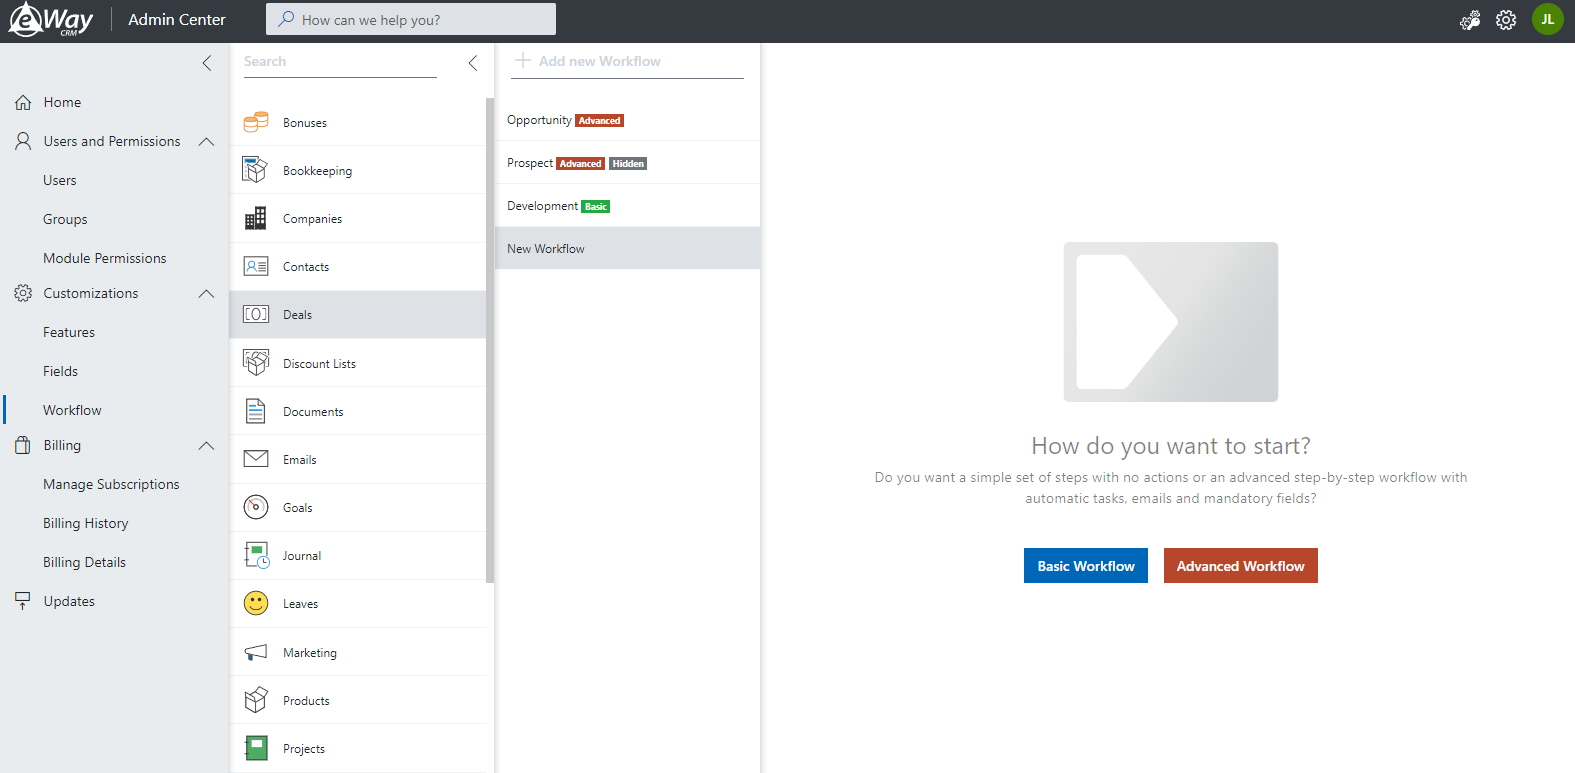
Work With Workflow List
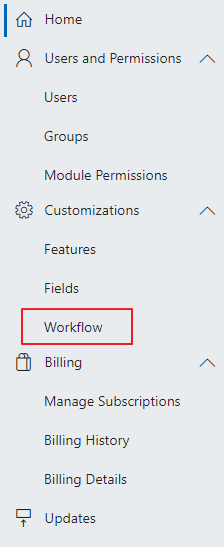
Click Workflow in the left menu of the Administration Center.
You see the list of all modules that can have a workflow. Now, workflow is available for all modules.
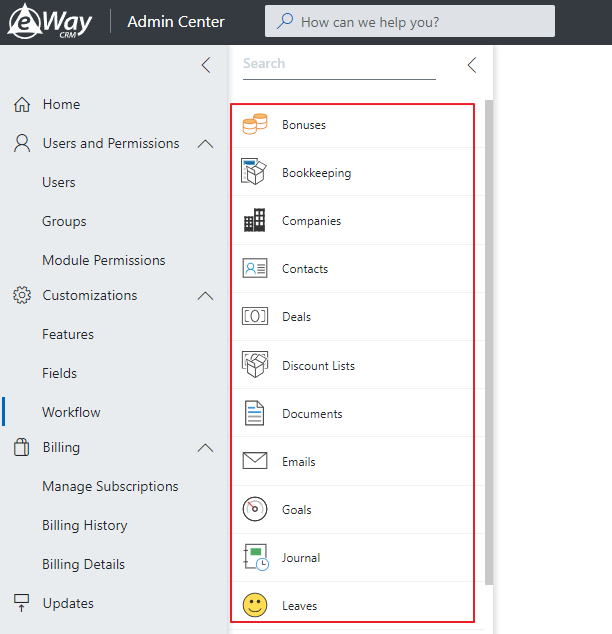
Click the module you want to work with and you see the list of all workflows that are defined for this module. If there is none, you can create your first one.
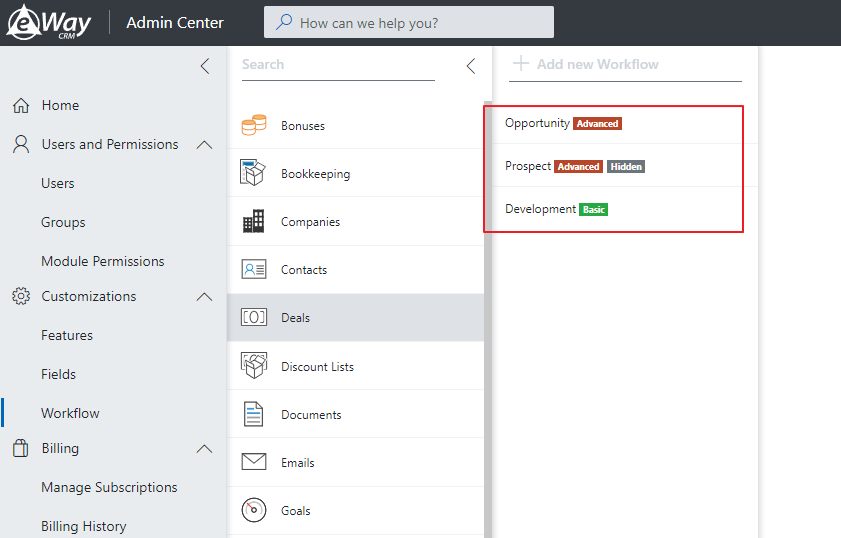
The workflow can have different stamps next to it:
- Basic - this is a basic, simple workflow, that is automatically generated for you - for more information, go to Basic Workflow.
- Advanced - more comprehensive workflow where you can define your own flows with actions related to them - for more information, go to Advanced Workflow.
- Hidden - users cannot see this workflow - for more information, go to Hide Workflow.
Create New Workflow
To create a new workflow, select a module where you want to add a new workflow and click to Add new Workflow field. Type in name of the workflow you want and press Enter. The name cannot be the same as the name of another workflow in the list.
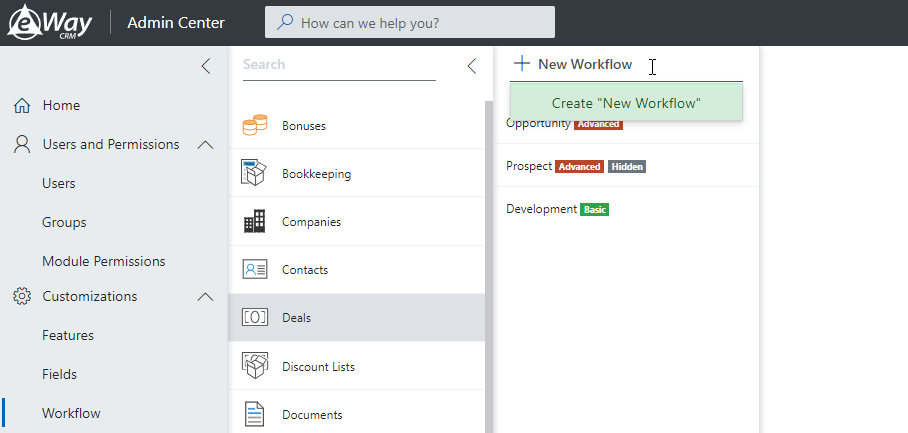
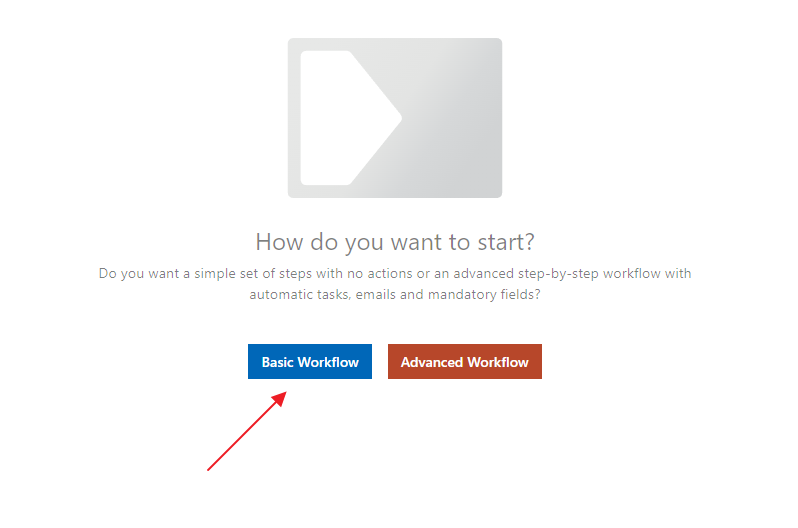
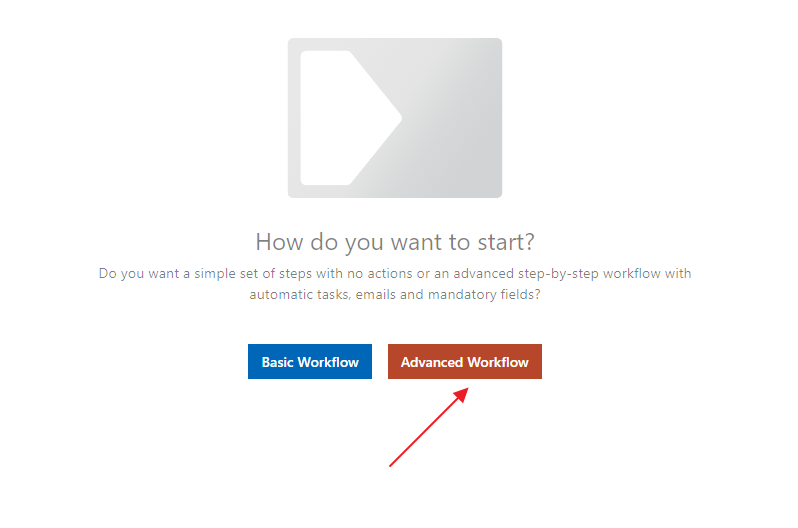
The new workflow is immediately created and you can select one of two types - create a basic workflow or an advanced workflow.
Basic Workflow
The meaning of the basic workflow is to create a workflow where the user can move among all statuses and it is simple to set.
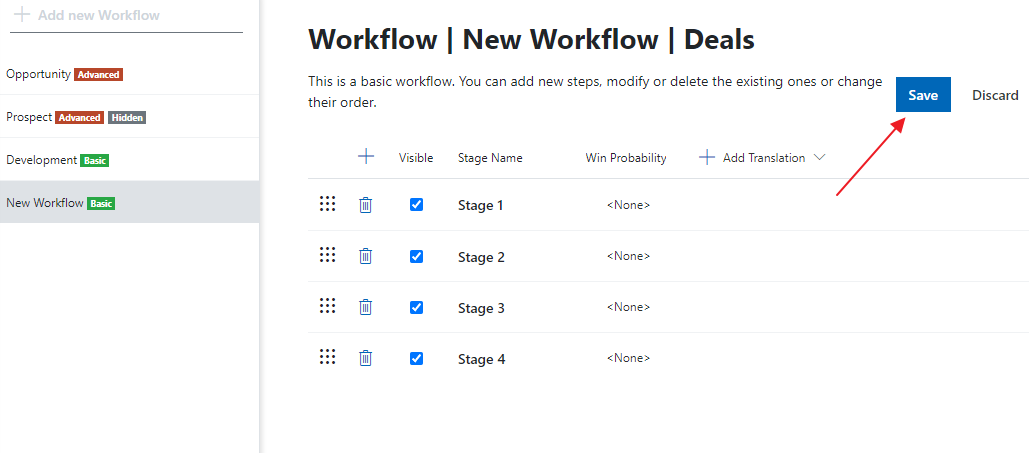
The basic workflow can have some simple actions in some modules. When you click Basic Workflow, you can start to edit it.
You can easily add new statuses.
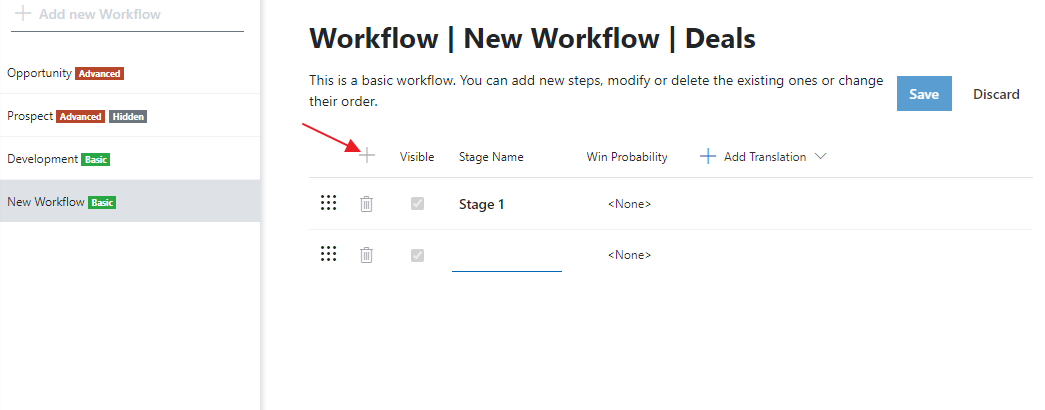
The list contains these options:
| Column | Function |
| Move Status | When you drag the 3x3 dot icon, you can move the status to the position you want. |
| Delete | You can delete the status, but only in the case that this status is not used on any item. |
| Visible | If it is marked, the status is visible to all users. If it is unmarked, users do not see this status and cannot move to it. |
| Stage Name | The basic name of the status is shown to users if there is no other translation. |
| Win Probability | See Specific Settings of Basic Workflow. |
| Add Translation | You can set a translation of status in different languages. |
When you make some changes in the list, you need to click Save, so the change would be confirmed.
An administrator can also use the option to edit the workflow directly in the item detail - see the article Easy Edit of Workflow.
Specific Settings of Basic Workflow
Win Probability
The Win Probability option is available for the Deals module.
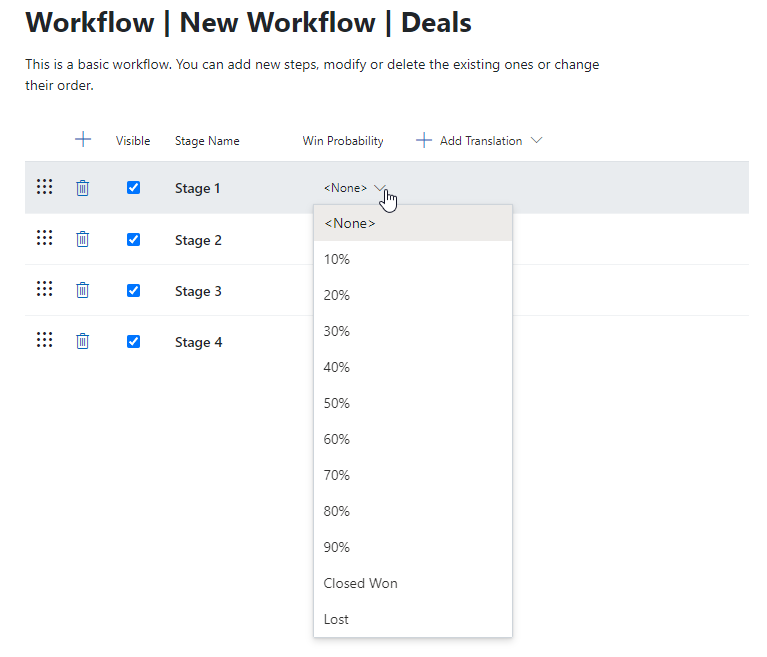
In this column, you can set a probability for each status that is automatically filled in the deal when you move to this status. You can also set that the status defines the deal that is transformed to project (Closed Won) or Lost.
Stage Attributes
The Stage Attributes option is available for the Time Sheet, Marketing, Project, and Tasks modules.
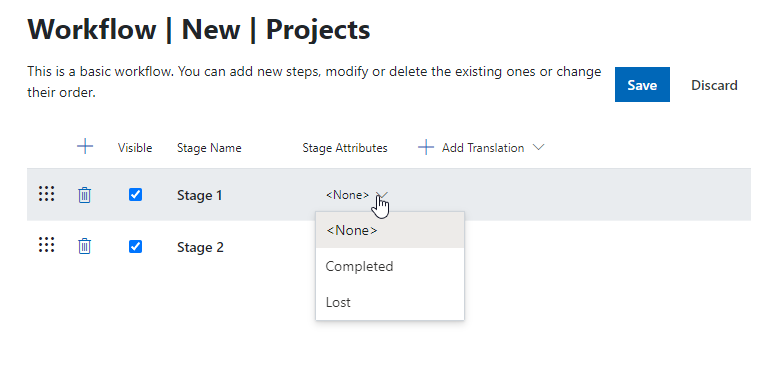
In this column, you can set the same stages for different workflow in one module. For example, different project types can have different names of the status but Completed or Lost stage attributes specifically define their meaning and are important, e.g. for reporting.
Advanced Workflow
You can edit advanced workflows only in the old administration application. Click Advanced Workflow and the old administration center opens.
For more information, go to Workflow Diagrams.
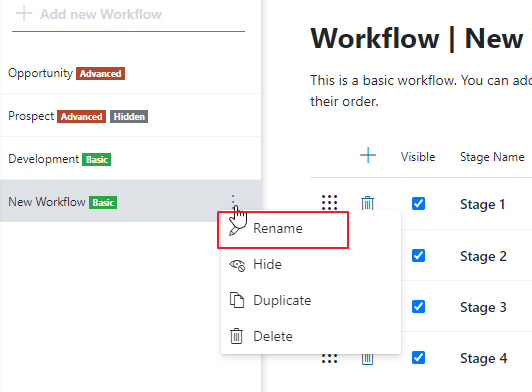
Rename Workflow
If you want to rename the workflow, just click the three dots icon next to it, and select Rename. This option is not active for system workflows.
You will see the dialog where you can rename the workflow and add some translations for different languages.
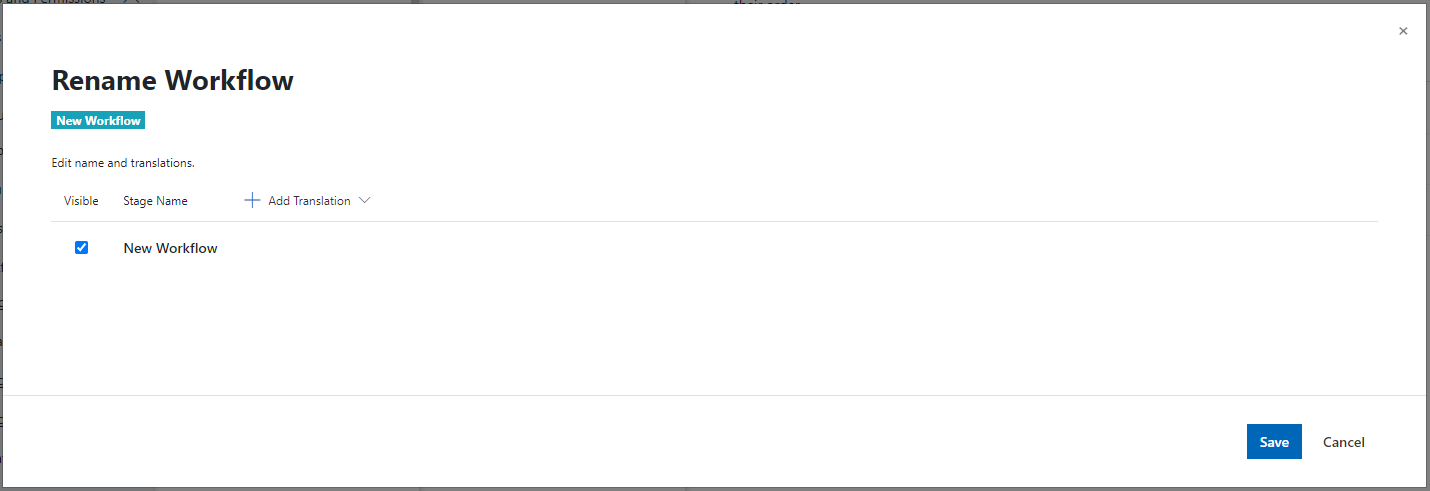
Confirm the change by clicking Save.
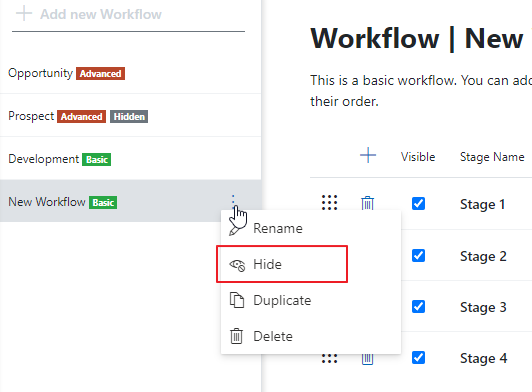
Hide Workflow
If you want to hide the workflow, just click the three dots icon next to it, and select Hide.
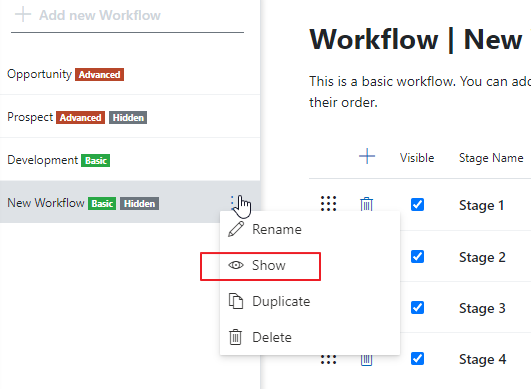
When you click Hide, the workflow is getting the Hidden stamp and users cannot see it. If you want to display it again, click the three dots icon and select Show.
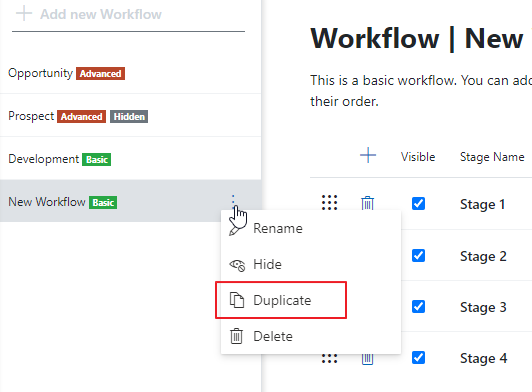
Duplicate Workflow
If you want to duplicate the workflow, just click the three dots icon next to it, and select Duplicate. This option is not active when a workflow has no statuses.
In the new dialog, you can enter the name of the new workflow where you duplicate the existing one, or you can select one existing and rewrite it.
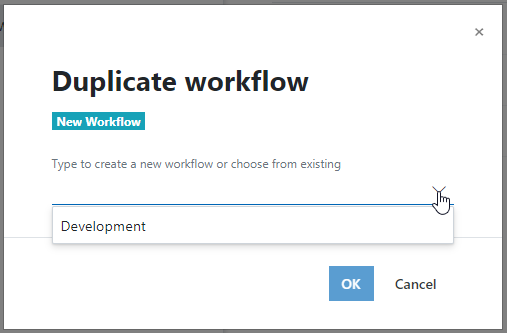
Click OK to confirm the duplication.
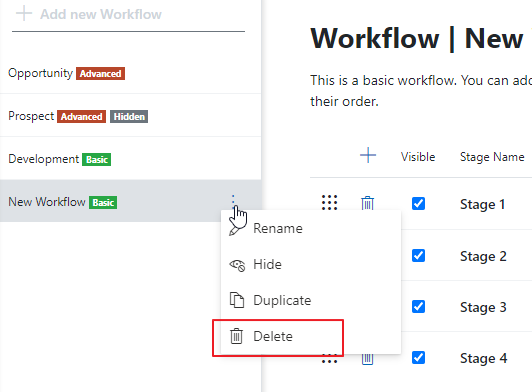
Delete Workflow
If you want to delete the workflow, just click the three dots icon next to it, and select Delete. This option is not active for the system, or used workflows.
In the confirmation dialog, click Delete and the workflow will be erased.