Grouping of Items
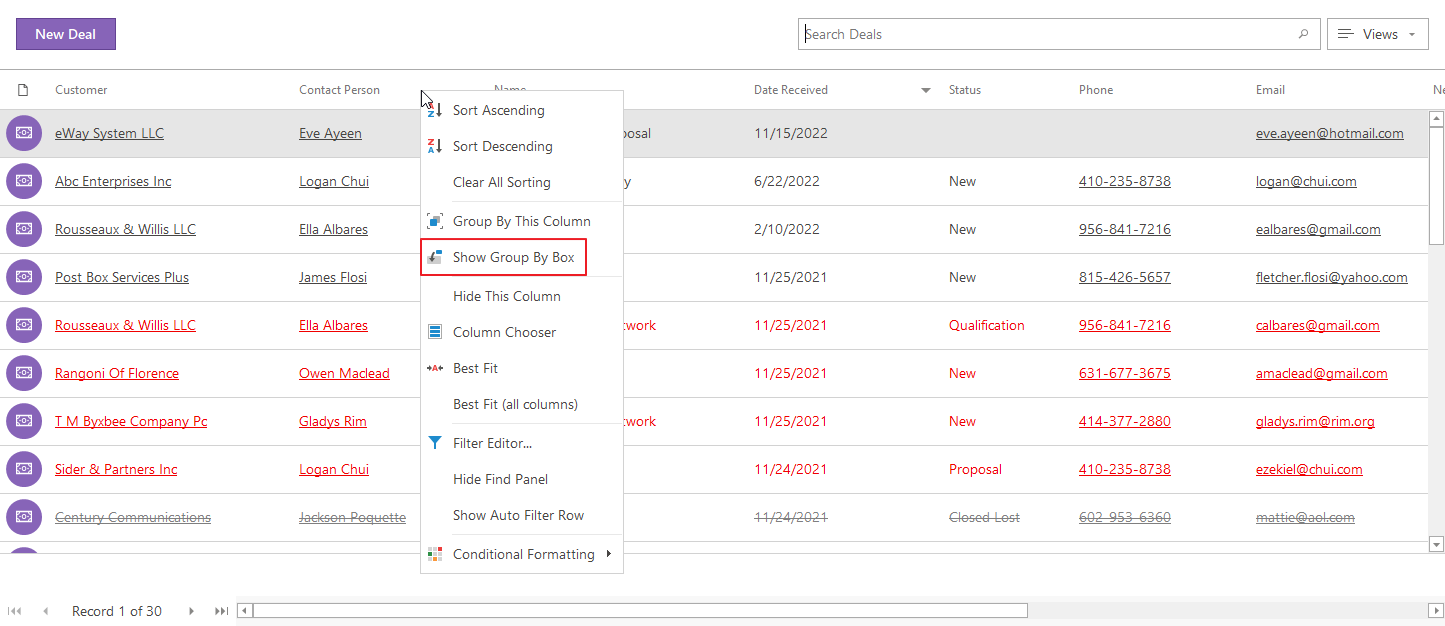
Items in the list can be grouped by any column. Right-click the column heading and select Show Group By Box in the context menu.
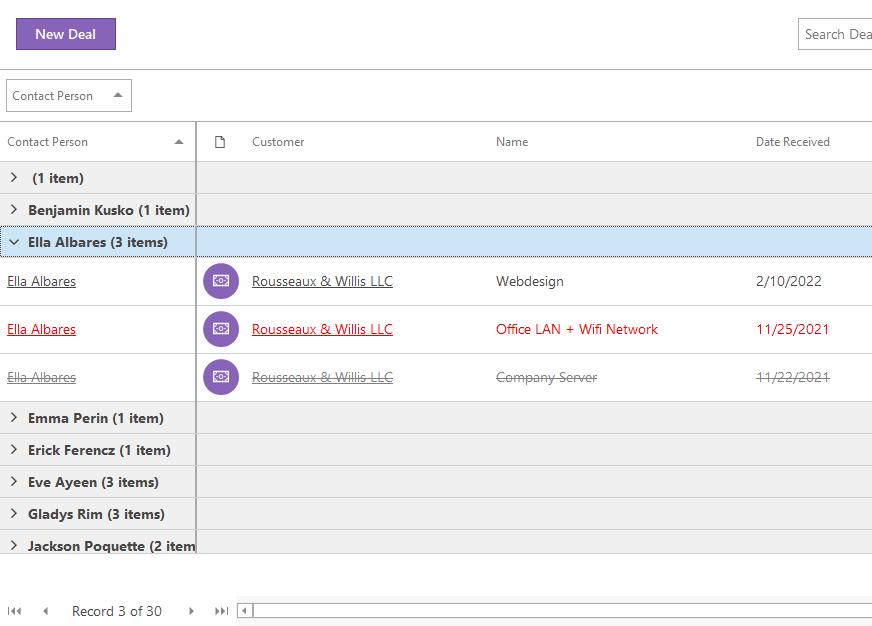
Above the column heading a grouping area will appear. You can drag the columns which you want to group, into this area. Simply grasp a column by its header and drag it into the grouping area. The name of the column is now displayed in the grouping area and items have been grouped to this column.

Work With Grouped Items
Clicking on the icon + next to the group icon will show all items belonging to the group.
Your grouping will be set even when you close the application and then start it again.
Sums in Group Rows
Even when you group items, you have always overview of your numeric columns. The sums are available not only for whole columns, but also for the each row when items are grouped. E.g. when you group deals by probability, you will see the groups and their prices. Or when you group projects by types, you will easily see the most profitable types.
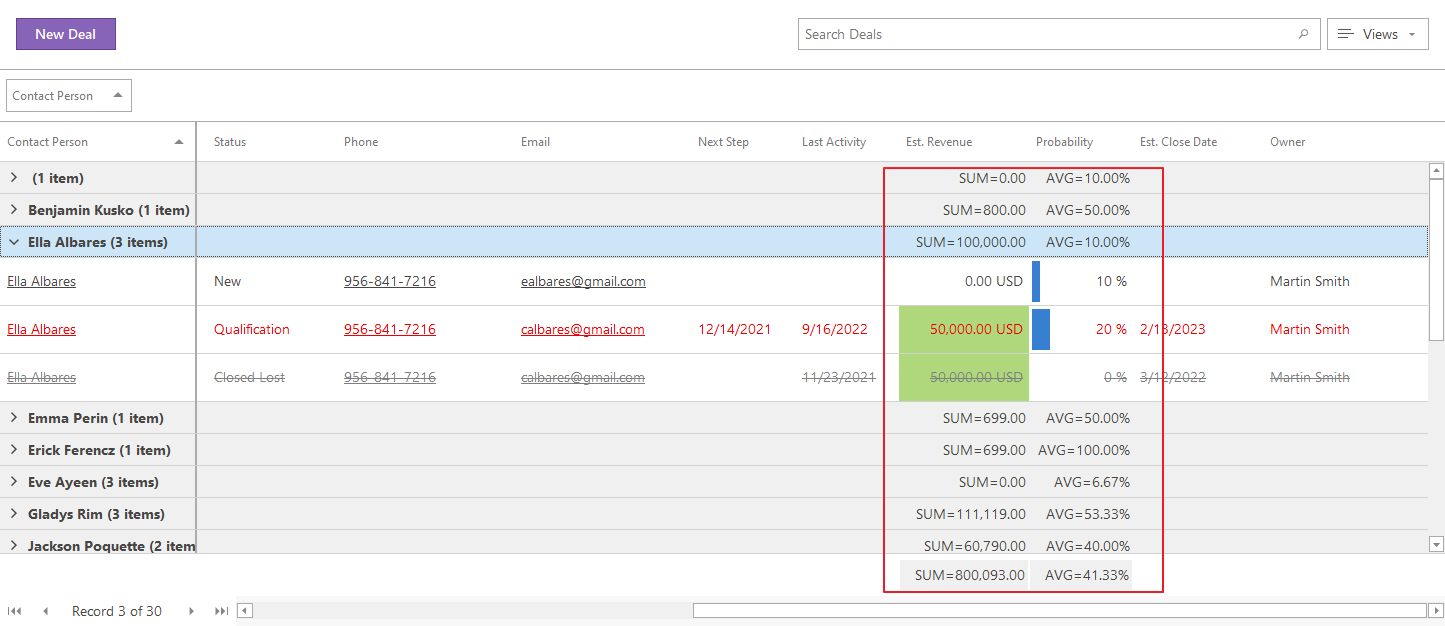
The column that is used for grouping is fixed, so even when you scroll, you will always know to what group sums belong.
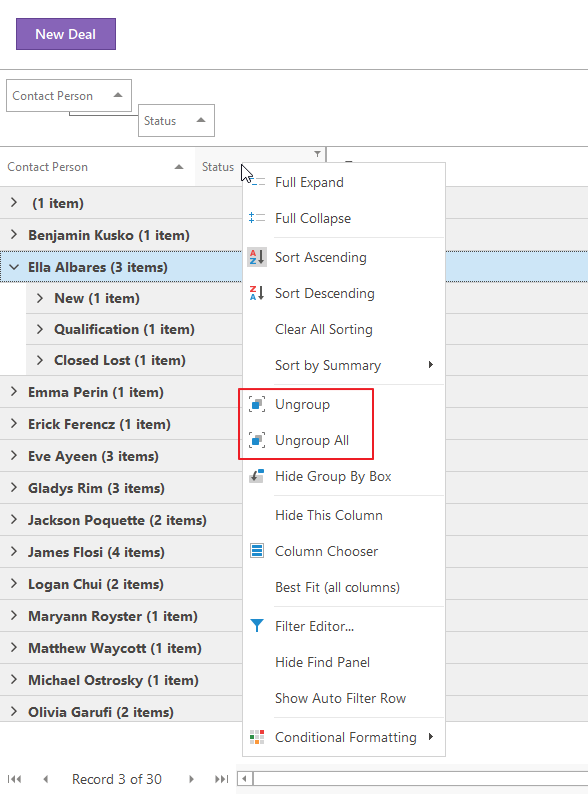
Cancel Grouping
A grouping can be canceled – simply drag the column from the grouping area back into the desired place between the other columns. The same result can be achieved when you right-click the header of the grouping column and select Ungroup. If you click Ungroup All, you will cancel grouping completely - this is used when you group by more than one column.