Conditional Formatting
eWay-CRM allows you to use conditional formatting similar to Microsoft Excel. Colors, icons, data bars and color scales will make your data even more well-arranged. You will be able to find important information at a glance.
Default Conditional Formatting
Each eWay-CRM module has a predefined rule or a set of predefined rules that can be applied by selecting the Default view under the Views option.
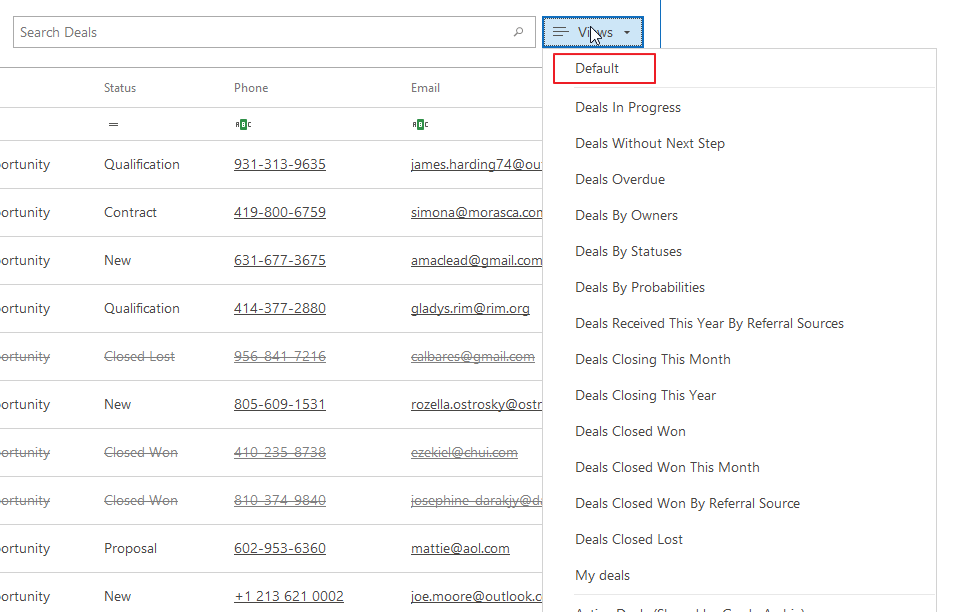
The table below shows default rules that have been applied to both the list of items and the tab system.
| Module | Default rules |
|---|---|
| Marketing |
Completed/lost items are displayed as crossed out with a gray font. Overdue items that are not completed/lost are highlighted with a red font. |
| Deals |
Completed/lost items are displayed as crossed out with a gray font. Overdue items that are not completed/lost are highlighted with a red font. The "Probability" column has a data bar–the higher the value the larger the bar. The "Price" column is highlighted in green–the higher the value the darker the color. |
| Projects |
Completed/lost items are displayed as crossed out with a gray font. Overdue items that are not completed/lost are highlighted with a red font. The "Price" column is highlighted in green–the higher the value the darker the color. |
|
Bookkeeping Records* |
Bookkeeping records of the purchase invoice, sales invoice, sales proforma invoice, purchase proforma invoice, debit note, and credit note type:
Bookkeeping records of the issued proposal and received proposal:
|
| Users | Items with the status "Inactive" are displayed as crossed out with a gray font. |
| Leaves | Items with the status "Accepted" are displayed as crossed out with a gray font. |
| Bonuses | Items with the status "Accepted" are displayed as crossed out with a gray font. |
| Goals | Overdue items are displayed as crossed out with a gray font. |
| Salaries | Overdue items are displayed as crossed out with a gray font. |
| Time Sheets* | Items with the status "Accepted" are displayed as crossed out with a gray font. |
| Exchange Rates | Overdue items are displayed as crossed out with a gray font. |
| Tasks* |
Items that are not overdue or completed are displayed with a gray background. Overdue items that are not completed are highlighted with a red font. Completed items are displayed as crossed out with a gray font. |
| Calendar* |
Items that are not overdue or completed are displayed with a gray background. Overdue items are displayed as crossed out with a gray font. |
* The same rules have been applied to HUBs in the tab system and in the eWay-CRM HUB.
Custom Conditional Formatting
Apart from default conditional formatting, you can apply additional predefined rules, create your own rules, and edit existing rules.
Adding Predefined Rules
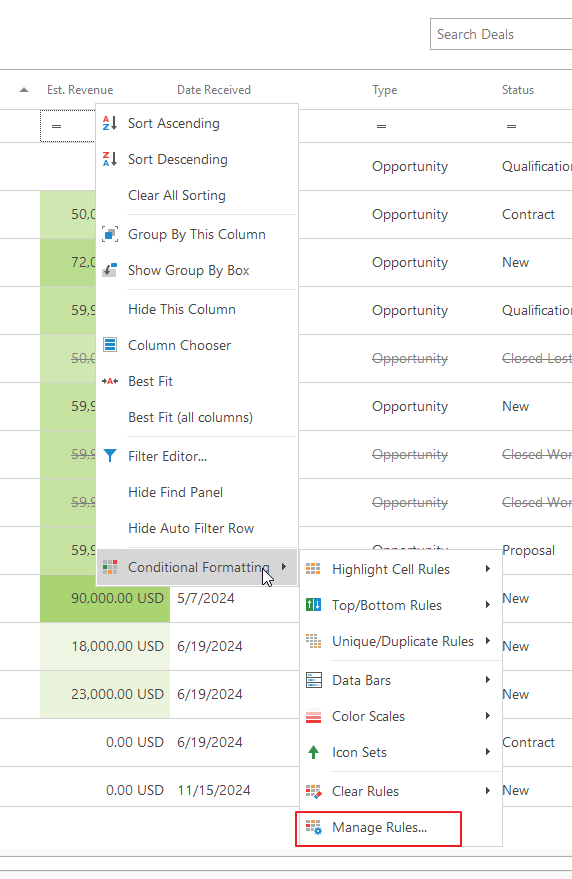
eWay-CRM offers a set of additional predefined rules that can be applied with a few clicks. These rules are shown as options when you right-click a column header and select Conditional Formatting in the context menu. Types of rules available for columns depend on the type of columns—numeric, text, drop-down menus, etc.
Types of possible rules include:
- Highlight Cell Rules
- Top/Bottom Rules
- Unique/Duplicate Rules
- Data Bars
- Color Scales
- Icon Sets
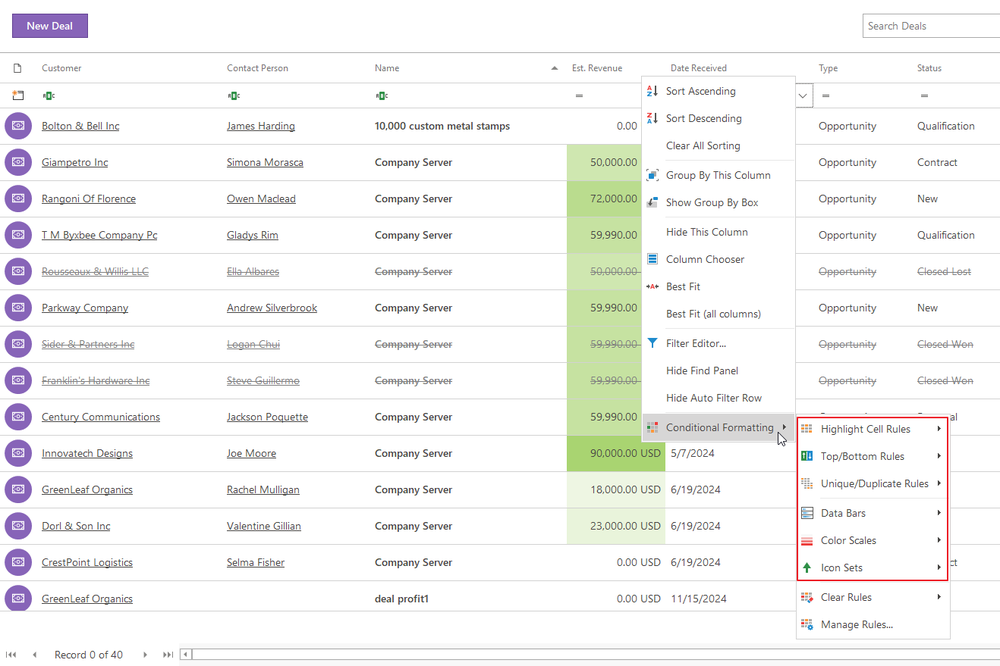
Example. To highlight all values that are higher than 10,000 in the Est. Revenue field on Deal cards, right-click on the column Est. Revenue and go to Conditional Formatting > Highlight Cell Rules.
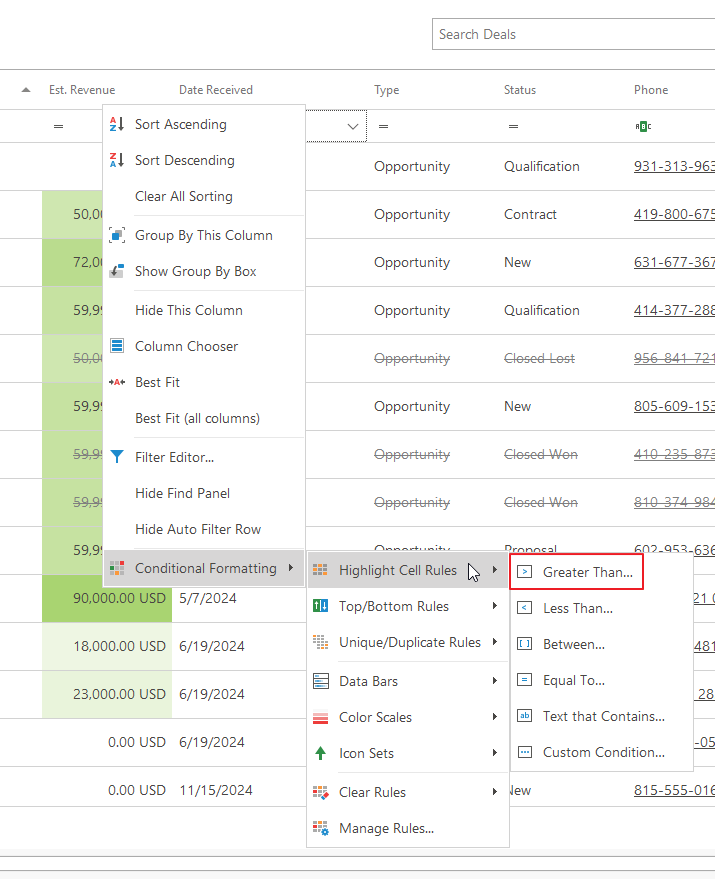
Click Greater Than, specify the value in the field, e.g. 10000, and in the dialog box select a type of formatting. To apply formatting to the whole row, check the corresponding box.
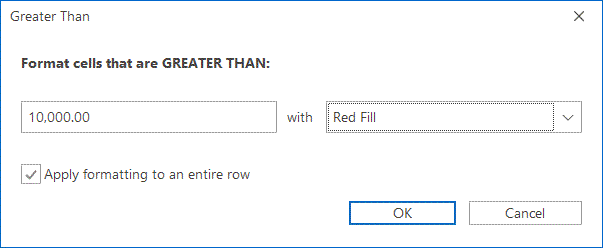
Confirm your choice by clicking OK.
As a result, only projects, where Est. Revenue greater than 10,000 will be highlighted with a red background.
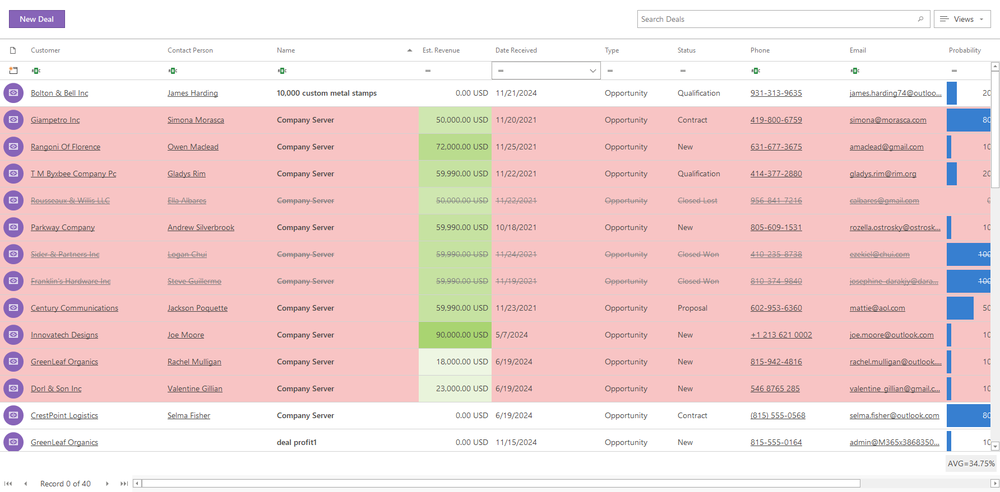
Important: Rules are always related to the column/columns they are applied to. If you hide a column, the formatting will be aborted. If you unhide a column, the formatting will revert.
Creating Custom Rules
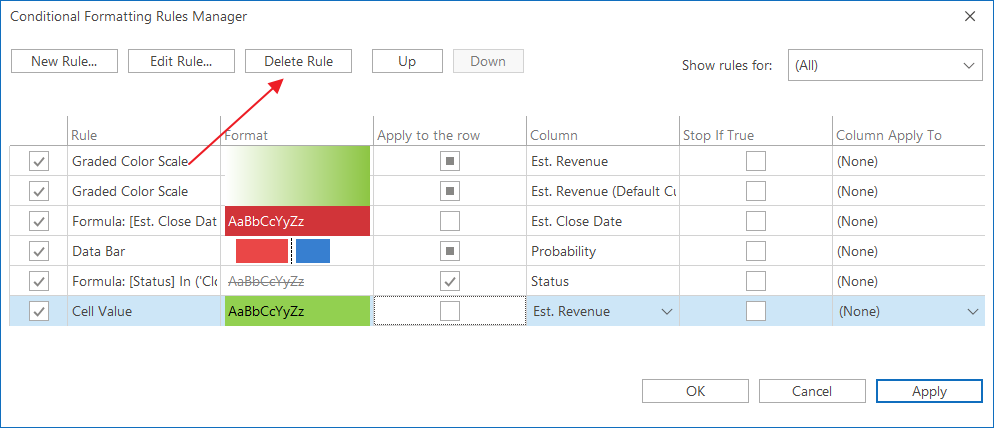
If a required rule is not among predefined ones, you can create your own custom rule. To do that, go to Conditional Formatting > Manage Rules:
In the pop-up dialog box click New Rule.
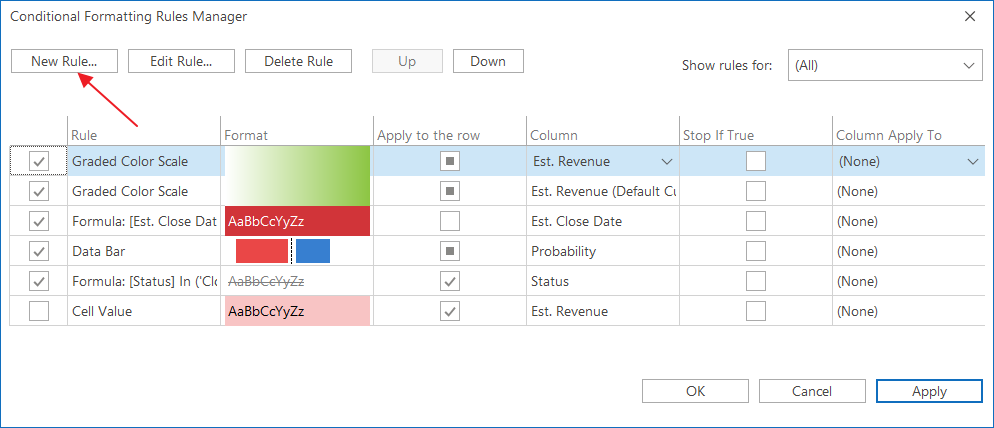
Select a rule type and define the conditions.
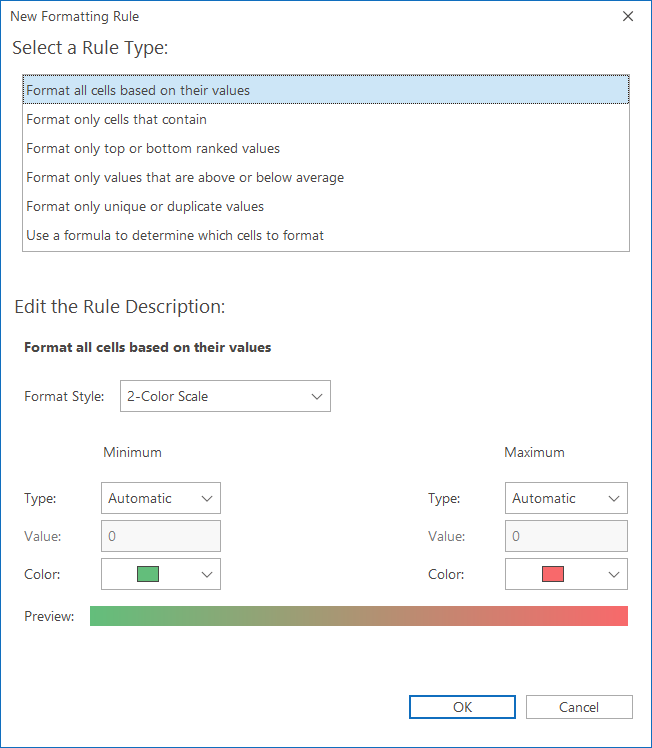
Click OK to apply a rule.
Editing Rules
To edit a rule, go to Conditional Formatting > Manage Rules highlight a rule by clicking on it, and hit Edit Rule.
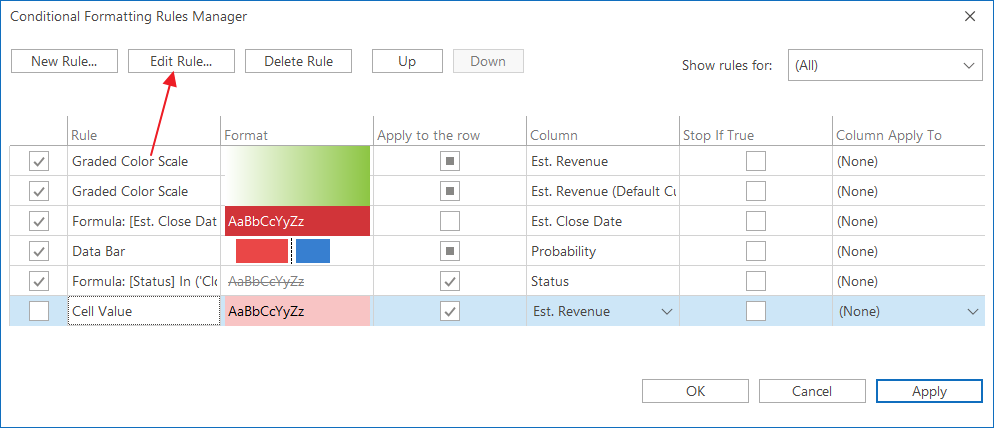
In the new dialog box select a rule type and edit the rule description.
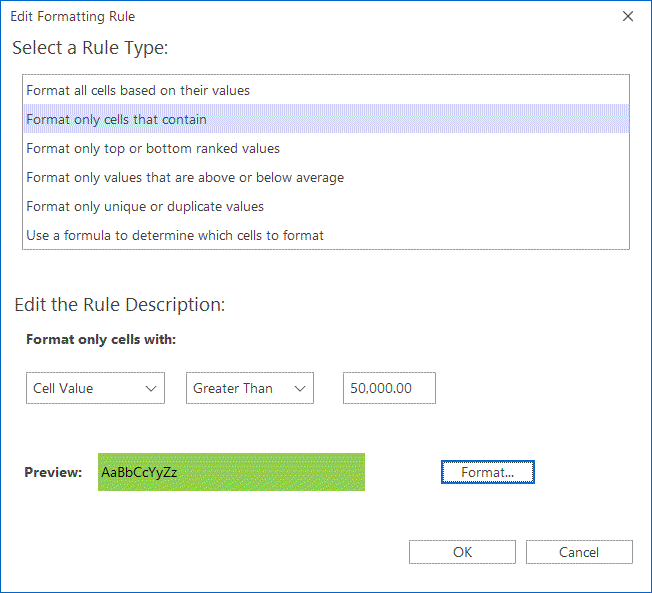
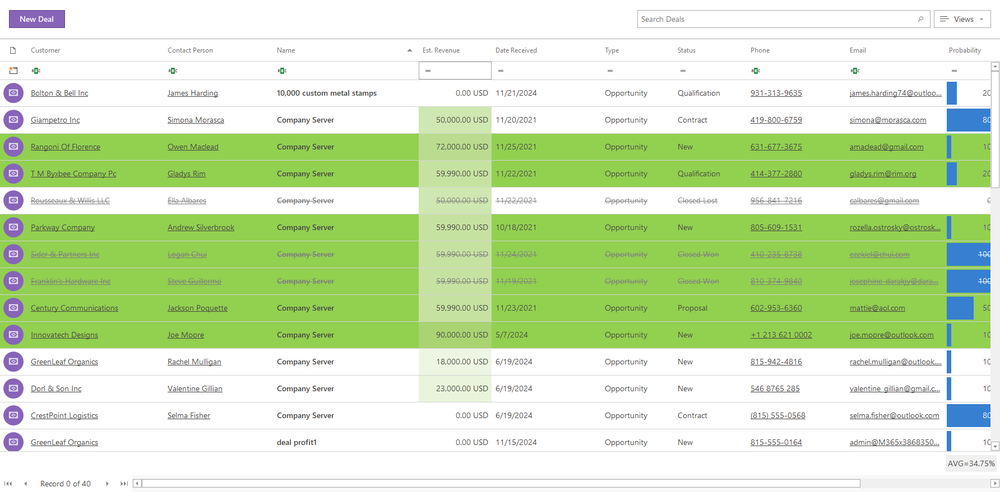
In the picture above, the rule has been edited to highlight deals with Est. Revenue above 50,000 with a green background.
Deleting Rules
You can delete a rule in two ways:
- Right-click the column header where a rule has been applied. Go to Conditional Formatting > Clear Rules. You can clear only rules from this column or all columns.
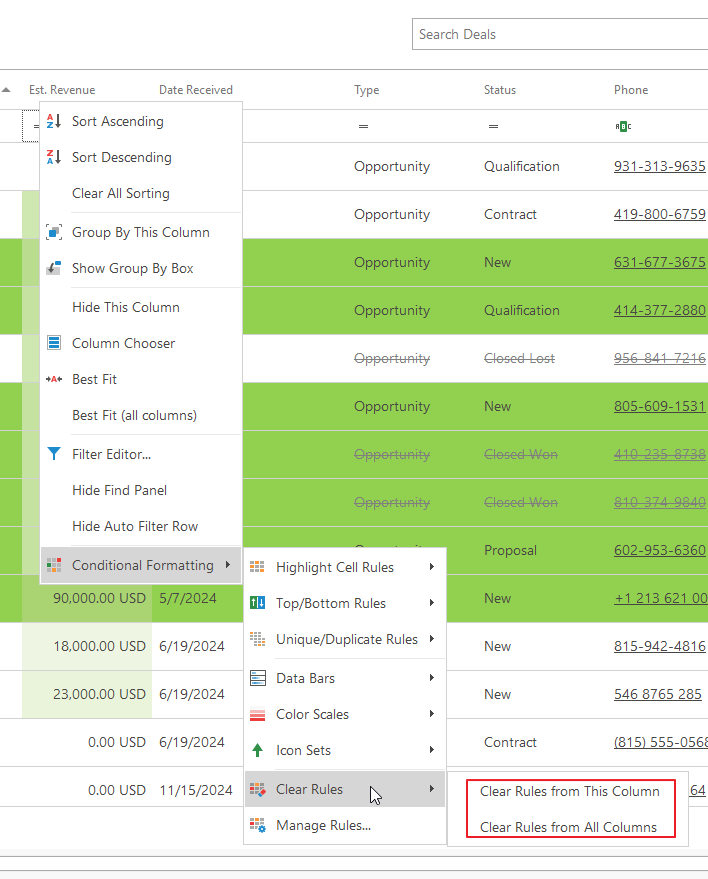
- Right-click the column header where a rule has been applied. Go to Conditional Formatting > Manage Rules. Highlight a rule you want to delete by clicking on it and hitting the Delete Rule button.
