Установка серверного компонента eWay-CRM
Contents:
1 - Copying web service to server
2 - Creation of virtual application in IIS
4 - Creation of user account for access to database
5 - Settings of connection string
6 - Other web service settings
7 - eWayTimer and its settings
8 - Verification of connection
What will you need for the installation?
You have to meet minimum requirements to install the server part of eWay-CRM. You will also need Microsoft SQL Server Management Studio in order to work with the database.
You will also need these parts of the eWay-CRM system:
- Web service (eWayWS folder)
- Database backup (file eWayDB.bak)
- License file (WSLicense.wel)
The procedure for installation described below is for Windows 2003 Server and Windows 2008 Server operating systems.
1) Copy the web service to default folder of web server
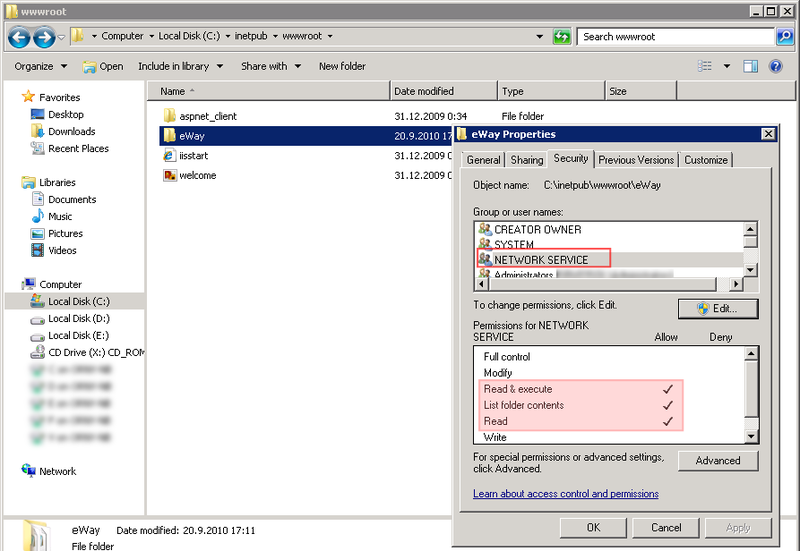
Usually the folder for the default web server is located in C:/inetpub/wwwroot. Copy the web service eWayWS folder into that folder, as is suggested in the next picture. You can change the name of the web service folder as you wish, but you shouldn't forget it in the following steps (for example the settings of the Web.config file).

Copy WSLicense.wel to the folder License, which is inside the web services folder. If the folder License is missing, create it.
Settings of permissions for work with the web service folder
It is necessary to set permissions to work with the web service folder in order to facilitate necessary operations. Firstly you should set permissions of the web services folder, where the account NETWORK_SERVICE should have permissions for reading, as shown in the picture. Sub-folders should inherit the permissions.
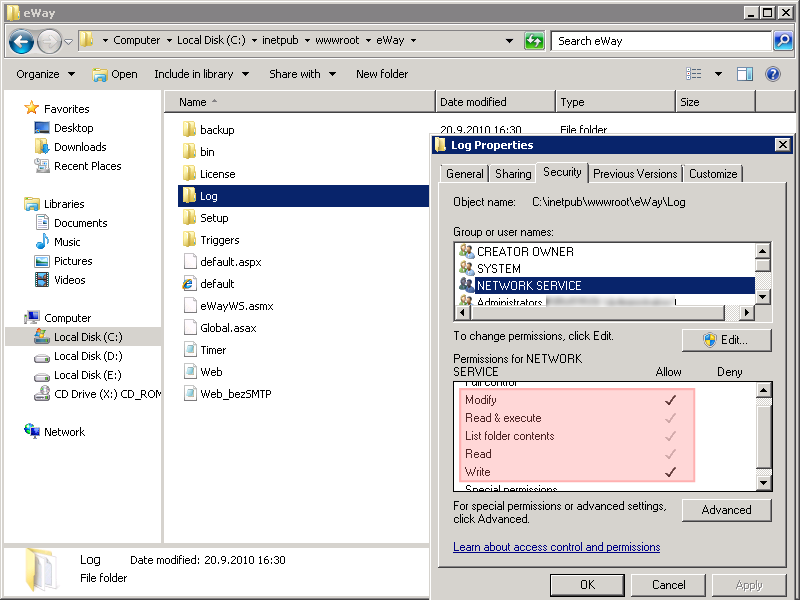
Only one folder, where the web service needs writing permissions, is a folder with log files of application. Set the writing permissions for the Log folder, which is situated inside the WS folder, for account NETWORK_SERVICE. (see the picture below).
2) Creating a virtual application in Internet Information Service (IIS)
Process for Windows 2003 Server
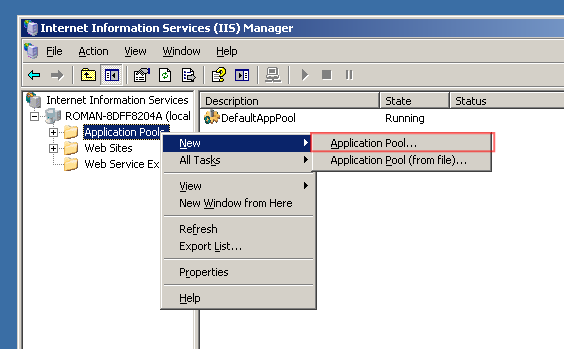
Start Internet Information Service. For security reasons, we recommend you create your own application pool for eWay-CRM. Right-click Application Pools and, from the menu, select New and Application Pool...
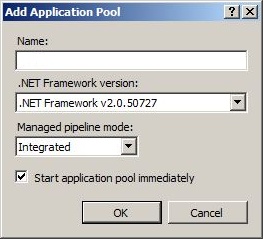
In the dialog window, which will appear, fill in the name of the application pool (for example eWayAppPool) and click OK. Other settings won't change.
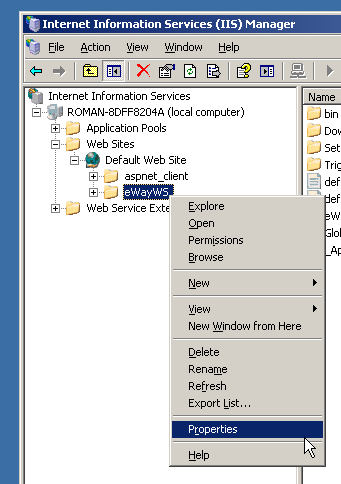
In the next step, go to Default Web Site under Web Sites and find the eWayWS folder which you created in the first step. If it is not appearing there, the folder into which the eWayWS folder was copied in Step 1, is probably not the default web server folder.
Find and right-click the eWayWS folder and select Properties.
In the eWayWs Properties dialog, click the Create button and fill in the Application name, which will be the part of the URL address of the eWay web service (for example eWay). In the Application pool box select the one you created earlier in this step (in our case eWayAppPool).
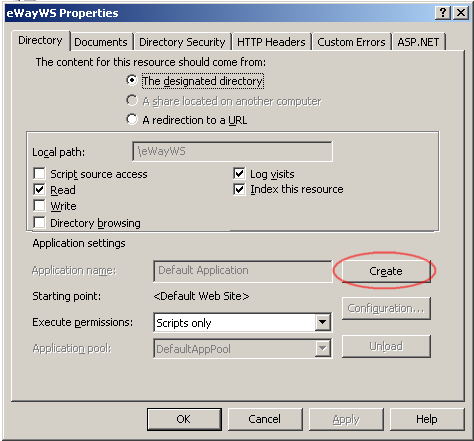
Finally, check whether the value of the field ASP.NET Version in the ASP.NET tab is set to 2.0.xxxx and press OK.
Process for Windows 2008 Server
The principle of creating a virtual application in Windows 2008 Server is same as in the prior version of this operating system. The only difference is that new versions of IIS will be used. The web service folder has already been created, files of the web service are in the place and permissions are set correctly for the NETWORK SERVICE account.
Now we can run Internet Information Service, where we recommend you create your own Application pool for higher security of applications on the server.
Right-click the Funds item of applications and select Add New Application Pool. In the window that appears, fill in the fund of applications name (for example eWayAppPool). Then check whether the version of the .NET Framework interface is set to the 2.0.xxxx value and click OK.
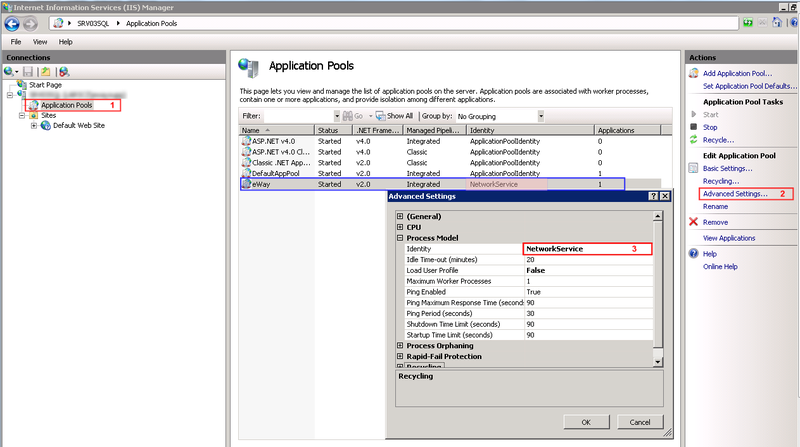
Then mark the newly created application pool and in the right section of the window select Advanced settings. In the section Identity, we need to set the NETWORK SERVICE value.
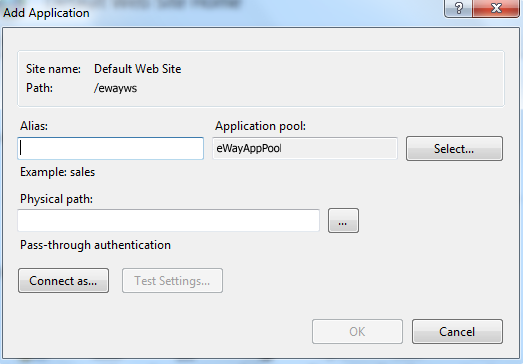
The next step is the creation of the server application. Select the appropriate button in the eWayWS items from Webs, Default Web Site and select the option Add application. Complete the field Alias, name of application as you wish to have it in your web browser, as a part of URL (for example eWay). Choose a name for the fund of applications (in our case its eWayAppPool). Validate your choice by clicking OK.
3) Creating a database
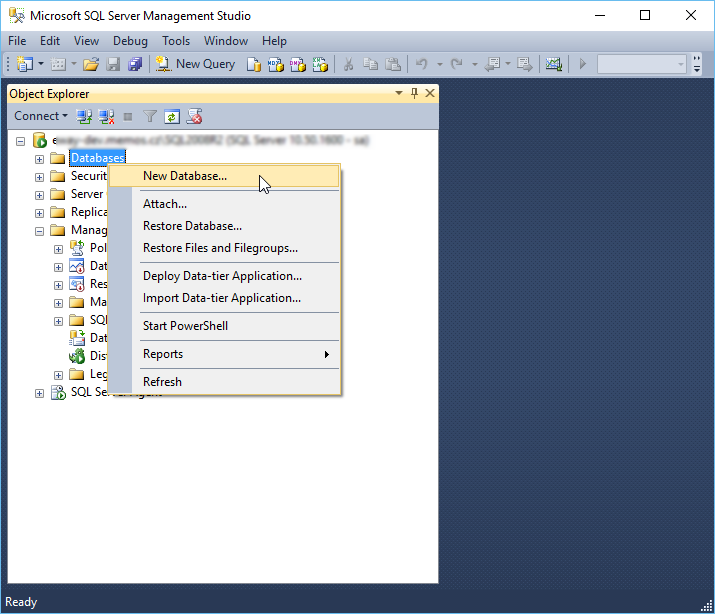
In the third step, we need to create a database on the server for the eWay-CRM system. Run Microsoft Management Studio as an administrator. Right-click the item Databases and select New Database.
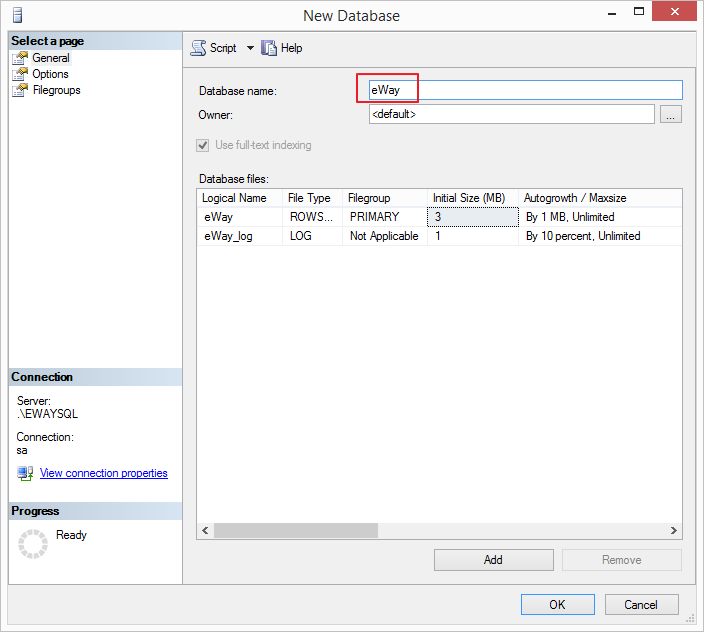
In the New Database window, fill in the name of the database (for example eWay) and keep the rest as it is. Verify by clicking OK.
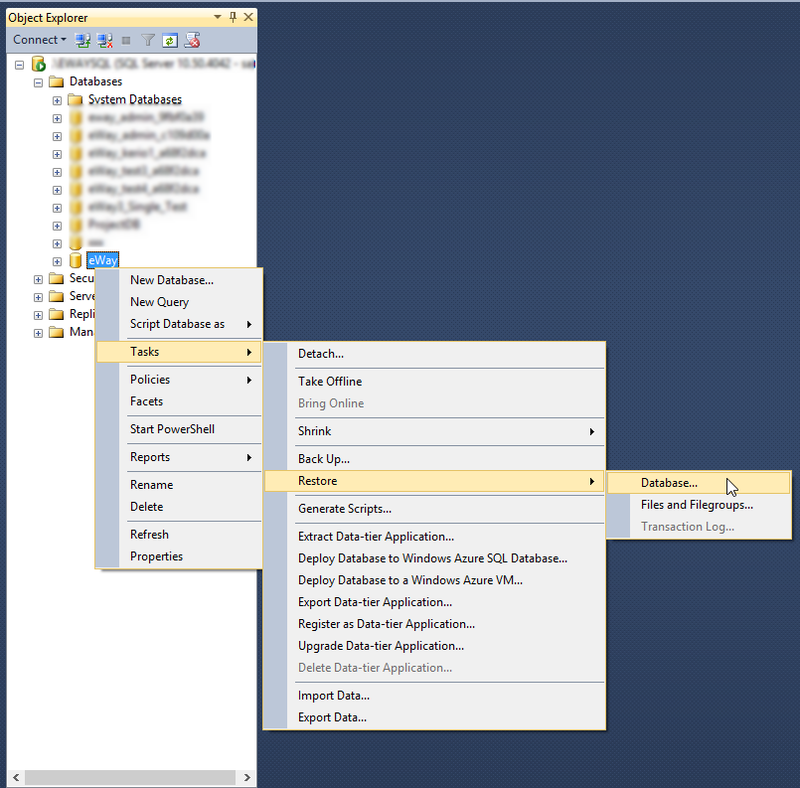
Now right-click the newly created item in the Databases folder and select: Tasks > Restore > Database. If the new database doesn't come up, right-click the Databases folder and select Refresh.
In the Restore Database – xxx dialog window check Device and click the button for loading a file. A window will appear in which, after clicking Add, you'll find a file with a backup of the database: eWayDB.bak.
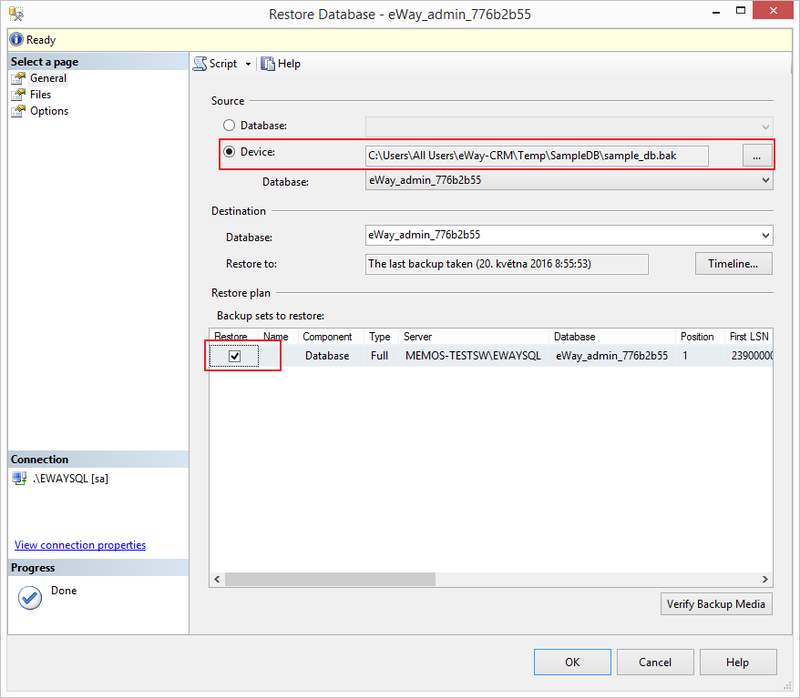
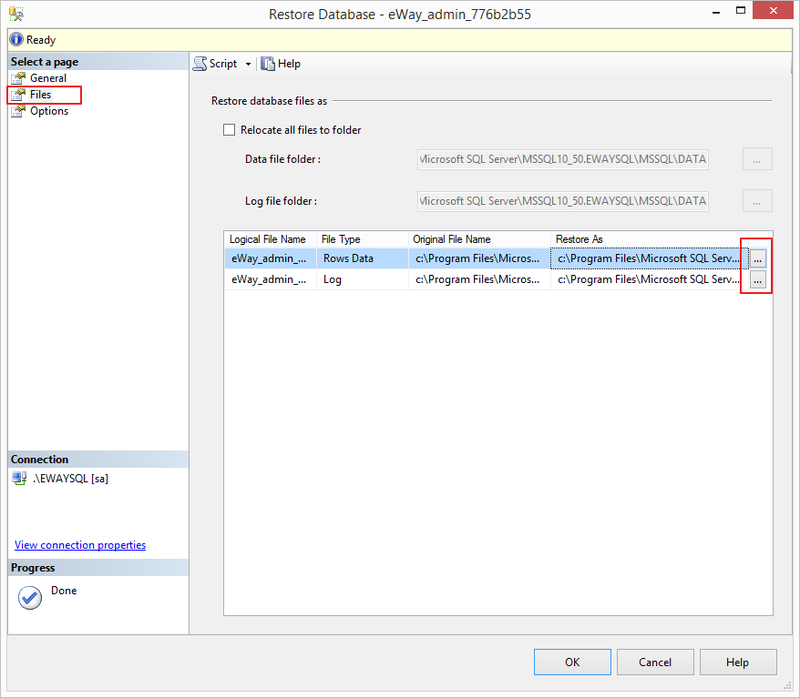
There will be new row in the list of databases. Mark it and click Files. now, you need to select files where to save the database. You have them created on your disk and you just need to find them. Usually they are saved in C:\Program Files\Microsoft SQL Server\MSSQL.1\MSSQL\Data. Now, it is necessary to map out files eWay.mdf and eWay_log.ldf.
Then, go to Options. You need to mark the Overwrite the existing database option and then select files where you weant to save the database.
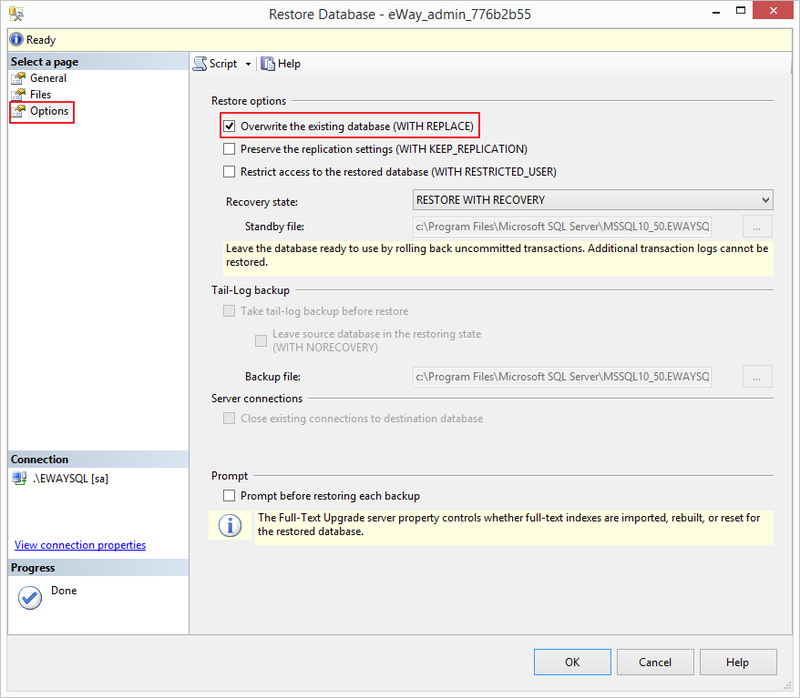
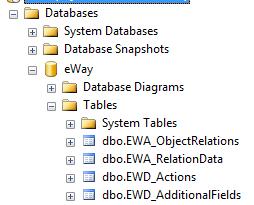
Accept your choices by clicking OK. If everything is in right order, the database will be restored. The success of the operation can be verified by clicking the eWay item in the Databases folder and then opening Tables. There you'll see a list of tables for the eWay-CRM system.
4) Creating a user account for access to the database
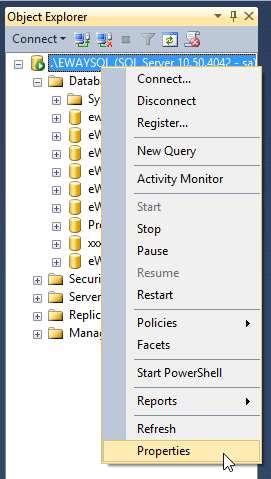
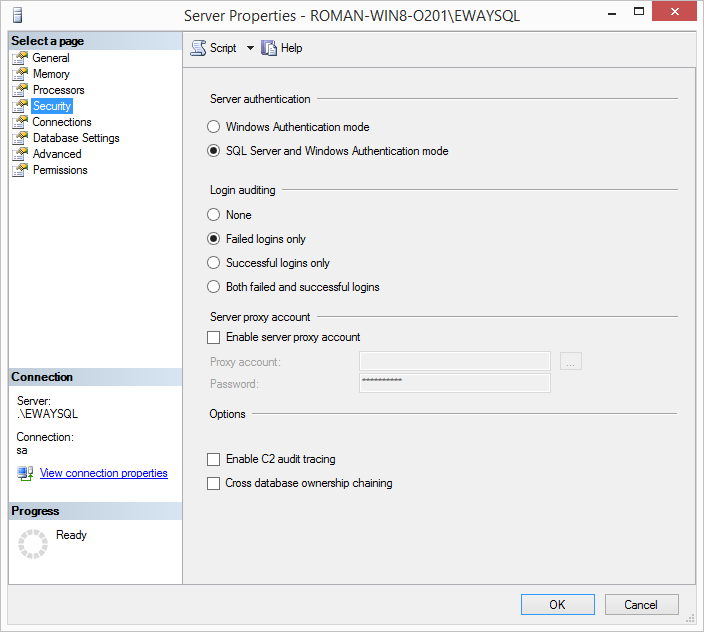
Usually we create eWay-CRM for users who are connected to the server via the SQL connection. First, it is necessary to check whether the mixed type of access to SQL server is allowed. Right-click the name of the server and choose Properties.
In the Server Properties window, section Security, check whether you have marked option SQL Server and Windows Authentication mode (1). Validate your choice by clicking OK.
If the mixed connection wasn't allowed before and you've set it, now you will have to restart SQL Server. Right-click the name of the server and click Restart.
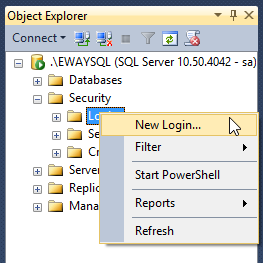
In Microsoft SQL Management Studio, right-click the Logins folder in the Security section and select New Login.
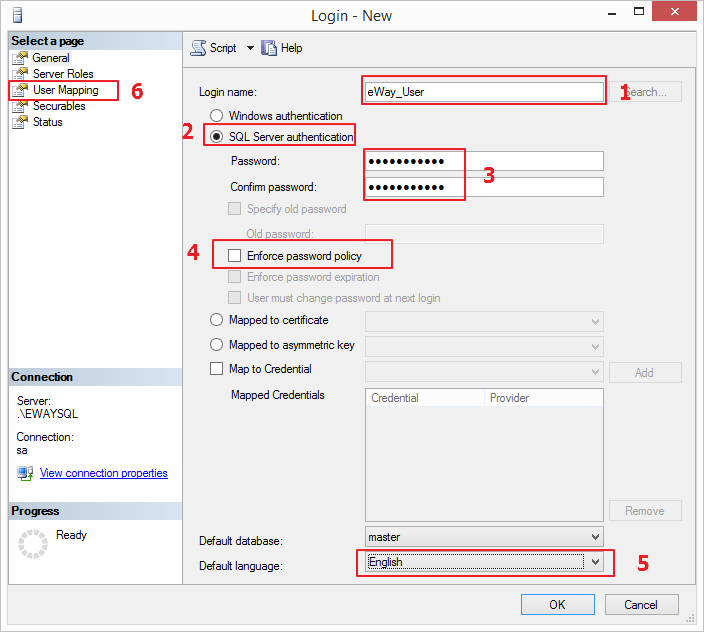
In the new window for the creation of a new user, fill in the user name (1) (for example eWay_User), then click the SQL Server authentication button (2) and set a password (3). Check whether the option Enforce password policy (4) isn't selected and the language is set to English (5). Then go to the User Mapping section (6).
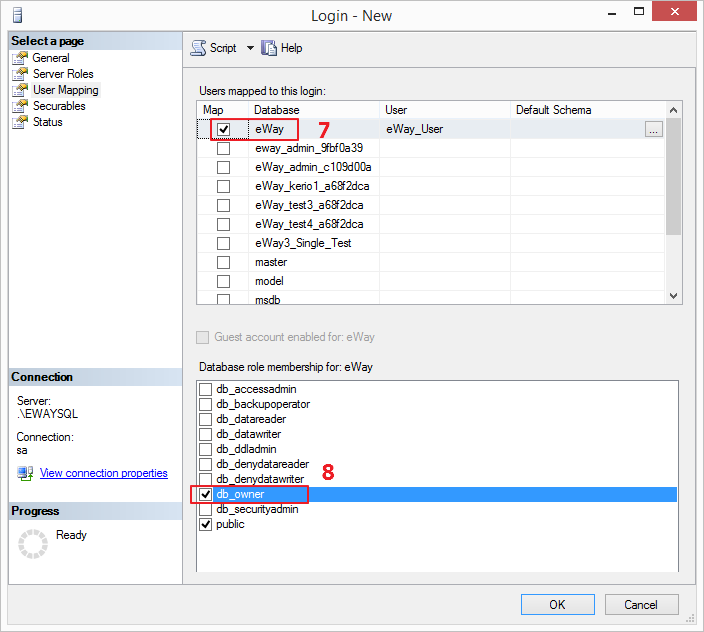
In the User mapping section, choose the eWay-CRM system database (in our case item eWay) (7) and in the bottom section select db_owner (8).
5) Adjusting a connection string
In the Notepad, or other text editor, open the file Web.config, which is situated in the web service folder (in our case C:\inetpub\wwwroot\eWayWS). Scroll down to the end of file where you'll find this tag in section appSettings:
<add key="sqlConnection.ConnectionString" value="Data Source = SOURCE; Initial Catalog = DB_NAME; User ID = USERNAME; Password = PASSWORD" />
|
Source |
Name of computer, or instance of SQL Server |
|
DB_NAME |
Name of a database (in your case eWay) |
|
USERNAME |
User name for a database (in our case eWay_User) |
|
PASSWORD |
User password to a database (in our case eWayPWD123( |
The eventual result should look like this:
<add key="sqlConnection.ConnectionString" value="Data Source=MYSERVER\SQLINSTANCE; Initial Catalog=eWay; User ID=eWay_User; Password=eWayPWD123" /> Specification of path to supplements
During setting the connection to the database we shouldn't forget to set the correct path to other modules of the application. The web service will not work correctly without them. This path is the last parameter of the appSettings section. The path is located on the same end of the Web.configs file. It looks like this.
<add key="pluginsPath" value="DIRECTORY_PATH"/>
DIRECTORY_PATH is the full path to the repository of the web service. And in the repository is a folder bin, which contains files with supplements. In our case the path would be like this:
<add key="pluginsPath" value="C:\inetpub\wwwroot\eWayWS\bin"/>6) Other web service settings
With the Web.config file you're able to set not only the connection of the web service to the database (last step), but settings has a few other options. The most important and most-used are the following settings:
Application log
The Application log means that the web service records performed actions and requests which were sent to it. In the case of synchronization malfunction, the log can very often help with the solution of the situation. It is very useful to have a correctly set path for the application log.
Settings is located in the Web.config file, in the log4net section. You just have to set the relevant path to the file in the web service folder. In the example below, the application log has been saved into the eWayWSLog.txt document and saved in the Log folder which is located in the web services folder. If the current folder/path does not exist, the application will not log.
<param name="File" value=".\Log\eWayWSLog.txt"/>
It is also important to set the correct permissions for writing in the Log folder. More information is given at the top of this article.
Sending of email notifications
The part of the functionality which eWay offers to its users is the sending of notification emails within workflows (in work procedures for projects, leads, etc.). It's important to configure the system correctly to guarantee accurate sending of emails. To do this, go to the server part of the appSettings section, marked “Email support”.
The tolerable parameters for adjusting the connection to the SMTP server are listed in the following table. The first three keys are required as a minimum. Others are shown in the case of need (the server need authentication and so on).
|
<add key="SendMail" value= "" /> |
Insert the required parameter, from the choice of teo, between the red marked quotation marks. Insert value: 0 – if you want to have functionality deactivated The final string could look like this: <add key="SendMail" value="1"/> |
|
<add key="enableSsl" value="" /> |
Insert the required parameter, from the choice of two, between the red marked quotation marks. Insert value: 0 – if you want the functionality deactivated Final string could look like this: <add key="enableSsl" value="0"/> Important: eWay-CRM only supports Explicit SSL. Implicit SSL is not supported. |
|
<add key="sender" value="SENDER"/> |
Insert the email address from which you want the email to be sent, instead of the red marked value SENDER. You're inserting an alias, so it doesn't have to be a real address, but this alias will be shown in the email. The parameter could look like this: <add key="sender" value="[email protected]"/> |
|
<add key="smtp" value="SMTP_SERVER"/> |
SMTP_SERVER – here insert the network name or the IP address of the smtp server which will process the sending of your mail. |
|
<add key="smtpUser" value="SMTP_USER"/> |
SMTP_USER – if the SMTP server needs verification, insert the email address of the user to enable him the database login. Usually it will have the same value as SENDER. <add key="smtpUser" value="[email protected]"/> |
|
<add key="smtpPassword" value="PASS"/> |
PASS – if the SMTP server needs verification, insert the user’s password here to enable him the database login. The key must look like this: <add key="smtpPassword" value="t4ck5Kd7"/> |
|
<add key="port" value="PORT"/> |
PORT – if the SMTP server doesn't run on the standard port 25, it's necessary to define the number of the port. The key should look like this: |
Domain logging:
You can specify whether the application will support the domain logging in the appSettings section, under application settings. You can adjust it with these two parameters.
In the first one you're setting whether the logging by domain name will be activated (1) or deactivated (0).
<add key="UseDomainLogin" value= "" />If domain authentication was activated in last the step, specify the name of your domain in next the step.
<add key="DomainName" value="DNAME"/> 7) eWayTimer and its settings
The part of the web service is the mini-application: eWayTimer, which provides periodic running and executing of specific pre-defined operations. These actions are, for example, the periodic sending of tasklists or a function for counting a merged value.
The application is composed of batch files, located in the Setup folder, which is the part of the folder with the web service. The configuration file for the eWayTimer application (file Timer.config) is situated in the main of the web service folder, as is the configure file for the whole eWay.
If you want to check whether everything is running correctly and at the pre-defined time, we recommend you activate the log output option.
This log also helps to diagnose problems. Set the path in which the application should save its log.
In the main web service folder, open the file Timer.config, for example, in Notepad. You find the following parameter there:
<param name="File" value="FILE_PATH"/>Here, fill in, instead of FILE_PATH, the path to the file. It should be in the format: “..\Log\eWayTimeLog.txt”. It means that the log file with the name "eWayTimeLog.txt" will be created in the Log folder, which is located in the web services folder.
Installation and launch
First of all you have to install the eWayTimer application. Open the Setup folder and double-click the launch file install.bat. Then a window will open displaying a command line, there will be some commands which you will have to accept by pressing any button. Then you can launch the application by double-clicking the start-timer.bat file. An initialization will run. You have to accept it by pressing any button.
From that moment the eWayTimer service is activated. If you ever want to copy a web service folder or delete it (for example within actualization), you will have to stop the service by launching stop-timer.bat.
8) Verifying the connection
Open your internet browser (for example Internet Explorer) and enter the address of your web service, for example http://localhost/eway. If you used another application name in IIS, the address will be different. Then a web page will load with links for checking the status of your web service and links for checking the version. Click Status, check. If everything is all right, you will see an XML document in your web browser, where this is particularly important information:
<ReturnCode>rcSuccess</ReturnCode>
This means that everything is correctly adjusted.
