Customize Dialogs With Form Designer
For a description of how to use the Form Design feature in the new design, please refer to the article Create Custom Forms.
eWay-CRM has default structure of all modules' windows, but your needs can be different. Because of it, eWay-CRM allows you to customize the structure of fields in all windows. You can use Form Designer. This tab is in the top part of the window of all modules, but you must be user with administrator permissions to be able to use Form Designer. This ensures that users will not change dialogs as they want and the whole company will have same window structure.

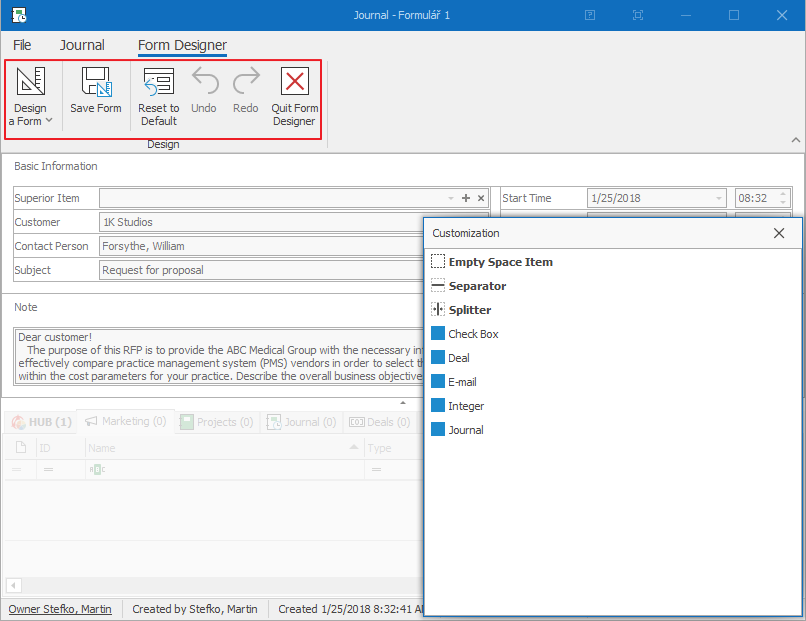
Form Designer Ribbon
You launch designer when you click Design a Form icon - all other icons are available now.
| Icon | Function |
|---|---|
| Design a Form |
Click the icon and you will launch Form Designer. If you click the text below the icon, you will see the context menu with all saved forms. You can also work with the list, if you click Modify List of Forms (see below the table). |
| Save Form | Save the current form. If you are editing already saved form, you will be asked whether you want to rewrite it. |
| Reset to Default | If you made some changes in the design of the form, but you do not want them, you can always go back to the default structure of fields. |
| Undo | Return the last step. Same action will proceed when you press Ctrl + Z. |
| Redo | Repeat the last action. |
| Quit Form Designer | The Form Designer will be closed. You will be informed that your changes will not be saved if you close the designer. Save all your changes before you close the Form Designer. |
Save Form and Relate It to Specific Item Type
If you are creating a form design, you are doing it on specific item type - for example journal of Email type as you see on pictures. But types are set also for other modules like deals, projects, documents, contacts, companies, etc. When you are saving your form, this dialog pops up:
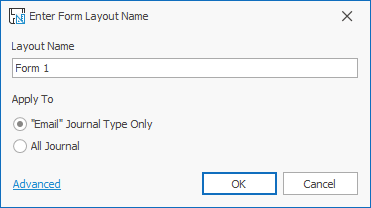
You can save the form only for the current type, or you can set it for all item types. Click OK to confirm your choice.
When you click Advanced, you will see this dialog:
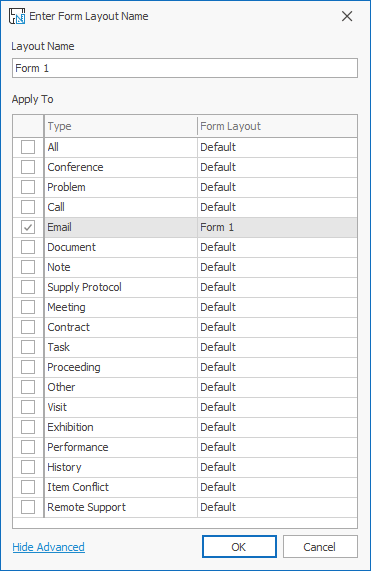
There, you can select specific types on what new form will be applied. Click OK to confirm your choice.
Modify List of Forms
You move fields in Form Designer as you want, hide them if you need to. If you are satisfied, you just save the form. If you click Design a Form text, you will see a context menu with the list of all saved forms:
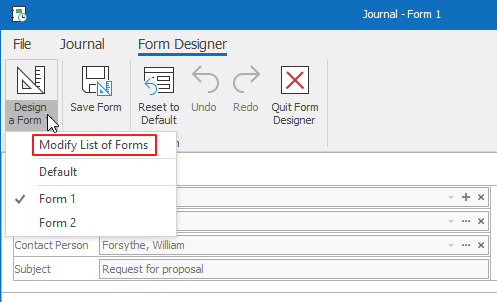
If you click Modify List of Forms, the window will display:
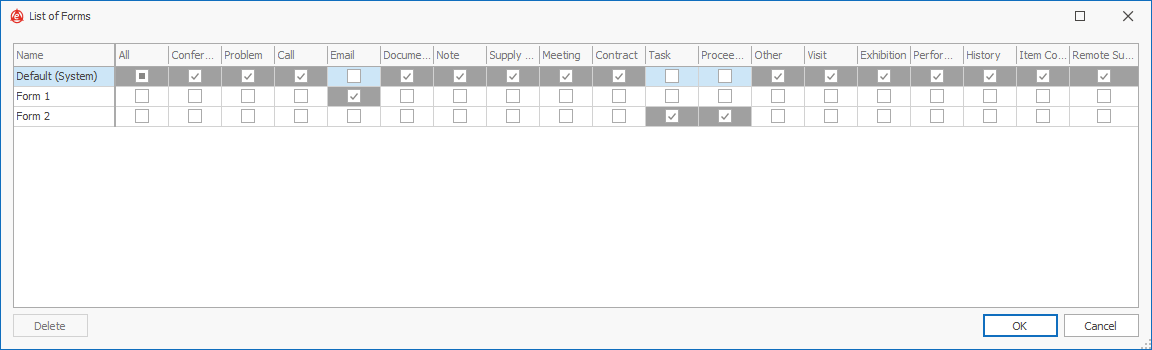
This list allows you to easily change form for specific item types as you need it.
If you need to assign one layout for all types use the first column All. When switching to the All option in the list of forms, all other item types will have the selected form set. If you want to assign a different form to certain types, you will need to set them manually.
There is also list of saved forms, but you can delete ones that you do not need anymore. You cannot delete forms that are Active or Default.
Customization List
When you launch the Form Designer, you will see the Customization list on the right side of the dialog.
If you cannot see some field in the Customization panel, it can be hidden because it is part of the field group.
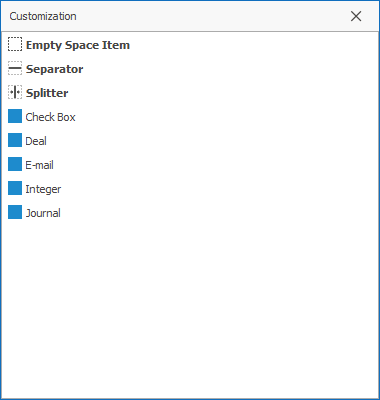
The Customization list contains all fields that are available for the current window including those that are invisible at the moment. These are both default fields and custom fields you created yourselves. You drag and drop fields from the Customization list and move them to the window where you want them.
The Customization list also contains other specific elements:
| Element | Description |
|---|---|
| Empty Space Item |
Inserts empty space that allows you to divide some fields or make the form well arranged. Empty Space Item can be used for check box field type that cannot be spread by default because the maximum width that is used for other fields is used only for the part with check box square. To be able to automatically resize checkboxes, you need to put Empty Space Item next to the check box.
|
| Separator | Inserts a line that visually separates fields or sections. |
| Splitter | Inserts separator that divides fields or sections. All users can move the separator as they need to make their dialogs well arranged. |
Work With Fields
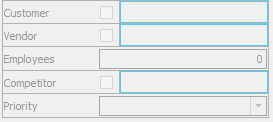
You can drag and drop fields as you want in the dialog or you can hide them (press Delete on the field you select or drag it and drop it in the Customization list).
Each field has a defined minimum width, which affects the minimum window size. If you need to make the window narrower, move the fields to fewer columns.
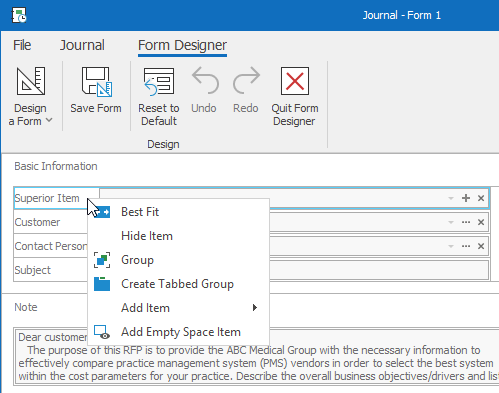
If you right-click any field in the form, you will see context menu with other options:
| Option | Description |
|---|---|
| Best Fit | Your fields can be spread incorrectly due to changes you make. Click Best Fit and designer |
| Hide Item |
The field will be hidden same as you do when you drop it in the Customization list or when you press Delete. You cannot hide fields that are mandatory, optional or unique at least for one users' group - see Column Permissions. |
| Group | You will create a group over the field (see below). |
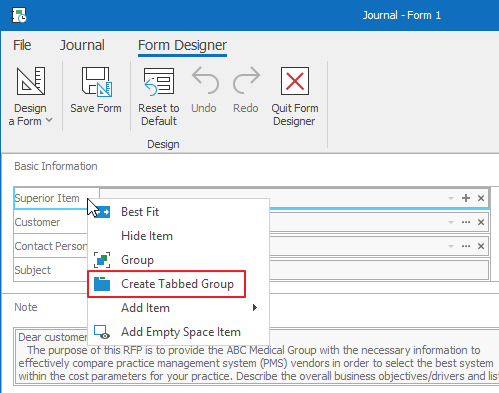
| Create Tabbed Group | You will create a tab group over the field (see below). |
| Add Item | You can add item like separator or splitter. |
| Create Empty Space Item | An empty space will be added to the field. |
Create Groups and Tabs
You can group fields in the form to make the structure the clear as possible.
Insert different fields to your groups - e.g. you will have groups of fields that have something in common.
Groups
Right-click a field and select Group.
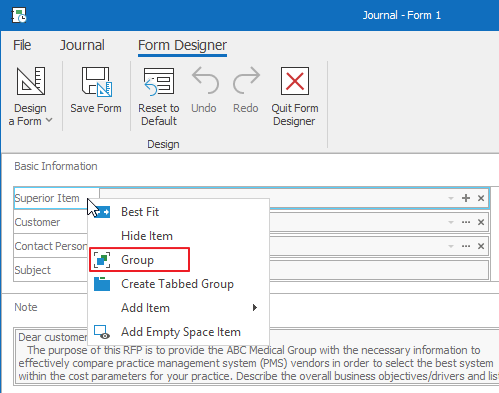
You will create new group with selected field. You can add other fields as you want. You can also rename the group. Just right-click it and select Rename.

You can always cancel the group. Right-click it and select Ungroup.
Tabs
If you want to create a tab, you need to right-click a field or a group and select Create Tabbed Group.
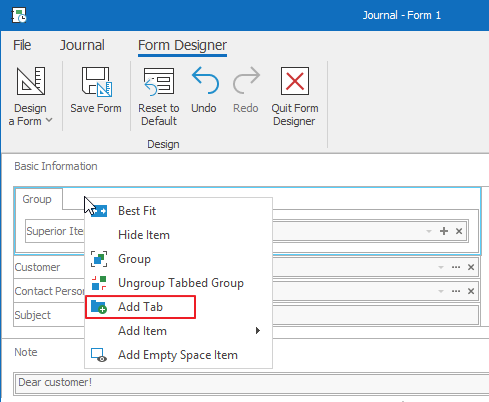
The tab will look like on the picture. You can also rename it.
If you want to add another tab, right.-click empty space next to the name of the existing tab and select Add Tab.
If you want to cancel the tab, right-click it the empty space next to it and select Ungroup Tabbed Group.