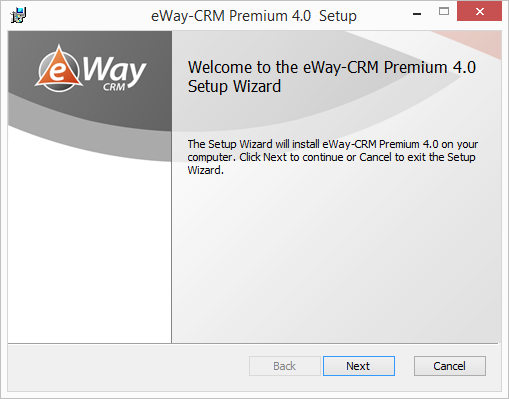
Client Installation (eWay-CRM Version Lower Than 4.2.1)
1) Start the eWay-CRM Installation
Close all MS Office programs (Outlook, Word, Excel, etc.). Launch the installation file and wait for it to load. The installation window will appear. Click the Next button to begin the installation.
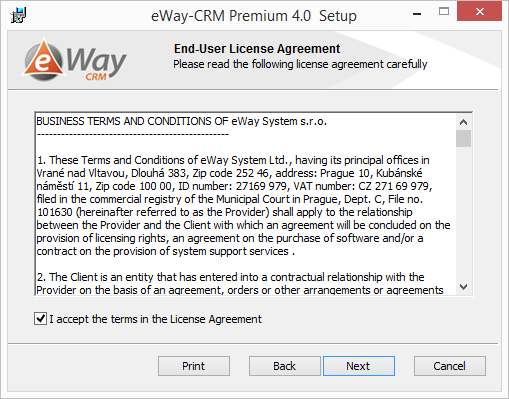
2) License Terms Agreement
Read license terms on the following window. If you agree with them check the I accept the terms in the License Agreement box at the bottom of the window – the agreement is necessary to continue the installation.
The license agreement can be printed by clicking Print.
Click Back to return on the previous window. Clicking Cancel will abort the whole installation. If you want to continue click Next.
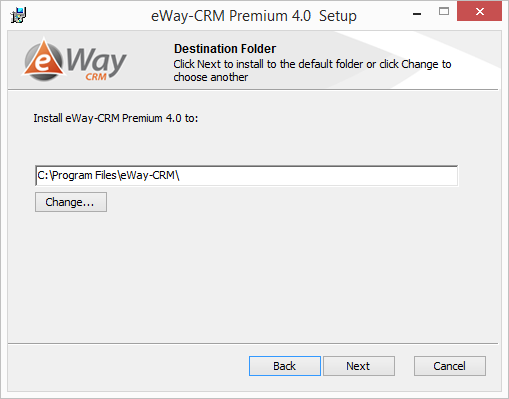
3) Choose the Folder for Installation
Now, you have an option to choose where eWay-CRM will be installed. By clicking Change... you open a window which allows you to browse the disk. Select the folder where you want eWay-CRM to be installed. If you don't have a specific reason for changing the path, we recommend you keep the predefined path.
To return to the previous window click Back. Clicking Cancel will abort the whole installation. If you want to continue, click Next.
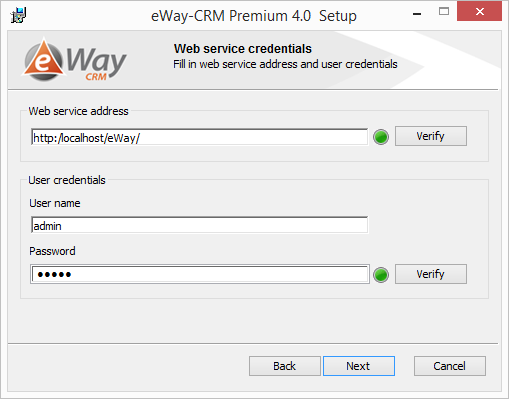
4) User Data Settings
Enter the web service address to which eWay-CRM should connect with – this specifies your administrator. If that field is already filled, don't change it. By clicking Verify situated next to the field for setting a web service address, you can check that communication with the server is working. A window will appear and inform you about the test result. After a successful test, the button between the field for web services address and the Verify button changes to green.
Enter your user specifications in the fields located below – name and password for the eWay-CRM system. Verity of entered data can be checked by clicking Verify. A window will appear and inform you about the test result. After a successful test, the button between the password field and the Verify button changes to green.
To return to the previous window click Back. Clicking Cancel will abort the whole installation. If you want to continue, click Next.
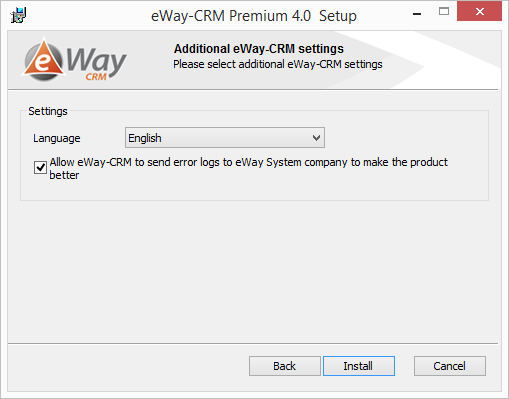
5) Select Language and Finish the Installation
Before the installation itself, you can set a language in which eWay-CRM will be installed. The language of your MW Windows Regional Settings is pre-selected. You can change the language of eWay-CRM always when you will use the system.
If you mark allow eWay-CRM to send error logs to eWay System company to make the product better, you gain the best service support possible.
To begin the installation click Install. In the installation window you can watch the installation progress. A window will appear to inform you that your eWay-CRM installation has been successful. Now you can launch MS Outlook. eWay-CRM will be launched simultaneously with Outlook.
To return to the previous window click Back. Clicking Cancel will cancel the whole installation.